Was du brauchst
-
-
Place the Game Boy Pocket face-down on a clean, flat surface.
-
Use a Y1 tri-wing screwdriver and turn counterclockwise to remove the four external screws.
-
Use a Y1 tri-wing screwdriver and turn counterclockwise to remove the two screws inside the battery compartment.
-
-
-
Place your hands on the front and back covers of the Game Boy Pocket, and carefully separate the device.
-
-
-
-
Use a Phillips #1 screwdriver and turn counterclockwise to remove the three screws on the motherboard.
-
-
-
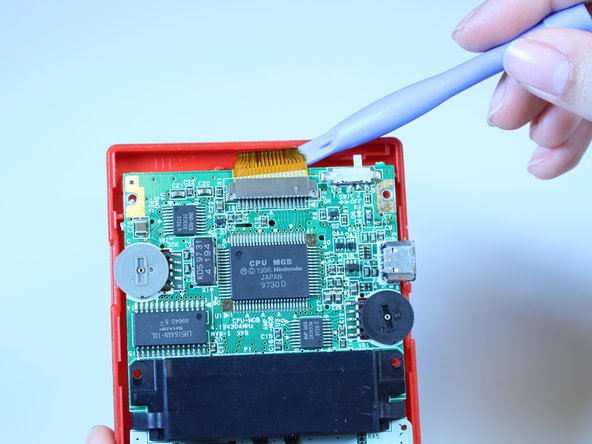
Use a plastic opening tool to dislodge and remove the clip securing the ribbon cable.
-
-
-
Use a plastic opening tool to dislodge the ribbon cable.
-
-
-
Grab the black piece protruding from the motherboard, and lift up to remove the motherboard.
-


To reassemble your device, follow these instructions in reverse order.
To reassemble your device, follow these instructions in reverse order.
Rückgängig: Ich habe diese Anleitung nicht absolviert.
5 weitere Nutzer:innen haben diese Anleitung absolviert.
Team

USF Tampa, Team 1-1, Leahy Fall 2014 Mitglied von USF Tampa, Team 1-1, Leahy Fall 2014
USFT-LEAHY-F14S1G1
4 Mitglieder
13 Anleitungen geschrieben