Einleitung
This guide will help you repair the directional pad on your GameSir Pro T4.
Directional pads need replacement after wear and tear over time or if it somehow cracks.
Was du brauchst
-
-
Using the Phillips 1 screwdriver, gently turn the screw to the left (repeat this step until all four screws are taken out).
-
-
-
-
Apply a slow, but consistent pull to the old 600 maH battery.
-
Attach new battery onto the pad.
-
-
-
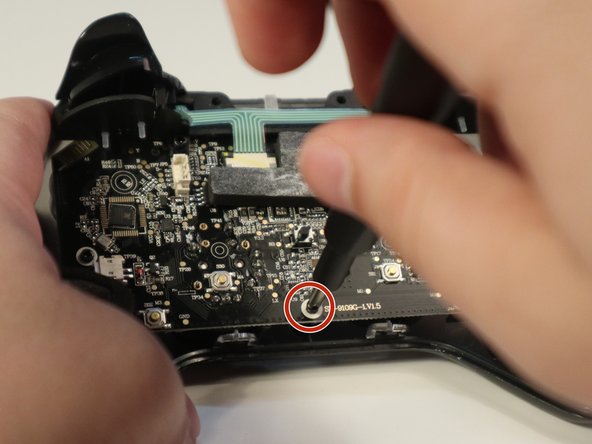
To get to the directional pad (d-pad), remove the three 5mm screws on the motherboard.
-


To reassemble your device, follow these instructions in reverse order.
To reassemble your device, follow these instructions in reverse order.
Rückgängig: Ich habe diese Anleitung nicht absolviert.
2 weitere Nutzer:innen haben diese Anleitung absolviert.
Team

Western Carolina University, Team 1-4, Virtue Fall 2022 Mitglied von Western Carolina University, Team 1-4, Virtue Fall 2022
WCU-VIRTUE-F22S1G4
4 Mitglieder
10 Anleitungen geschrieben