Zum Hauptinhalt wechseln

GameStop GS3 GameCube Controller Motherboard Replacement

Was du brauchst

  1. GameStop GS3 GameCube Controller Motherboard Replacement, Motherboard: Schritt 1, Bild 1 von 2 GameStop GS3 GameCube Controller Motherboard Replacement, Motherboard: Schritt 1, Bild 2 von 2
    • Open the controller by unscrewing the screws located on the back panel

    • Separate the two halves of the controller.

  2. GameStop GS3 GameCube Controller Motherboard Replacement: Schritt 2, Bild 1 von 3 GameStop GS3 GameCube Controller Motherboard Replacement: Schritt 2, Bild 2 von 3 GameStop GS3 GameCube Controller Motherboard Replacement: Schritt 2, Bild 3 von 3
    • Remove the rumble-pack by unscrewing the screws located on on either side.

    • Remove the rumble pack to fully separate the two halves of the controller

  3. GameStop GS3 GameCube Controller Motherboard Replacement: Schritt 3, Bild 1 von 3 GameStop GS3 GameCube Controller Motherboard Replacement: Schritt 3, Bild 2 von 3 GameStop GS3 GameCube Controller Motherboard Replacement: Schritt 3, Bild 3 von 3
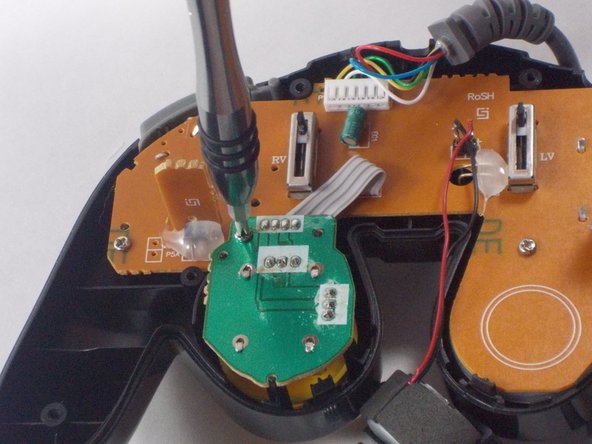
    • Disconnect the motherboard from the front half of the controller by unscrewing the small screws around its perimeter.

    • The motherboard should separate and lift right out from the front half.

Abschluss

To reassemble your device, follow these instructions in reverse order.

John Harrison

Mitglied seit: 10/28/16

213 Reputation

2 Anleitungen geschrieben

Team

UMass Dartmouth, Team 3-5, Isaacson Fall 2016 Mitglied von UMass Dartmouth, Team 3-5, Isaacson Fall 2016

UMASSD-ISAACSON-F16S3G5

3 Mitglieder

10 Anleitungen geschrieben

0 Kommentare

Kommentar hinzufügen

Seitenaufrufe:

Letzte 24 Stunden: 0

Letzte 7 Tage: 2

Letzte 30 Tage: 8

Insgesamt: 618