Diese Version enthält möglicherweise inkorrekte Änderungen. Wechsle zur letzten geprüften Version.
Was du brauchst
-
Dieser Schritt ist noch nicht übersetzt. Hilf mit, ihn zu übersetzen!
-
Orient the GPS V backside up.
-
With a #0 Philips screwdriver, remove six M2x0.4 black screws on the back of the unit.
-
-
Dieser Schritt ist noch nicht übersetzt. Hilf mit, ihn zu übersetzen!
-
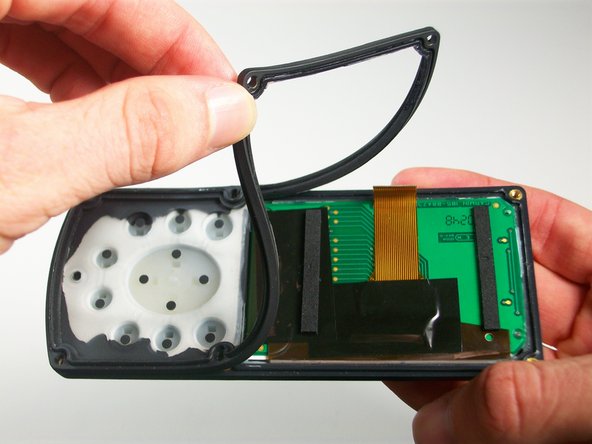
With the spudger, gently pry the back plate off the unit starting at the corners.
-
Open the back plate about 35°, use the antenna side act like a hinge.
-
-
Dieser Schritt ist noch nicht übersetzt. Hilf mit, ihn zu übersetzen!
-
Locate the white 8-pin connector on the logic board and disconnect it.
-
Open the device all the way, making sure to not disconnect the brown antenna wire.
-
-
-
Dieser Schritt ist noch nicht übersetzt. Hilf mit, ihn zu übersetzen!
-
With a #1 Philips screwdriver, remove the silver M2x0.4 screw on the logic board near the brown wire.
-
-
Dieser Schritt ist noch nicht übersetzt. Hilf mit, ihn zu übersetzen!
-
Locate the ribbon connector on the logic board.
-
With the spudger, gently apply pressure to both sides of the brown connector lock until it pushes out.
-
With the spudger, gently work the ribbon cable out of the connector until it is free.
-
-
Dieser Schritt ist noch nicht übersetzt. Hilf mit, ihn zu übersetzen!
-
With the spudger, gently pry out the logic board.
-
-
Dieser Schritt ist noch nicht übersetzt. Hilf mit, ihn zu übersetzen!
-
Locate the brown wire connection on the logic board.
-
Carefully apply heat with the soldering iron while gently pulling on the brown wire.
-
Pull brown wire free of the logic board.
-
-
Dieser Schritt ist noch nicht übersetzt. Hilf mit, ihn zu übersetzen!
-
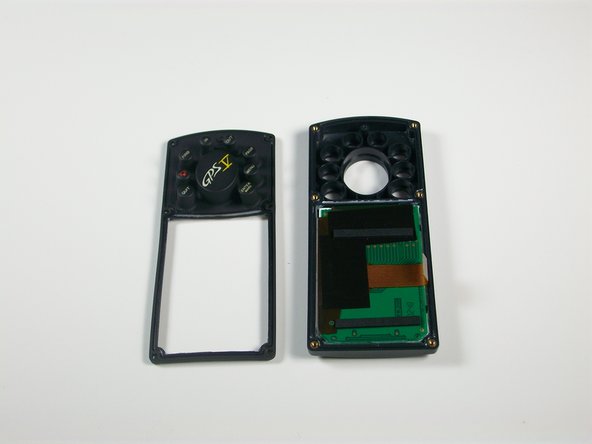
Gently pry the button pad off of the front plate.
-
-
Dieser Schritt ist noch nicht übersetzt. Hilf mit, ihn zu übersetzen!
-
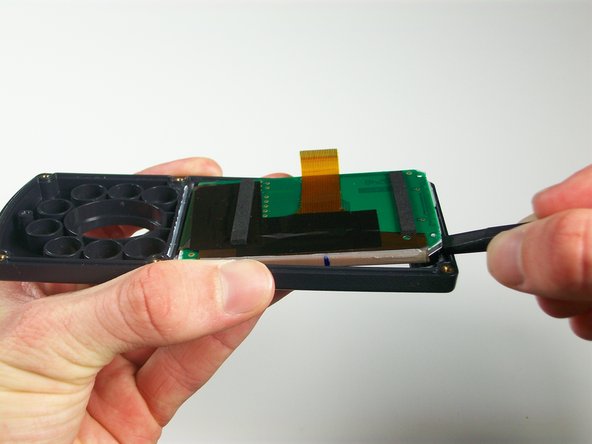
Orient the front plate of the device so the display board is facing up.
-
With the spudger, gently work your way around the display assembly.
-
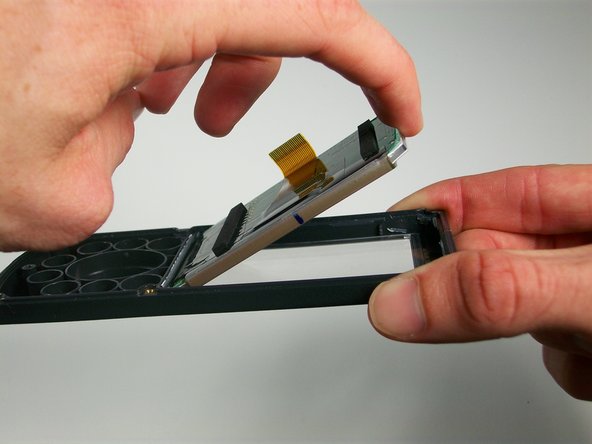
Pry the display free of the front plate.
-


Rückgängig: Ich habe diese Anleitung nicht absolviert.
Ein:e weitere:r Nutzer:in hat diese Anleitung absolviert.
Team

Cal Poly, Team 3-25, Amido Winter 2012 Mitglied von Cal Poly, Team 3-25, Amido Winter 2012
CPSU-AMIDO-W12S3G25
4 Mitglieder
4 Anleitungen geschrieben
Ein Kommentar
This is very helpful - especially when having problems with display (vertical or horizontal lines missing). With your detailed aid it is possible, to remove the display connector, to softly grind it, making contacts conductive again, cleaning them and reassembly the connector - then display was healed - really great help!!