Einleitung
This guide will show you how to replace the display screen on your Garmin Nuvi 56lmt.
Was du brauchst
-
-
Locate the four 11.0 mm Torx screws and remove them with the T5 Torx screwdriver.
-
-
-
-
Run the plastic opening tool around the border of the device until it can be easily pried open by hand.
-
-
-
With your fingers hold back each of the clips located around the border of the screens back.
-
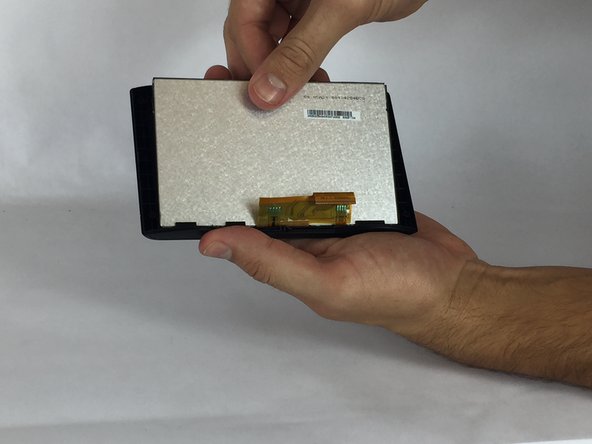
Pull screen up and slide out in the opposite direction of the ribbon to avoid snapping the fixed clips.
-


To reassemble your device, follow these instructions in reverse order.
To reassemble your device, follow these instructions in reverse order.
Rückgängig: Ich habe diese Anleitung nicht absolviert.
Ein:e weitere:r Nutzer:in hat diese Anleitung absolviert.
Team

USF Tampa, Team S3-G5, Nance Fall 2017 Mitglied von USF Tampa, Team S3-G5, Nance Fall 2017
USFT-NANCE-F17S3G5
3 Mitglieder
4 Anleitungen geschrieben