Zum Hauptinhalt wechseln

Gateway NE52203u USB Port Replacement

Was du brauchst

  1. Gateway NE52203u USB Port Replacement, Battery: Schritt 1, Bild 1 von 1
    • Flip the device over onto its backside in order to access the battery.

  2. Gateway NE52203u USB Port Replacement: Schritt 2, Bild 1 von 2 Gateway NE52203u USB Port Replacement: Schritt 2, Bild 2 von 2
    • Locate the battery release latch and slide it over to the other side.

    • A small tool like a pen or screwdriver may be helpful in sliding the latch to release the battery.

  3. Gateway NE52203u USB Port Replacement: Schritt 3, Bild 1 von 1
    • Grab the newly ejected battery from the device to completely remove it.

    • When reinserting the new battery, make sure the prongs on the battery are aligned with the corresponding holes on the laptop.

  4. Gateway NE52203u USB Port Replacement, Touchpad Assembly: Schritt 4, Bild 1 von 2 Gateway NE52203u USB Port Replacement, Touchpad Assembly: Schritt 4, Bild 2 von 2
    • Remove 18 6.0 mm Phillips #00 screws from the bottom of the laptop.

    • Remove 5 6.0 mm Phillip #00 screws from under cover.

  5. Gateway NE52203u USB Port Replacement: Schritt 5, Bild 1 von 1
    • Remove three 2.9 mm Phillips #00 screws from the battery compartment.

  6. Gateway NE52203u USB Port Replacement: Schritt 6, Bild 1 von 2 Gateway NE52203u USB Port Replacement: Schritt 6, Bild 2 von 2
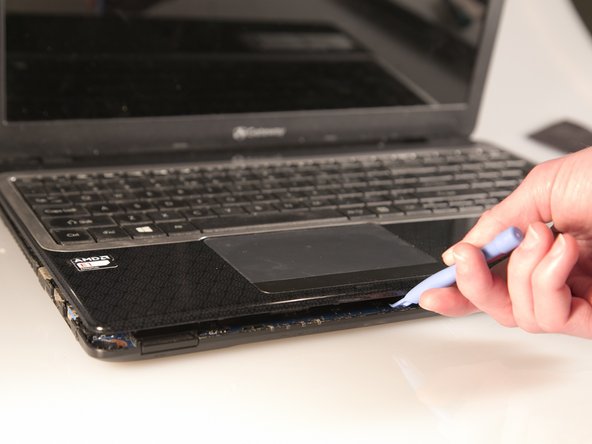
    • Separate the bottom panel from the touchpad assembly by inserting a plastic opening tool between them on all four sides.

  7. Gateway NE52203u USB Port Replacement: Schritt 7, Bild 1 von 1
    • Pull black ribbon wire from port using tweezers in order to completely separate touchpad assembly from bottom assembly.

  8. Gateway NE52203u USB Port Replacement: Schritt 8, Bild 1 von 3 Gateway NE52203u USB Port Replacement: Schritt 8, Bild 2 von 3 Gateway NE52203u USB Port Replacement: Schritt 8, Bild 3 von 3
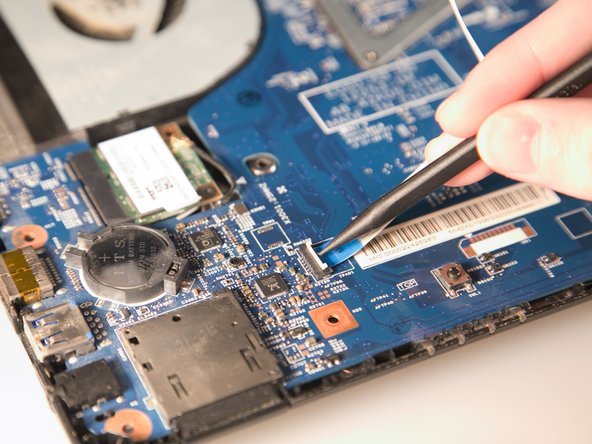
    • Disconnect the two ZIF ports that attach the touchpad assembly to the motherboard.

    • First flip open the flap covering the ribbon using a spudger or fingernail.

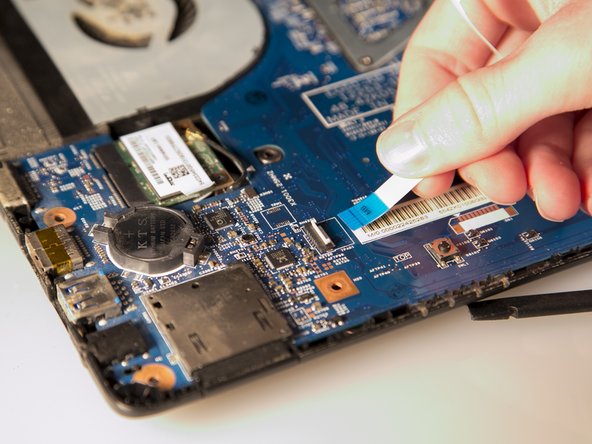
    • Second gently pull the ribbon away from the port.

  9. Gateway NE52203u USB Port Replacement, USB Port: Schritt 9, Bild 1 von 2 Gateway NE52203u USB Port Replacement, USB Port: Schritt 9, Bild 2 von 2
    • Using a spudger, pry the ZIF connector upwards.

  10. Gateway NE52203u USB Port Replacement: Schritt 10, Bild 1 von 1
    • Use your fingers to gently disconnect the ribbon wire from the USB circuit board.

  11. Gateway NE52203u USB Port Replacement: Schritt 11, Bild 1 von 1
    • Using a #00 Phillips head screwdriver, remove the 2.9 mm screw on the USB circuit board.

  12. Gateway NE52203u USB Port Replacement: Schritt 12, Bild 1 von 1
    • Finally, remove the old USB port.

Abschluss

To reassemble your device, follow these instructions in reverse order.

3 weitere Nutzer:innen haben diese Anleitung absolviert.

Stephen Spees

Mitglied seit: 03/20/15

542 Reputation

4 Anleitungen geschrieben

Team

Baylor, Team 2-1, Grigsby Spring 2015 Mitglied von Baylor, Team 2-1, Grigsby Spring 2015

BU-GRIGSBY-S15S2G1

4 Mitglieder

10 Anleitungen geschrieben

0 Kommentare

Kommentar hinzufügen

Seitenaufrufe:

Letzte 24 Stunden: 0

Letzte 7 Tage: 1

Letzte 30 Tage: 2

Insgesamt: 641