Zum Hauptinhalt wechseln

Gateway SA1 Hard Drive Replacement

Was du brauchst

  1. Gateway SA1 Hard Drive Replacement, Battery: Schritt 1, Bild 1 von 1
    • Move the latch to the right of the battery to unlock.

  2. Gateway SA1 Hard Drive Replacement: Schritt 2, Bild 1 von 1
    • Slide the latch on the left directly below the battery to unlock and pull out the battery as shown.

    • The latch must be held in position to remove the battery.

  3. Gateway SA1 Hard Drive Replacement, Hard Drive: Schritt 3, Bild 1 von 1
    • Before you begin, it's recommended that you back up all your computer's information on the original hard drive. Also, verify the laptop is off and all cables are disconnected.

    • Turn the laptop over so the bottom is facing up.

  4. Gateway SA1 Hard Drive Replacement: Schritt 4, Bild 1 von 2 Gateway SA1 Hard Drive Replacement: Schritt 4, Bild 2 von 2
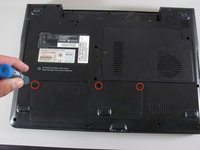
    • Loosen the three Philips cover screws that secure the hard drive.

    • These screws cannot be fully removed from the hard drive cover.

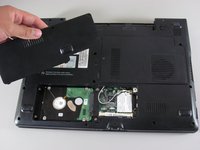
    • Use the spudger to lift and to remove the hard drive cover.

  5. Gateway SA1 Hard Drive Replacement: Schritt 5, Bild 1 von 2 Gateway SA1 Hard Drive Replacement: Schritt 5, Bild 2 von 2
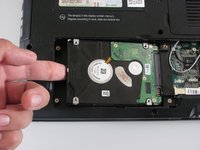
    • Slide the original hard drive to the left and lift it to remove.

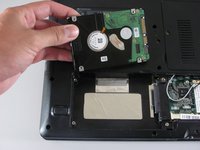
    • Insert the new hard drive.

Abschluss

To reassemble your device, follow these instructions in reverse order.

5 weitere Nutzer:innen haben diese Anleitung absolviert.

Team

Cal Poly, Team 24-20, Regan Spring 2010 Mitglied von Cal Poly, Team 24-20, Regan Spring 2010

CPSU-REGAN-S10S24G20

4 Mitglieder

14 Anleitungen geschrieben

0 Kommentare

Kommentar hinzufügen

Seitenaufrufe:

Letzte 24 Stunden: 0

Letzte 7 Tage: 2

Letzte 30 Tage: 10

Insgesamt: 13,877