Einleitung
In this guide, we will guide you through the process of how to successfully remove and replace the Gateway 1450 Solo's optical drive.
Was du brauchst
-
-
First it is necessary to locate the battery release button. With the laptop orientated so that the screen hinges are facing up the button is located about halfway up the laptop and slightly to the left.
-
-
-
The next step is to simultaneously push up on the battery release button and to pull out on the battery itself. If this is not done simultaneously then the battery will not budge.
-
-
-
To fully free the battery it is necessary to firmly grasp the battery and give it a firm tug.
-
-
-
Orient the laptop open to see the keyboard. Have the screen tilted all of the way back for easier access as shown.
-
-
-
-
Above the keyboard, locate the plastic part containing the power button along with various other command buttons. This needs to come off before you can access the keyboard.
-
Use the spudger to assist in this step. Using the spudger, wedge it underneath the component.
-
Once spudger is inserted and pulled far enough, grasp it and firmly, but carefully, pull it out from the left side first
-
-
-
Once unattached from left side, proceed to right side of component and remove it from clips it is attached to.
-
Once removed from clamps, the part is now removed to provide access to the keyboard.
-
-
-
The two J0 screws have now become visible. Using the Phillips J0 screwdriver, remove screws. The screws are 5mm long J0 Philips screws.
-
-
-
Once screws are removed, firmly grasp the top edge of the keyboard and wiggle it slightly while firmly tugging on it. This will release the clips holding it.
-
Once clips become unattached, the keyboard is now out.
-
-
-
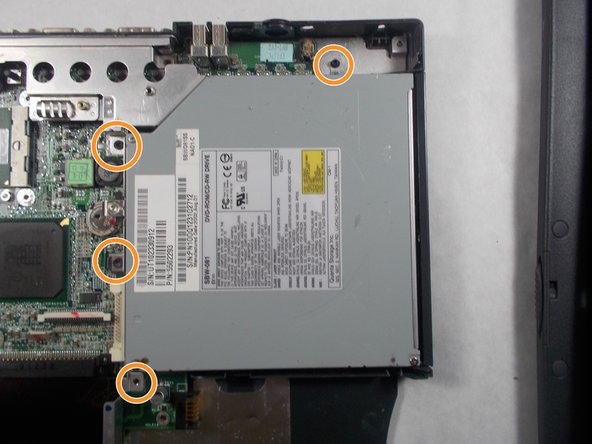
Locate the optical drive.
-
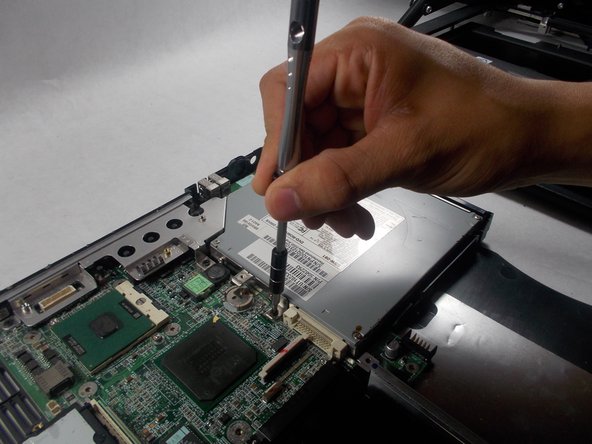
Locate the points where the optical drive is secured to the laptop's interior with screws.
-
Unscrew the screws holding the optical drive in place.
-


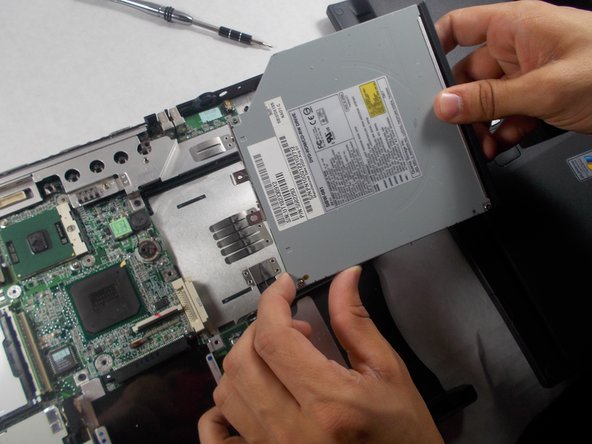
To reassemble your device, follow these instructions in reverse order.
To reassemble your device, follow these instructions in reverse order.
Team

UMass Dartmouth, Team S5-G4, Peak Spring 2018 Mitglied von UMass Dartmouth, Team S5-G4, Peak Spring 2018
UMASSD-PEAK-S18S5G4
3 Mitglieder
12 Anleitungen geschrieben