Zum Hauptinhalt wechseln

General Electric Telephone 2-9710A 3V Headset Battery Replacement

Was du brauchst

  1. General Electric Telephone 2-9710A 3V Headset Battery Replacement, Phone Cord: Schritt 1, Bild 1 von 2 General Electric Telephone 2-9710A 3V Headset Battery Replacement, Phone Cord: Schritt 1, Bild 2 von 2
    • Unplug the device before proceeding.

    • Using a plastic opening tool, remove the phone cord from the phone jack at the base of the headset.

    • To release the cable, gently press down on the top plastic tab of the connector.

  2. General Electric Telephone 2-9710A 3V Headset Battery Replacement: Schritt 2, Bild 1 von 3 General Electric Telephone 2-9710A 3V Headset Battery Replacement: Schritt 2, Bild 2 von 3 General Electric Telephone 2-9710A 3V Headset Battery Replacement: Schritt 2, Bild 3 von 3
    • Remove the 7.5 mm screw.

    • Remove the screw cap.

    • Pull up the phone cord to remove it from the base.

  3. General Electric Telephone 2-9710A 3V Headset Battery Replacement, General Electric Telephone 2-9710A Handset: Schritt 3, Bild 1 von 2 General Electric Telephone 2-9710A 3V Headset Battery Replacement, General Electric Telephone 2-9710A Handset: Schritt 3, Bild 2 von 2
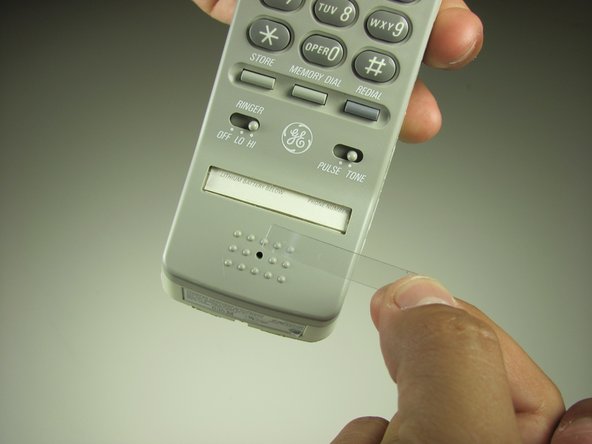
    • Remove the plastic cover with a plastic opening tool by gently sliding the tool underneath the plastic and pry the cover off.

  4. General Electric Telephone 2-9710A 3V Headset Battery Replacement: Schritt 4, Bild 1 von 1
    • Remove the paper with a plastic opening tool by gently sliding the tool underneath and prying the paper away from the phone.

  5. General Electric Telephone 2-9710A 3V Headset Battery Replacement: Schritt 5, Bild 1 von 2 General Electric Telephone 2-9710A 3V Headset Battery Replacement: Schritt 5, Bild 2 von 2
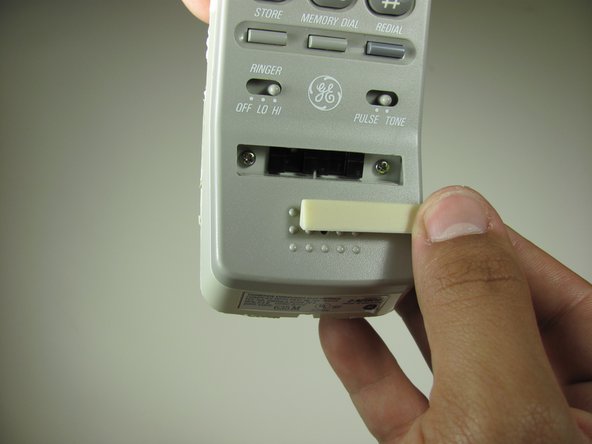
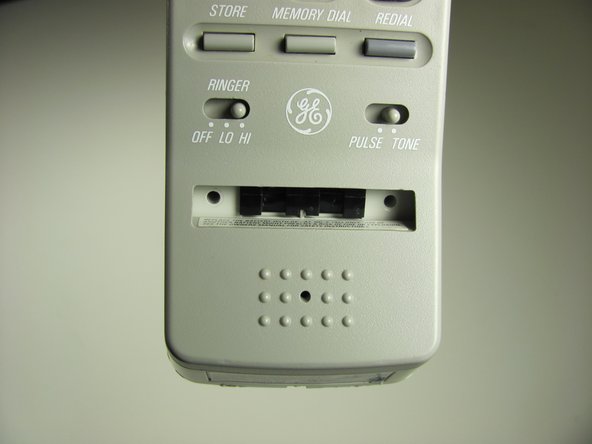
    • Remove the rubber stopper with a plastic opening tool by gently sliding the tool underneath and pry away from the phone.

  6. General Electric Telephone 2-9710A 3V Headset Battery Replacement: Schritt 6, Bild 1 von 2 General Electric Telephone 2-9710A 3V Headset Battery Replacement: Schritt 6, Bild 2 von 2
    • Remove the two 2.1 mm screws with a Phillips #1 screwdriver.

  7. General Electric Telephone 2-9710A 3V Headset Battery Replacement: Schritt 7, Bild 1 von 1
    • Pull apart the handset by pulling the top shell away from the other half of the phone.

  8. General Electric Telephone 2-9710A 3V Headset Battery Replacement: Schritt 8, Bild 1 von 2 General Electric Telephone 2-9710A 3V Headset Battery Replacement: Schritt 8, Bild 2 von 2
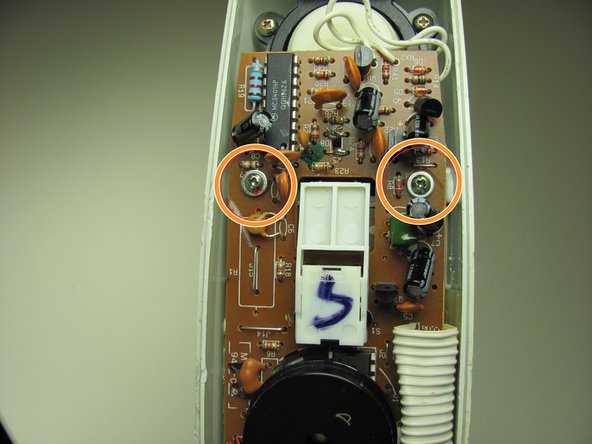
    • Remove 3 screws attaching the motherboard to shell.

    • Remove the 13 mm screw with a Philips #1 screwdriver.

    • Remove the two 13 mm screws with washers with a Philips #1 screwdriver.

  9. General Electric Telephone 2-9710A 3V Headset Battery Replacement: Schritt 9, Bild 1 von 2 General Electric Telephone 2-9710A 3V Headset Battery Replacement: Schritt 9, Bild 2 von 2
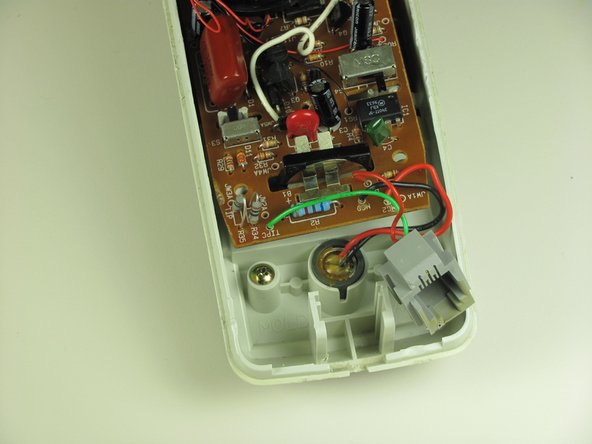
    • Slide the phone jack out from the shell by gently lifting up the female phone jack connector.

  10. General Electric Telephone 2-9710A 3V Headset Battery Replacement: Schritt 10, Bild 1 von 1
    • Without removing the motherboard completely, pull up slightly and pivot the motherboard out of the shell.

    • Be careful not to pull the connectors out.

  11. General Electric Telephone 2-9710A 3V Headset Battery Replacement, 3V Headset Battery: Schritt 11, Bild 1 von 1
    • Use tweezers to apply pressure on battery holder tabs.

    • Apply pressure directly on battery holder to slide it through the shell.

    • Battery is going to slide through the bottom.

  12. General Electric Telephone 2-9710A 3V Headset Battery Replacement: Schritt 12, Bild 1 von 2 General Electric Telephone 2-9710A 3V Headset Battery Replacement: Schritt 12, Bild 2 von 2
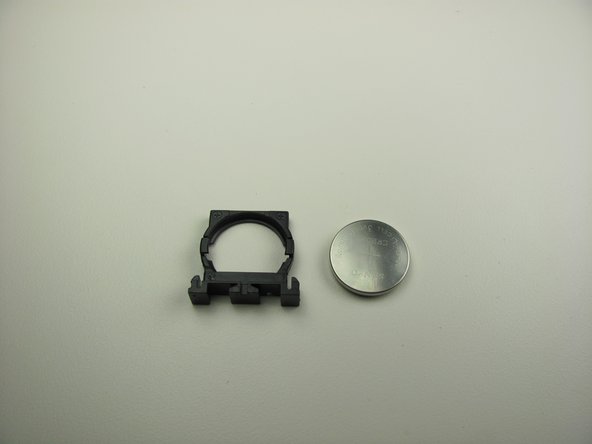
    • Lift tabs on the side of the holder by putting your fingers directly on the tab to pull it apart.

    • While holding the battery, remove it from the holder.

  13. General Electric Telephone 2-9710A 3V Headset Battery Replacement: Schritt 13, Bild 1 von 1
    • Now insert the new battery.

    • Ensure that the positive side of the battery is facing the tabs.

Abschluss

To reassemble your device, follow these instructions in reverse order.

Ein:e weitere:r Nutzer:in hat diese Anleitung absolviert.

Team

Cal Poly, Team 16-59, Forte Fall 2012 Mitglied von Cal Poly, Team 16-59, Forte Fall 2012

CPSU-FORTE-F12S16G59

4 Mitglieder

17 Anleitungen geschrieben

0 Kommentare

Kommentar hinzufügen

Seitenaufrufe:

Letzte 24 Stunden: 0

Letzte 7 Tage: 0

Letzte 30 Tage: 1

Insgesamt: 1,282