Diese Version enthält möglicherweise inkorrekte Änderungen. Wechsle zur letzten geprüften Version.
Was du brauchst
-
Dieser Schritt ist noch nicht übersetzt. Hilf mit, ihn zu übersetzen!
-
Using a plastic opening tool, remove the phone cord from the phone jack at the base of the headset.
-
-
Dieser Schritt ist noch nicht übersetzt. Hilf mit, ihn zu übersetzen!
-
Remove the 7.5 mm screw.
-
Remove the screw cap.
-
Pull up the phone cord to remove it from the base.
-
-
Dieser Schritt ist noch nicht übersetzt. Hilf mit, ihn zu übersetzen!
-
Remove the battery compartment door (located on the bottom of the radio) by applying thumb pressure to the area indicated on the battery door.
-
Slide the door off of the battery compartment.
-
Remove the battery from the phone.
-
-
-
Dieser Schritt ist noch nicht übersetzt. Hilf mit, ihn zu übersetzen!
-
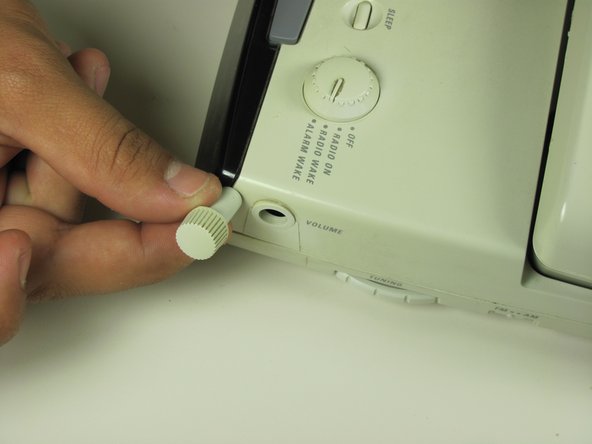
Locate the volume dial on the right side of the telephone.
-
Remove the volume dial by gently grasping it and pulling it away from the base.
-
-
Dieser Schritt ist noch nicht übersetzt. Hilf mit, ihn zu übersetzen!
-
Remove the three 12 mm screws with a Phillips #1 screwdriver.
-
Remove the three 18 mm screws with a Phillips #1 screwdriver.
-
-
Dieser Schritt ist noch nicht übersetzt. Hilf mit, ihn zu übersetzen!
-
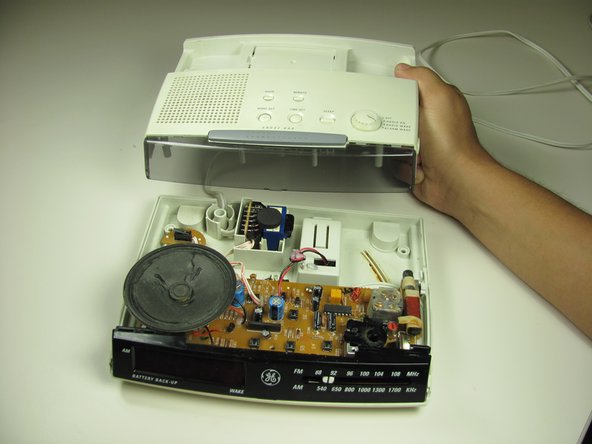
Pry off the base shell using a plastic opener tool.
-
Set the shell aside.
-
-
Dieser Schritt ist noch nicht übersetzt. Hilf mit, ihn zu übersetzen!
-
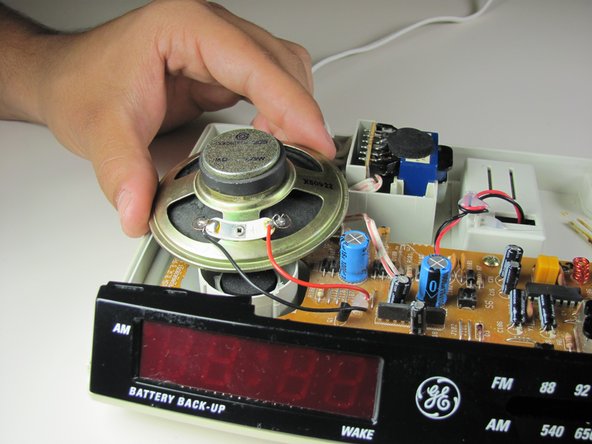
Slightly pull out speaker.
-
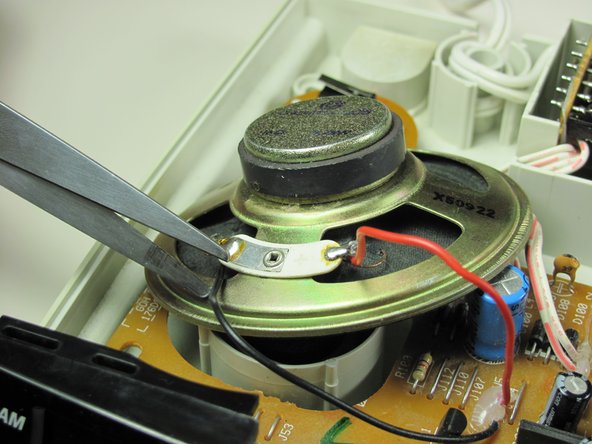
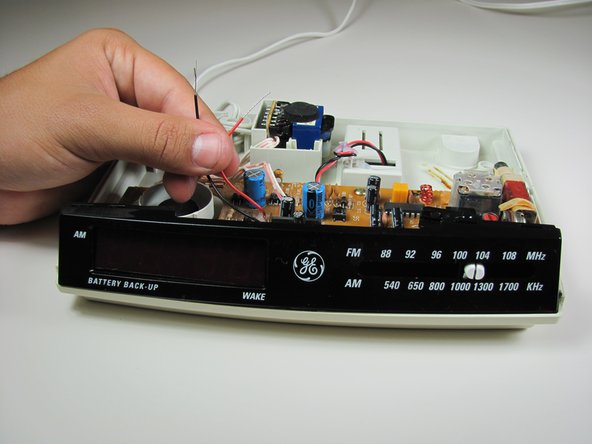
Cut wire as close as speaker as possible with wire cutters.
-
Remove speaker.
-
-
Dieser Schritt ist noch nicht übersetzt. Hilf mit, ihn zu übersetzen!
-
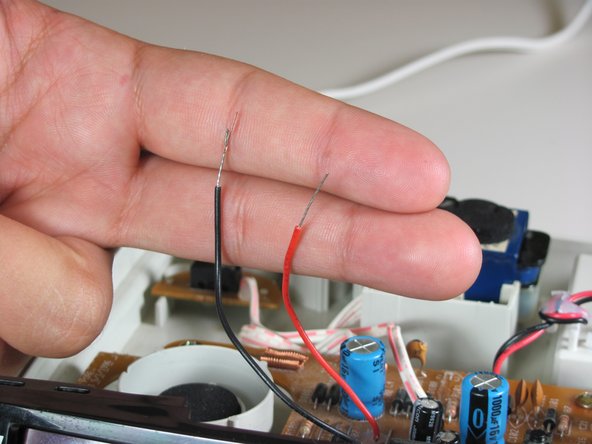
Strip the wire half an inch using wire strippers for a 24 gauge wire.
-
-
Dieser Schritt ist noch nicht übersetzt. Hilf mit, ihn zu übersetzen!
-
Solder on the new speaker.
-
Please visit How to Solder to learn more about soldering.
-


Team

Cal Poly, Team 16-59, Forte Fall 2012 Mitglied von Cal Poly, Team 16-59, Forte Fall 2012
CPSU-FORTE-F12S16G59
4 Mitglieder
17 Anleitungen geschrieben