Was du brauchst
-
-
Use the plastic opening tool to remove the faceplate.
-
There is some adhesive and clips so be careful and the faceplate should pop right off.
-
-
-
-
Now that the faceplate is off, it is time to remove the 4 screws on each corner.
-
Use the T4 tool bit from the iFixit toolkit in order to remove the 4 screws on each corner.
-
-
-
Note: Make sure you remove the door cover of the USB, mini HDMI, and SD port before. Separating the motherboard will be easier.
-
Using the plastic opening tool, slowly pry open the motherboard assembly.
-
-
-
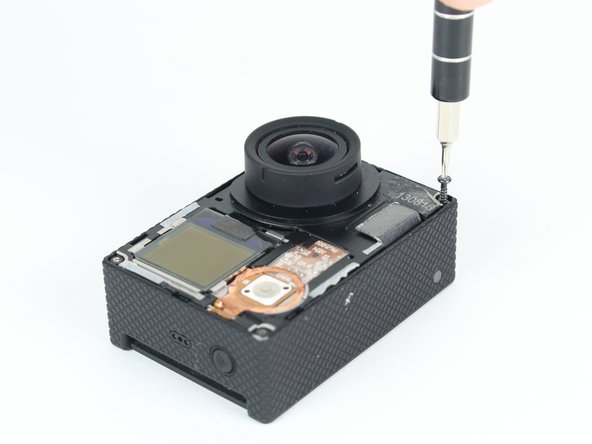
Use the spudger to gently pry off the connector of the housing to the motherboard.
-
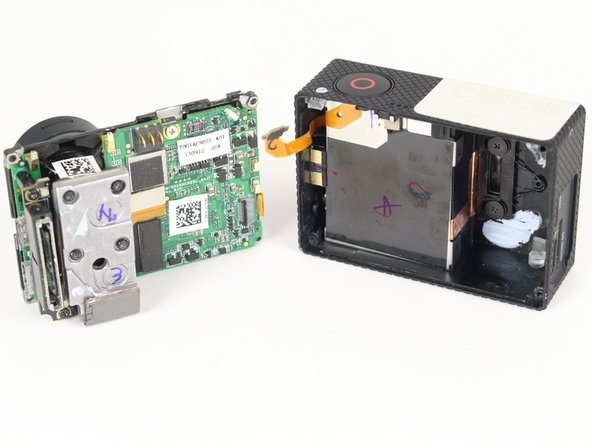
You should now have the motherboard assembly and the housing separated.
-
-
-
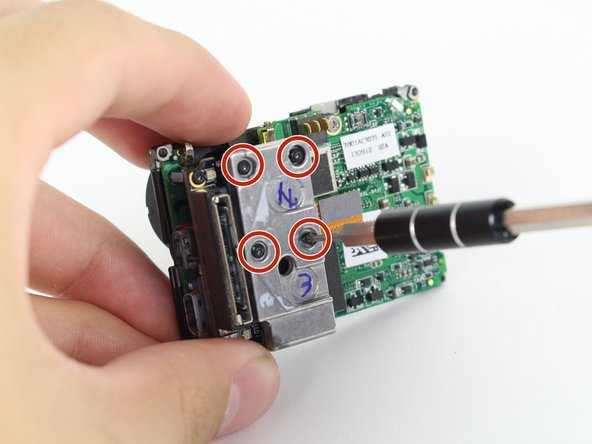
Use the spudger to remove the heat shield tape and detach the image sensor from the motherboard.
-
Using the T4 Torx toolbit, remove the 4 screws that connect the sensor to the lens.
-
-
-
Remove the silver connector of the image sensor from the motherboard using the spudger to pry it off.
-
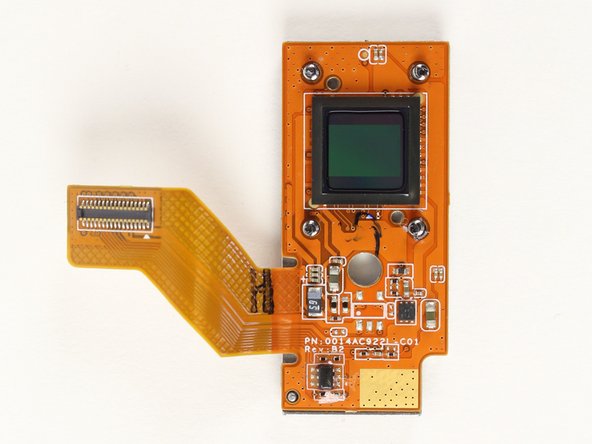
You should now be able to remove the image sensor by simply pulling it.
-


To reassemble your device, follow these instructions in reverse order.
To reassemble your device, follow these instructions in reverse order.
Rückgängig: Ich habe diese Anleitung nicht absolviert.
2 weitere Nutzer:innen haben diese Anleitung absolviert.
Team

Cal Poly, Team 24-7, Lancaster Spring 2015 Mitglied von Cal Poly, Team 24-7, Lancaster Spring 2015
CPSU-LANCASTER-S15S24G7
3 Mitglieder
21 Anleitungen geschrieben
2 Kommentare
After the sensor has been replaced, does the camera need any catibration?