Einleitung
This guide has been updated, the newest version is available here.
The battery provides internal energy for the phone. This guide will show you how to remove a defective battery without damaging other components. Before beginning please make sure you have all the necessary tools listed below which are required to complete this replacement effectively. We also advise you to be extra cautious while using the suction handle and the spudger when opening the phone up.
Before disassembling your phone, discharge the battery below 25%. A charged lithium-ion battery can catch fire and/or explode if accidentally punctured.
If your battery is swollen, take appropriate precautions.
Was du brauchst
-
-
Place the suction handle onto the top of the phone's display. Make sure to have a strong connection.
-
Insert the edge of the blue opening tool between the phone's crease. Pull up with the suction cup and pry the display off.
-
-
-
-
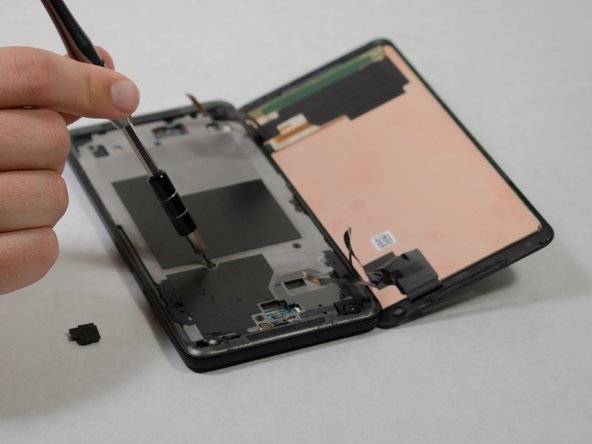
Remove the magnesium midframe by pulling out all eleven 3.5 mm screws holding the piece down, using a JIS #000 screwdriver.
-
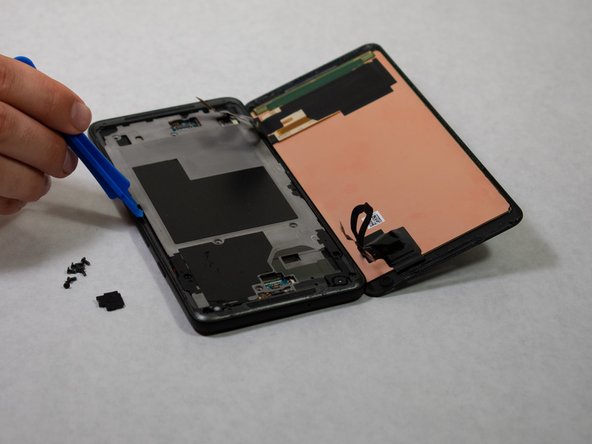
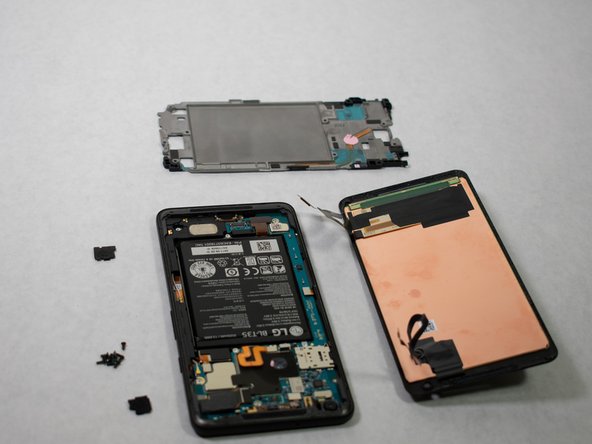
Use the plastic opening tool to pry open the frame from the side.
-
-
-
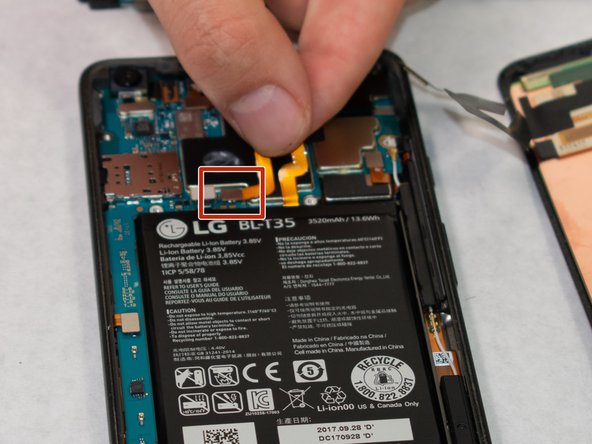
The battery is held down by a large orange ribbon. Simply disconnect the metal tab that attatches the ribbon to the phone.
-
Pry apart and remove the battery from the device using a spudger.
-
Remove any remaining adhesive from the phone, and clean the glued areas with isopropyl alcohol and a lint-free cloth.
-
Secure the new battery with pre-cut adhesive or double-sided adhesive tape. In order to position it correctly, apply the new adhesive into the phone, not directly onto the battery.
-
Press the battery firmly into place for 5-10 seconds.
-


To reassemble your device, follow these instructions in reverse order.
To reassemble your device, follow these instructions in reverse order.
Team

Cal Poly, Team S7-G1, Paton Spring 2020 Mitglied von Cal Poly, Team S7-G1, Paton Spring 2020
CPSU-PATON-S20S7G1
3 Mitglieder
14 Anleitungen geschrieben