Zum Hauptinhalt wechseln

Google Pixel 5a Rear-Facing Cameras Replacement

Archivierte Anleitung
Diese Anleitung wurde ausschließlich für historische Zwecke erhalten. Verwende die aktualisierte Version dieser Anleitung, um deine Reparatur durchzuführen.

Was du brauchst

  1. Google Pixel 5a Rear-Facing Cameras  Replacement, Screen: Schritt 1, Bild 1 von 3 Google Pixel 5a Rear-Facing Cameras  Replacement, Screen: Schritt 1, Bild 2 von 3 Google Pixel 5a Rear-Facing Cameras  Replacement, Screen: Schritt 1, Bild 3 von 3
    • Shut down the device before starting screen removal.

    • Insert a paper clip or SIM card removal tool into the SIM card tray hole.

    • Apply a small amount of pressure until the tray pops out.

    • Slide the SIM card tray out of your Google Pixel 5a.

  2. Google Pixel 5a Rear-Facing Cameras  Replacement: Schritt 2, Bild 1 von 2 Google Pixel 5a Rear-Facing Cameras  Replacement: Schritt 2, Bild 2 von 2
    • Pry the screen off of your device using an opening tool around all four sides.

  3. Google Pixel 5a Rear-Facing Cameras  Replacement: Schritt 3, Bild 1 von 3 Google Pixel 5a Rear-Facing Cameras  Replacement: Schritt 3, Bild 2 von 3 Google Pixel 5a Rear-Facing Cameras  Replacement: Schritt 3, Bild 3 von 3
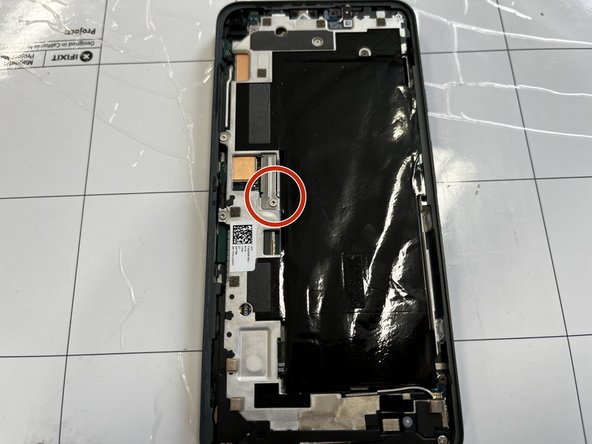
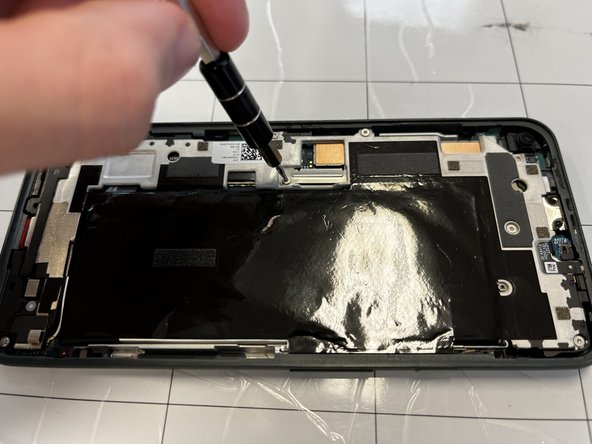
    • Remove the 4 mm screw using a T4 Torx screwdriver.

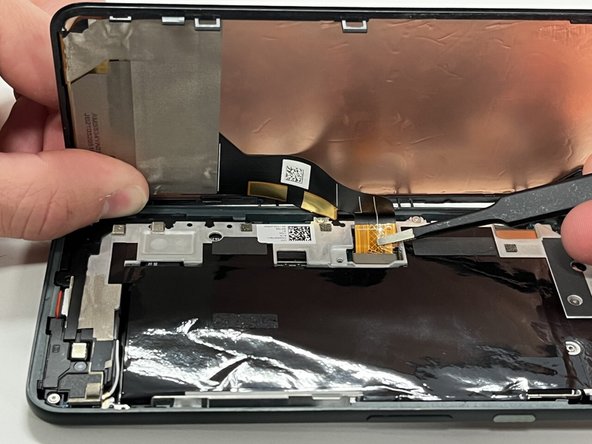
    • Disconnect the ribbon cable holding the screen in place.

    • Remove the screen from the rest of the phone.

  4. Google Pixel 5a Rear-Facing Cameras  Replacement, Midframe: Schritt 4, Bild 1 von 3 Google Pixel 5a Rear-Facing Cameras  Replacement, Midframe: Schritt 4, Bild 2 von 3 Google Pixel 5a Rear-Facing Cameras  Replacement, Midframe: Schritt 4, Bild 3 von 3
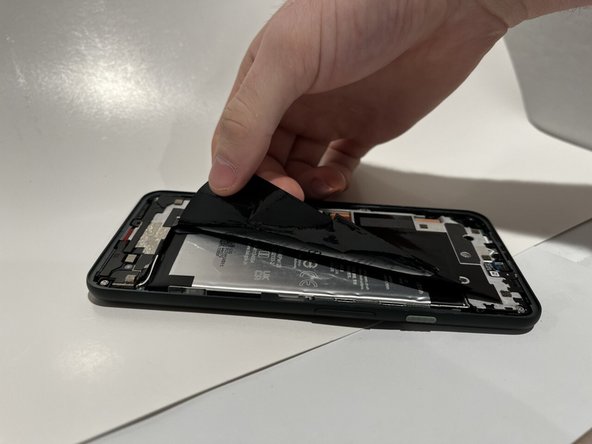
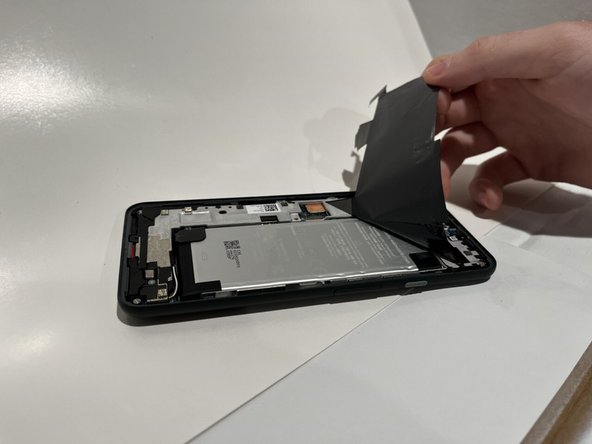
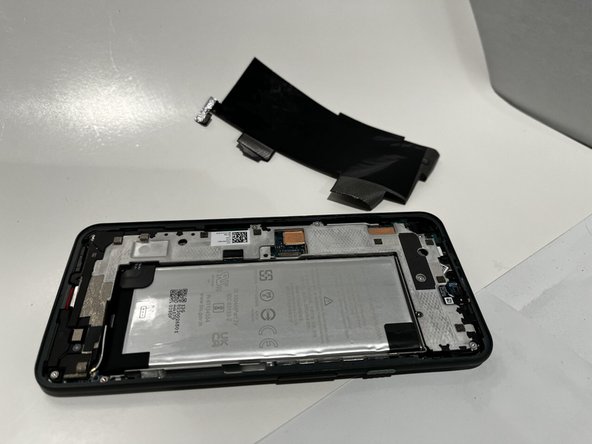
    • Peel back the black plastic film covering the battery.

  5. Google Pixel 5a Rear-Facing Cameras  Replacement: Schritt 5, Bild 1 von 2 Google Pixel 5a Rear-Facing Cameras  Replacement: Schritt 5, Bild 2 von 2
    In diesem Schritt verwendetes Werkzeug:
    Tweezers
    $4.99
    Kaufen
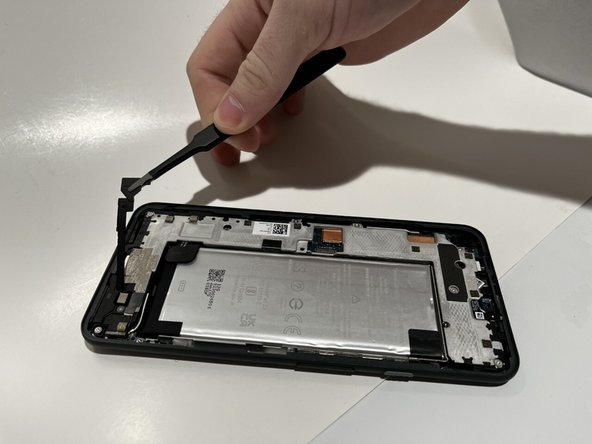
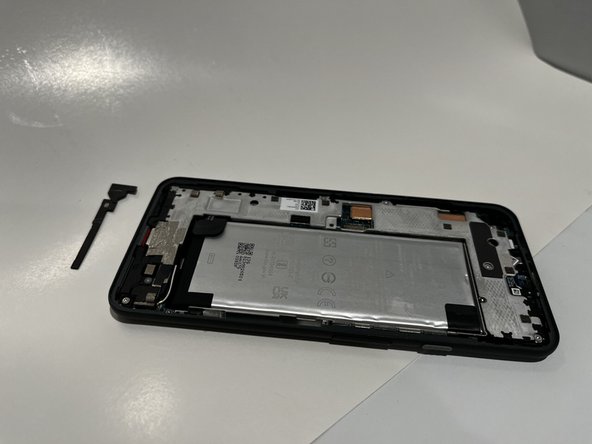
    • Use a pair of tweezers to remove the black plastic cover.

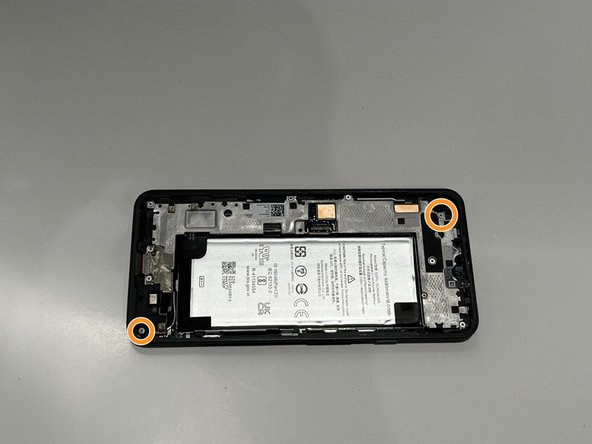
  6. Google Pixel 5a Rear-Facing Cameras  Replacement: Schritt 6, Bild 1 von 3 Google Pixel 5a Rear-Facing Cameras  Replacement: Schritt 6, Bild 2 von 3 Google Pixel 5a Rear-Facing Cameras  Replacement: Schritt 6, Bild 3 von 3
    • Use a spudger to peel back the protective tape covering two screws.

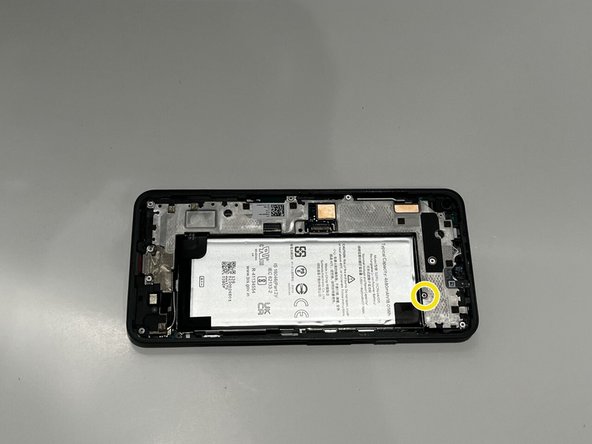
  7. Google Pixel 5a Rear-Facing Cameras  Replacement: Schritt 7, Bild 1 von 3 Google Pixel 5a Rear-Facing Cameras  Replacement: Schritt 7, Bild 2 von 3 Google Pixel 5a Rear-Facing Cameras  Replacement: Schritt 7, Bild 3 von 3
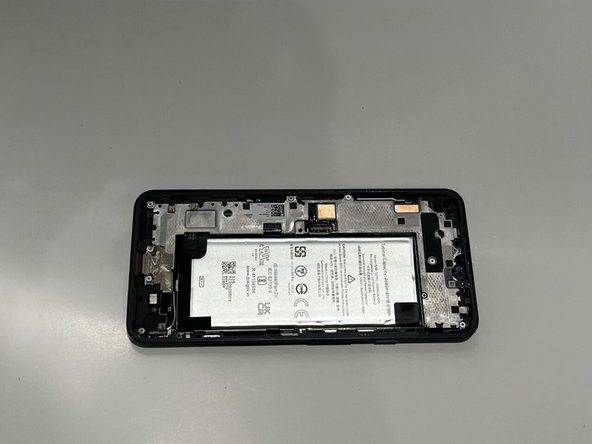
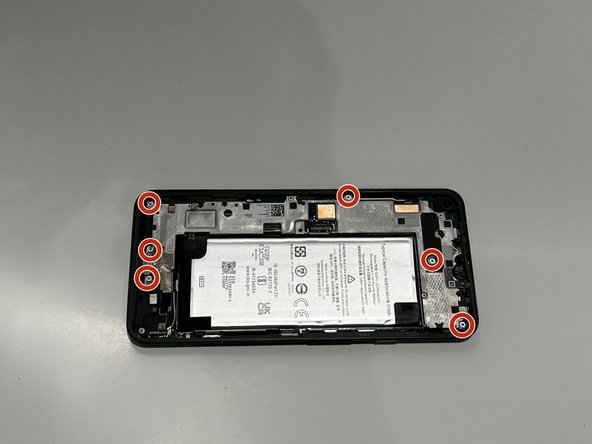
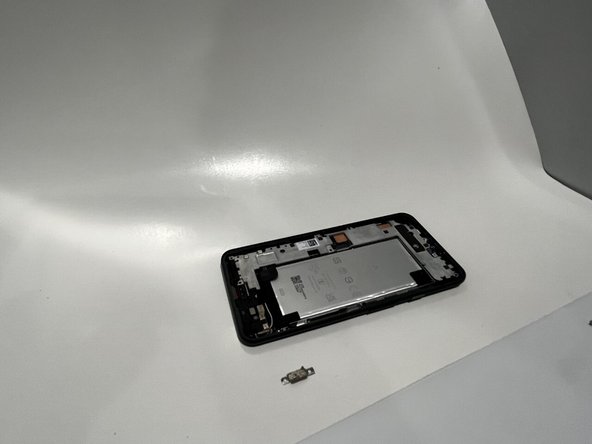
    • Using a T4 screwdriver, remove the six 4 mm screws.

    • Using a T4 screwdriver, remove the two 3 mm screws.

    • Using a T4 screwdriver, remove the 5 mm screw.

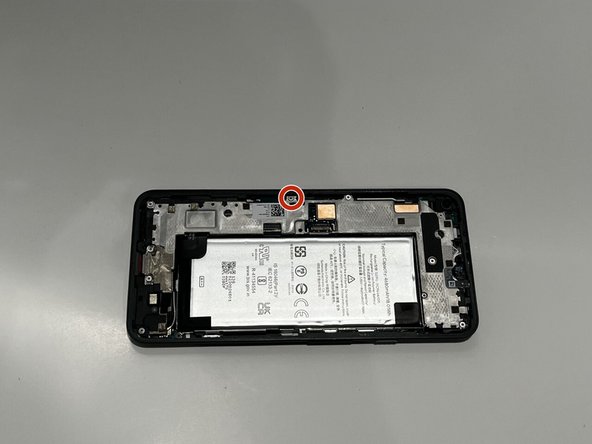
  8. Google Pixel 5a Rear-Facing Cameras  Replacement: Schritt 8, Bild 1 von 1
    • Using a T4 screwdriver, remove the single 1 mm screw.

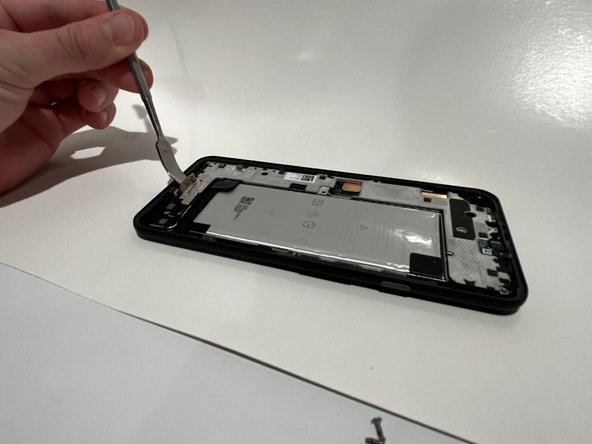
  9. Google Pixel 5a Rear-Facing Cameras  Replacement: Schritt 9, Bild 1 von 2 Google Pixel 5a Rear-Facing Cameras  Replacement: Schritt 9, Bild 2 von 2
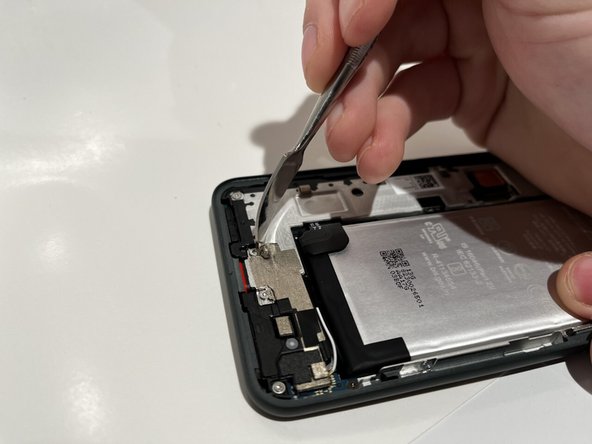
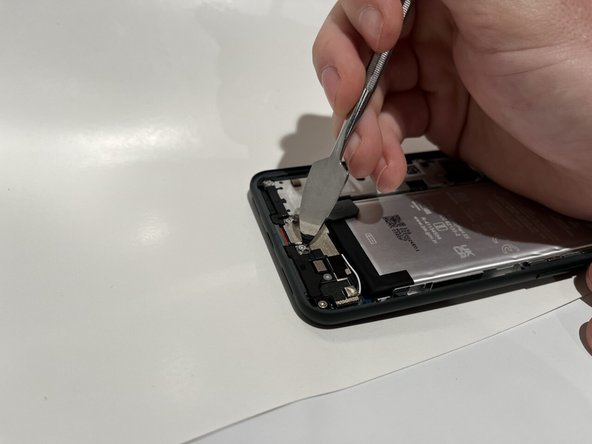
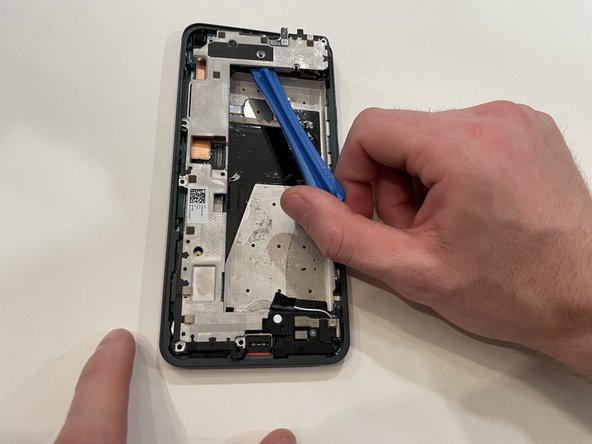
    • Place a spudger under the metal bracket that covers the charging port.

    • Pry the metal bracket upwards, and remove it from the phone.

  10. Google Pixel 5a Rear-Facing Cameras  Replacement: Schritt 10, Bild 1 von 3 Google Pixel 5a Rear-Facing Cameras  Replacement: Schritt 10, Bild 2 von 3 Google Pixel 5a Rear-Facing Cameras  Replacement: Schritt 10, Bild 3 von 3
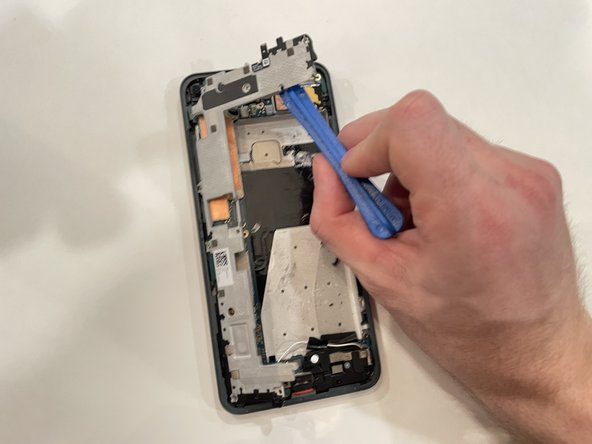
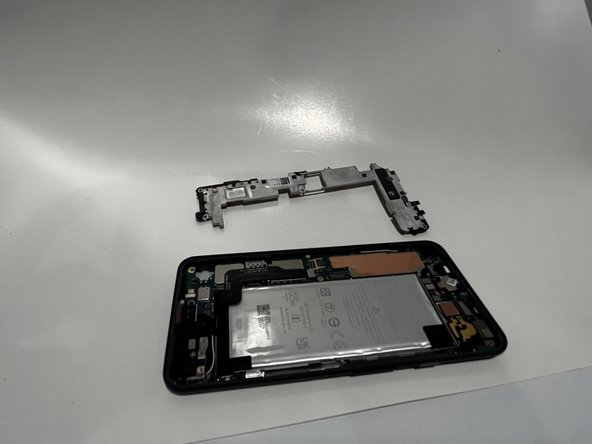
    • Place an opening tool under the midframe.

    • Pry the midframe up, and remove it from the phone.

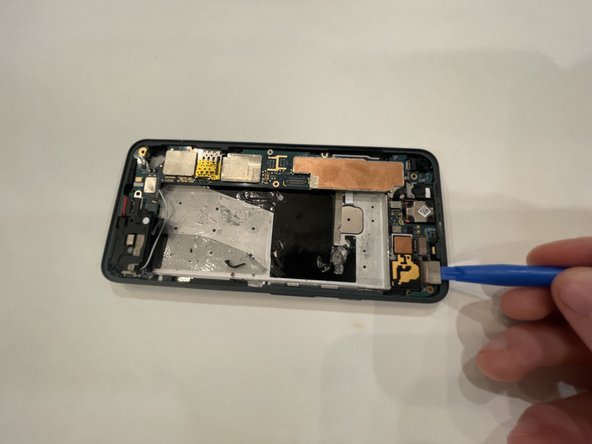
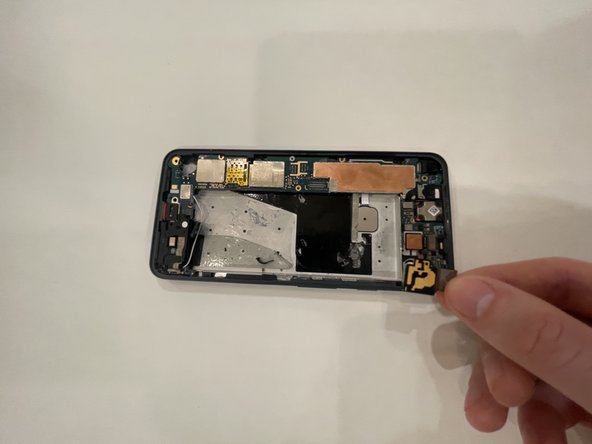
  11. Google Pixel 5a Rear-Facing Cameras  Replacement, Rear-Facing Cameras: Schritt 11, Bild 1 von 2 Google Pixel 5a Rear-Facing Cameras  Replacement, Rear-Facing Cameras: Schritt 11, Bild 2 von 2
    • Place an opening tool under the camera connector and pry upward.

    • Carefully remove the camera connector from the phone.

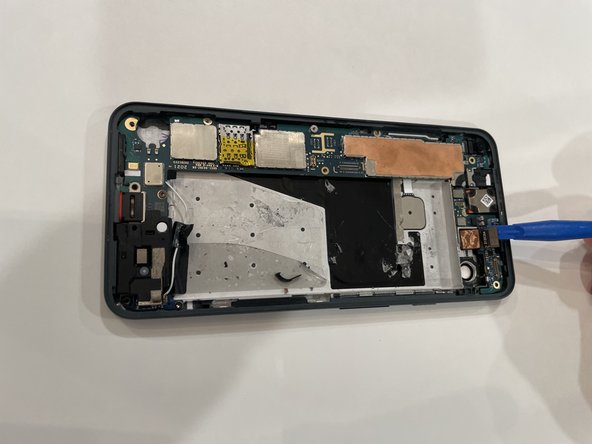
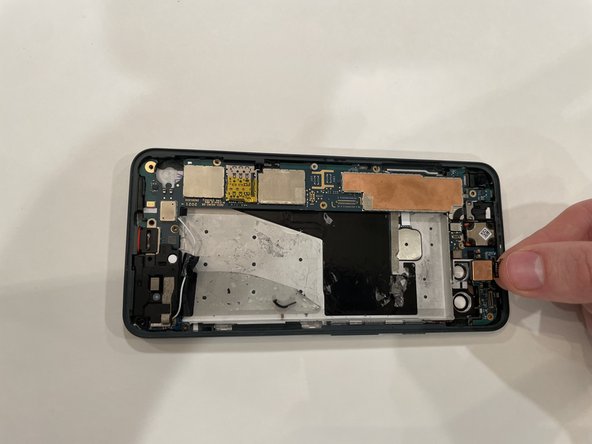
  12. Google Pixel 5a Rear-Facing Cameras  Replacement: Schritt 12, Bild 1 von 2 Google Pixel 5a Rear-Facing Cameras  Replacement: Schritt 12, Bild 2 von 2
    • Place an opening tool under the camera and pry upward.

    • Carefully remove the camera from the phone.

Abschluss

To reassemble your device, follow these instructions in reverse order.

0 Kommentare

Kommentar hinzufügen

Seitenaufrufe:

Letzte 24 Stunden: 0

Letzte 7 Tage: 0

Letzte 30 Tage: 0

Insgesamt: 42