Zum Hauptinhalt wechseln

Google Pixel XL Earpiece Speaker Replacement

Archivierte Anleitung
Diese Anleitung wurde ausschließlich für historische Zwecke erhalten. Verwende die aktualisierte Version dieser Anleitung, um deine Reparatur durchzuführen.

Was du brauchst

  1. Google Pixel XL Earpiece Speaker Replacement, Earpiece Speaker: Schritt 1, Bild 1 von 1
    • Power off your device.

    • Eject the SIM card tray by inserting a SIM card tool (or the end of a paperclip) into the hole in the SIM tray. Press firmly to eject the tray.

    • Slide the SIM card tray out of the phone.

    • Take care not to lose the SIM card, which is small and may fall out unexpectedly.

  2. Google Pixel XL Earpiece Speaker Replacement: Schritt 2, Bild 1 von 3 Google Pixel XL Earpiece Speaker Replacement: Schritt 2, Bild 2 von 3 Google Pixel XL Earpiece Speaker Replacement: Schritt 2, Bild 3 von 3
    • Heat the perimeter of the display using an iOpener, hair dryer, or heat gun.

    • Heat will help soften the adhesive securing the display, making it easier to separate. The display should be heated until it's slightly too hot to touch, for roughly two minutes. Use extra caution if working with a heat gun, as applying too much heat will permanently damage the OLED panel.

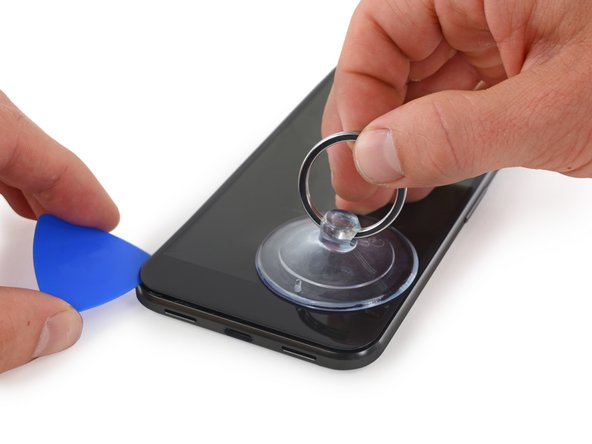
    • Use a suction cup to lift one edge of the screen just slightly, creating a small gap between the display and the frame of the phone.

    • Insert an opening pick into the gap.

    • Carefully slide the opening pick around the perimeter of the phone to separate the adhesive.

    • If you plan to re-use the display, don't insert the opening pick more than a few millimeters into the phone, or you may damage the OLED panel underneath the glass.

    • You may need to slide the pick around the perimeter multiple times to fully separate the adhesive. Work slowly and carefully until the display begins to come free.

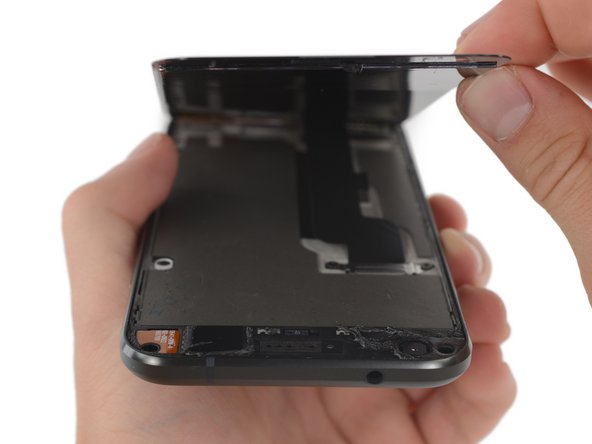
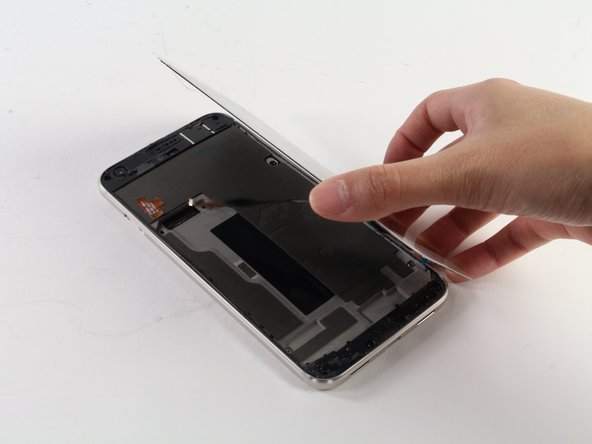
    • Gently lift the display, but don't try to fully detach it yet—it is still connected by a ribbon cable lying underneath.

  3. Google Pixel XL Earpiece Speaker Replacement: Schritt 3, Bild 1 von 1
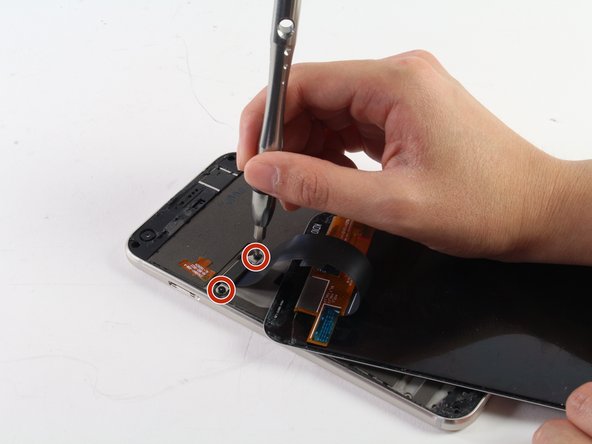
    • Use the T5 screwdriver to undo the two black, 4mm screws which hold the screen connector shield in place.

    • Gently remove the metal screen connector shield.

  4. Google Pixel XL Earpiece Speaker Replacement: Schritt 4, Bild 1 von 2 Google Pixel XL Earpiece Speaker Replacement: Schritt 4, Bild 2 von 2
    • Be careful not to damage the connector when performing this step.

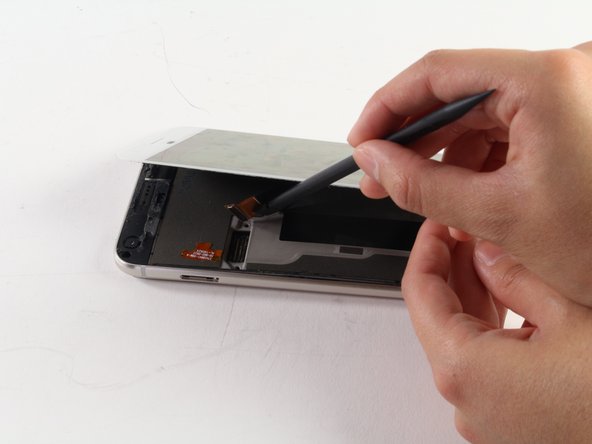
    • Use the spudger or your fingernail to lift off the connector that holds the screen in place.

    • Lift off the display assembly completely and place it off to the side.

    • Gently scrape any remaining adhesive from your phone. Use a small amount of high concentration isopropyl alcohol (at least 90%) to clean the frame and prep it for the new screen adhesive.

    • The replacement adhesive should only be applied to the edges of the frame, but may come with the center filled in.

    • To remove the unnecessary center section of the adhesive strip, carefully peel away the perforated rectangle in middle of the white backing. At the same time, peel up the black adhesive underneath the white backing.

    • Only adhesive for the edges of the frame should remain.

  5. Google Pixel XL Earpiece Speaker Replacement: Schritt 5, Bild 1 von 2 Google Pixel XL Earpiece Speaker Replacement: Schritt 5, Bild 2 von 2
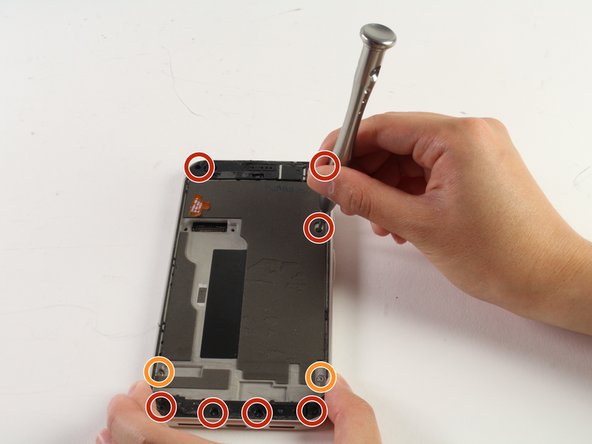
    • Unscrew the seven black 4mm T5 screws.

    • Unscrew the two silver 3mm T5 screws which secure the mid frame assembly.

    • There will be clicks as you take the mid frame out of the phone due to the clips that normally hold it in place.

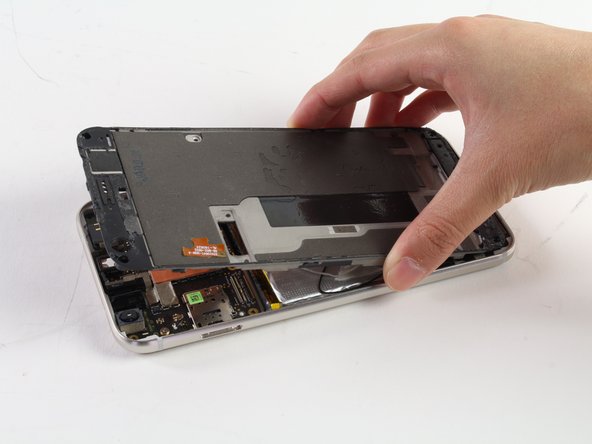
    • Lift the mid frame from the rear casing by pulling it upwards.

  6. Google Pixel XL Earpiece Speaker Replacement: Schritt 6, Bild 1 von 3 Google Pixel XL Earpiece Speaker Replacement: Schritt 6, Bild 2 von 3 Google Pixel XL Earpiece Speaker Replacement: Schritt 6, Bild 3 von 3
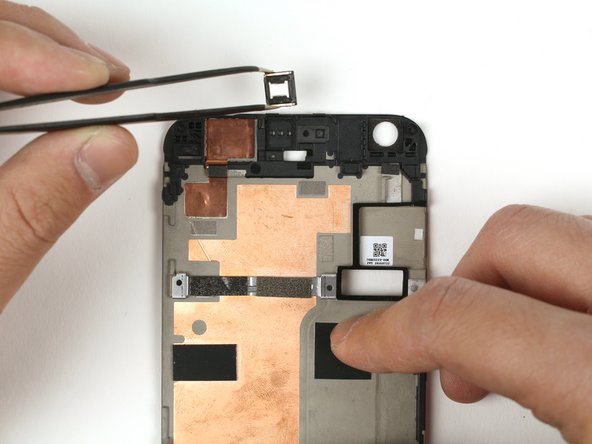
    • Once you have removed the mid-frame from the device, flip the frame over so that the copper tape is visible.

    • Using a pair of tweezers, remove the earpiece speaker from the mid-frame by pulling up gently.

Abschluss

To reassemble your device, follow these instructions in reverse order.

Justin Ogihara

Mitglied seit: 09/18/17

27.167 Reputation

52 Anleitungen geschrieben

Team

EDU Team Mitglied von EDU Team

Staff

7 Mitglieder

637 Anleitungen geschrieben

0 Kommentare

Kommentar hinzufügen

Seitenaufrufe:

Letzte 24 Stunden: 0

Letzte 7 Tage: 0

Letzte 30 Tage: 0

Insgesamt: 11