Einleitung
In this guide, you will learn how to replace the left charging port on your Google Pixelbook to fix charging issues.
Was du brauchst
-
-
Use the iFixit opening tools or a metal spudger to pry the rubber covers off the back of your Pixelbook.
-
Peel the linings off completely until the back of the Pixelbook looks bare.
-
-
-
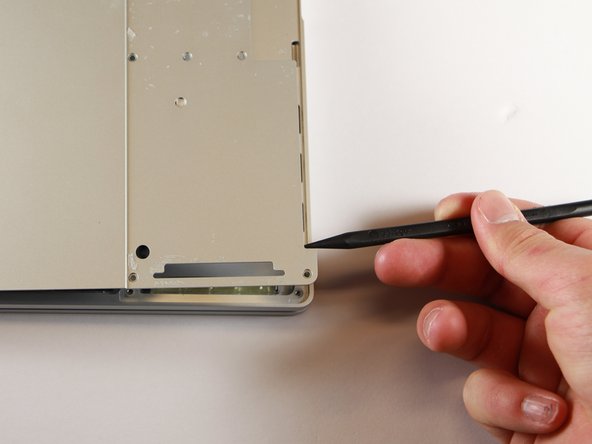
Use the nylon spudger to pry the edge of the Pixelbook up until you can grab the edge with your fingers.
-
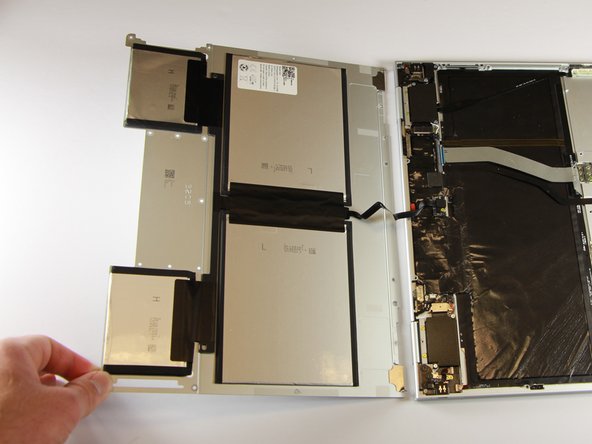
Open the back panel completely and lay it flat so you see the whole inside of the computer.
-
-
-
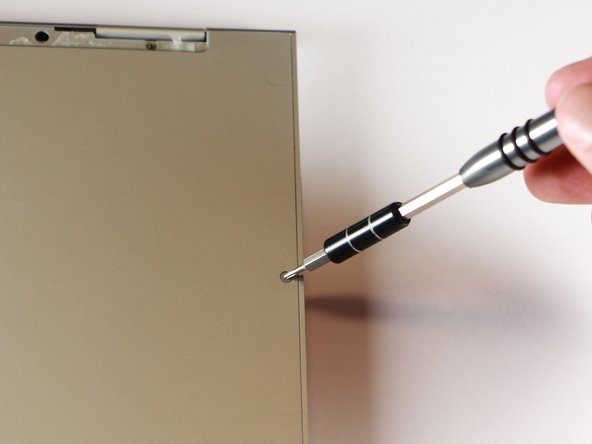
Remove the yellow 2.0mm screw from the middle of the panel by using the T3 Torx screwdriver to turn the screw counterclockwise.
-
-
-
-
Remove the small, black casing by using the spudger to lift it up from its place.
-
-
-
Disconnect the flat, black cord from the main component by using a spudger to push it out of the slot, or by using your hand to carefully pull it out.
-
Your back panel is now free from the main component.
-
-
-
Remove the two 3.0mm silver screws from the thin, black component by using a T3 Torx screwdriver to turn the screws counterclockwise.
-
-
-
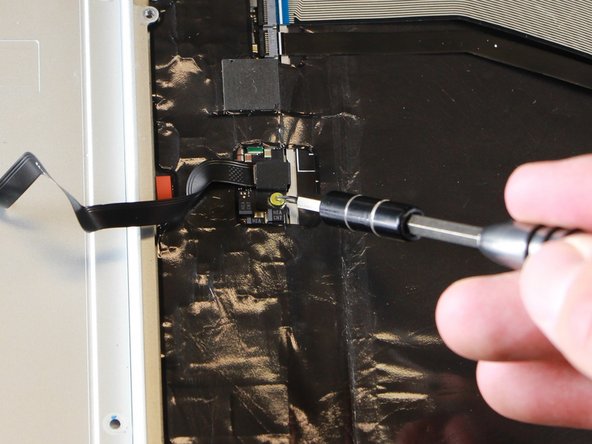
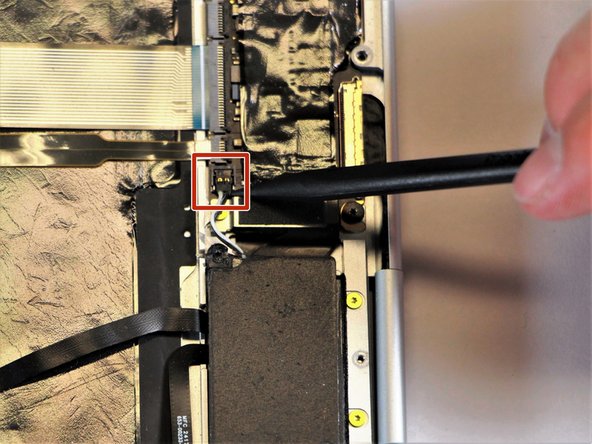
Disconnect the thin, black and white cord from the motherboard by using the spudger to snap the connector up and out of place.
-
-
-
Remove the thin, black component by pulling it up and out of the laptop with your fingers.
-
-
-
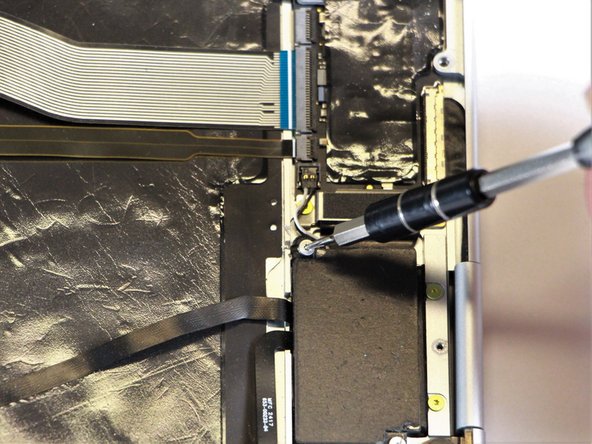
Remove the gold 2.0mm corner screw by turning it counterclockwise with a T3 Torx screwdriver.
-
-
-
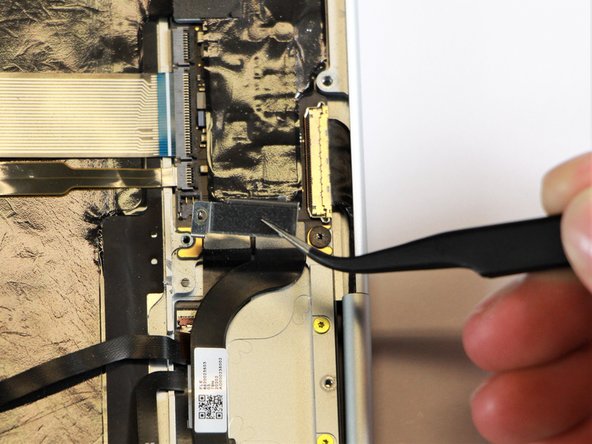
Using needle-nose tweezers, remove the silver casing by lifting it up and out of the computer.
-
-
-
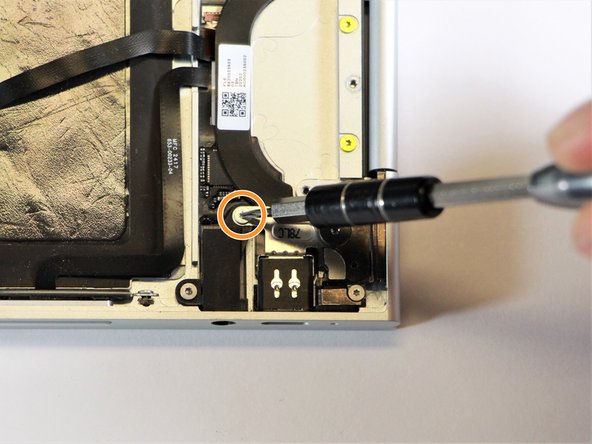
Remove the three 3.0mm black screws on the right side by using a T5 Torx screwdriver to turn the screws counterclockwise.
-
Remove the silver 2.0mm screw on the left side by using a T3 Torx screwdriver to turn the screw counterclockwise.
-
-
-
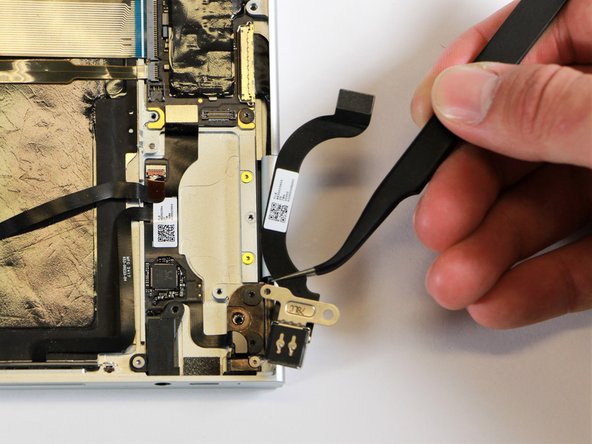
Disconnect the thin, black ribbon cable by using the spudger to lift it up from the computer.
-
-
-
Use the needle-nose tweezers to remove the charging port by lifting the component up and out of the Pixelbook.
-


To reassemble your device, follow these instructions in reverse order.
To reassemble your device, follow these instructions in reverse order.
Rückgängig: Ich habe diese Anleitung nicht absolviert.
Eine weitere Person hat diese Anleitung absolviert.
Team

Cal Poly, Team S18-G1, Livingston Winter 2018 Mitglied von Cal Poly, Team S18-G1, Livingston Winter 2018
CPSU-LIVINGSTON-W18S18G1
4 Mitglieder
8 Anleitungen geschrieben
3 Kommentare
Where to get replacemt charging port from please
Where can we get a replacement charging port for the Pixelbook Go 2 (i7)?
Hi Michael, did you manage to find the charging port and replace it for the Pixelbook Go?