Zum Hauptinhalt wechseln

Graco Secure Coverage Nursery Unit Power Jack Replacement

Was du brauchst

  1. Graco Secure Coverage  Nursery Unit Power Jack Replacement, Nursery Unit Battery: Schritt 1, Bild 1 von 3 Graco Secure Coverage  Nursery Unit Power Jack Replacement, Nursery Unit Battery: Schritt 1, Bild 2 von 3 Graco Secure Coverage  Nursery Unit Power Jack Replacement, Nursery Unit Battery: Schritt 1, Bild 3 von 3
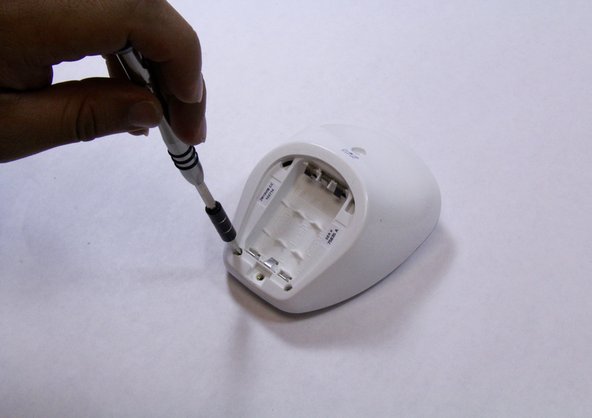
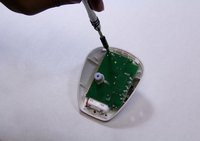
    • Remove the 9mm screw from the battery cover of the nursery unit using a Phillips #1 tip screwdriver.

  2. Graco Secure Coverage  Nursery Unit Power Jack Replacement: Schritt 2, Bild 1 von 2 Graco Secure Coverage  Nursery Unit Power Jack Replacement: Schritt 2, Bild 2 von 2
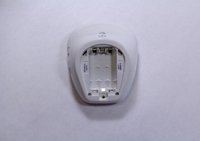
    • Using the plastic opening tool, pry and remove the battery cover carefully.

    • Remove the batteries using plastic opening tool.

    • Replace the batteries.

  3. Graco Secure Coverage  Nursery Unit Power Jack Replacement, Nursery Unit Power Jack: Schritt 3, Bild 1 von 2 Graco Secure Coverage  Nursery Unit Power Jack Replacement, Nursery Unit Power Jack: Schritt 3, Bild 2 von 2
    • Remove the two 9mm Phillips #1 screws from the rare case of the device.

    • Place the screws in a secure place.

  4. Graco Secure Coverage  Nursery Unit Power Jack Replacement: Schritt 4, Bild 1 von 1
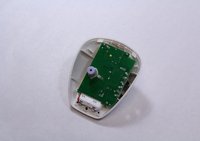
    • Hold the bottom of the device with one hand and pull down to separate the front and rare cases.

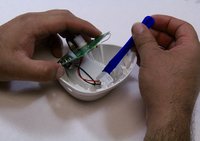
    • While holding the device with one hand, use plastic opening tool to pry the edges of the front case away from the back case.

    • Take your time and apply constant force carefully to avoid breaking any other plastic parts from the device.

  5. Graco Secure Coverage  Nursery Unit Power Jack Replacement: Schritt 5, Bild 1 von 2 Graco Secure Coverage  Nursery Unit Power Jack Replacement: Schritt 5, Bild 2 von 2
    • Remove all three 7mm Phillips #1 screws from the mother board.

    • Make sure you gently unscrew the screws with moderate force and light pressure to avoid any damages.

  6. Graco Secure Coverage  Nursery Unit Power Jack Replacement: Schritt 6, Bild 1 von 2 Graco Secure Coverage  Nursery Unit Power Jack Replacement: Schritt 6, Bild 2 von 2
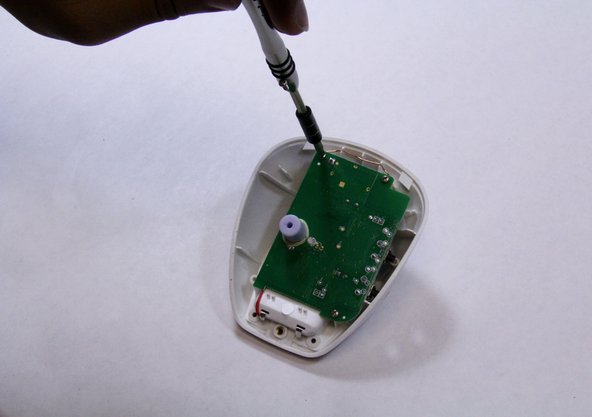
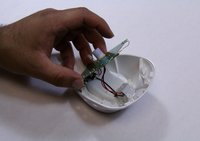
    • Pick up the mother board carefully.

    • Using plastic opening tool, gently pry the power jack plastic part and separate it away from the device case.

    • Apply constant force to avoid breaking the plastic part.

  7. Graco Secure Coverage  Nursery Unit Power Jack Replacement: Schritt 7, Bild 1 von 1
    • Solder off the wires from the mother board.

    • There are many pins attached to the mother board, make sure you solder off the proper pins that attached to the power jack wires.

    • Replace the power jack.

Abschluss

To reassemble your device, follow these instructions in reverse order.

Omar Abdullah

Mitglied seit: 09/06/15

201 Reputation

2 Anleitungen geschrieben

Team

USF Tampa, Team 6-5, Remmell Fall 2015 Mitglied von USF Tampa, Team 6-5, Remmell Fall 2015

USFT-REMMELL-F15S6G5

4 Mitglieder

8 Anleitungen geschrieben

0 Kommentare

Kommentar hinzufügen

Seitenaufrufe:

Letzte 24 Stunden: 0

Letzte 7 Tage: 0

Letzte 30 Tage: 4

Insgesamt: 129