Einleitung
If the HMDX Chill begins to show issues with its ability to charge and the issue is not related to the charging port or charging cable it may be time to change the battery. This guide will show how to disassemble the device in order to locate and find the battery along with showing all of the attachments from the battery to the motherboard in order to properly replace the battery.
Was du brauchst
-
-
Insert a metal spudger under the rubber base.
-
Pry the rubber base off.
-
-
-
Use a Phillips #1 screwdriver to remove four 9 mm screws from the base of the device.
-
-
-
-
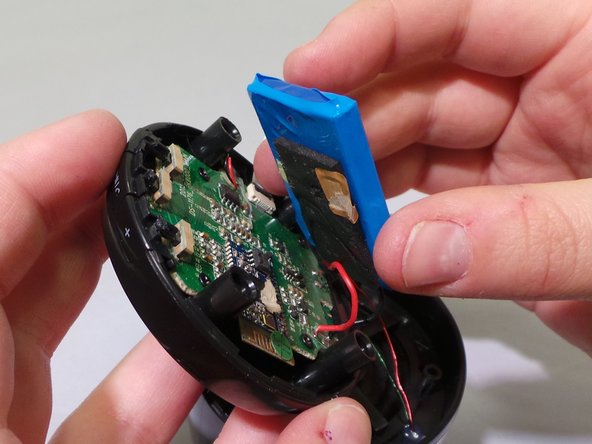
Once the base has been removed from the rest of the speaker locate the battery.
-
-
-
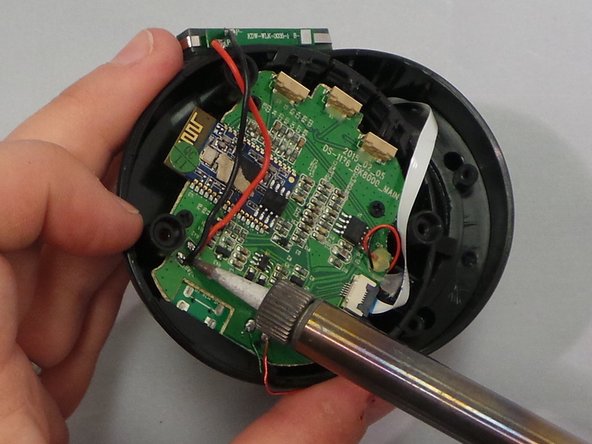
Locate the wires that attaches from the battery to the motherboard.
-
Using a soldering iron desolder the wires from the motherboard.
-


To reassemble your device, follow these instructions in reverse order.
To reassemble your device, follow these instructions in reverse order.
Rückgängig: Ich habe diese Anleitung nicht absolviert.
Eine weitere Person hat diese Anleitung absolviert.
Team

EWU-Giguere-S16S1G1 Mitglied von EWU-Giguere-S16S1G1
Community
4 Mitglieder
7 Anleitungen geschrieben