Zum Hauptinhalt wechseln

HP 15-BA078DX RAM Replacement

Was du brauchst

  1. HP 15-BA078DX RAM Replacement, Battery: Schritt 1, Bild 1 von 3 HP 15-BA078DX RAM Replacement, Battery: Schritt 1, Bild 2 von 3 HP 15-BA078DX RAM Replacement, Battery: Schritt 1, Bild 3 von 3
    • Unclip the two latches on the bottom of the laptop.

    • Slide the battery straight out while holding the clip open.

  2. HP 15-BA078DX RAM Replacement, Disc Drive: Schritt 2, Bild 1 von 1
    • Using the Phillips #0 screwdriver, remove the 7.5mm screw from the underside of the plastic frame that holds the disc tray in place.

  3. HP 15-BA078DX RAM Replacement: Schritt 3, Bild 1 von 3 HP 15-BA078DX RAM Replacement: Schritt 3, Bild 2 von 3 HP 15-BA078DX RAM Replacement: Schritt 3, Bild 3 von 3
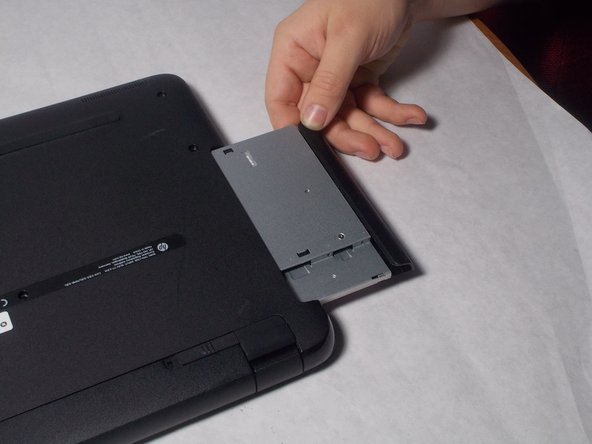
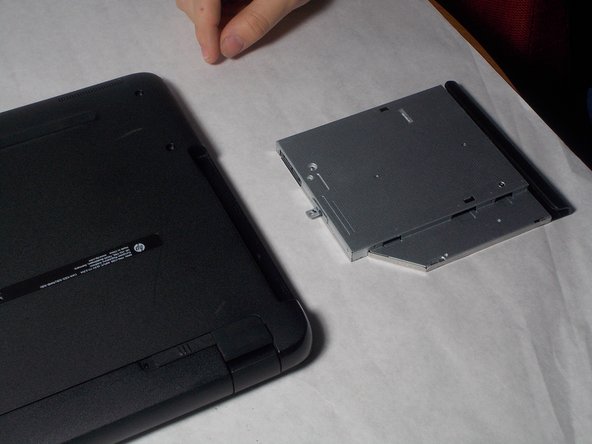
    • Remove the disk tray assembly by sliding it out from the side using the blue plastic opening tool.

  4. HP 15-BA078DX RAM Replacement, Back Panel: Schritt 4, Bild 1 von 1
    • Remove all of the remaining back panel screws with a #0 Phillips head screwdriver.

    • Remember to remove the two screws under the rubber feet.

  5. HP 15-BA078DX RAM Replacement: Schritt 5, Bild 1 von 3 HP 15-BA078DX RAM Replacement: Schritt 5, Bild 2 von 3 HP 15-BA078DX RAM Replacement: Schritt 5, Bild 3 von 3
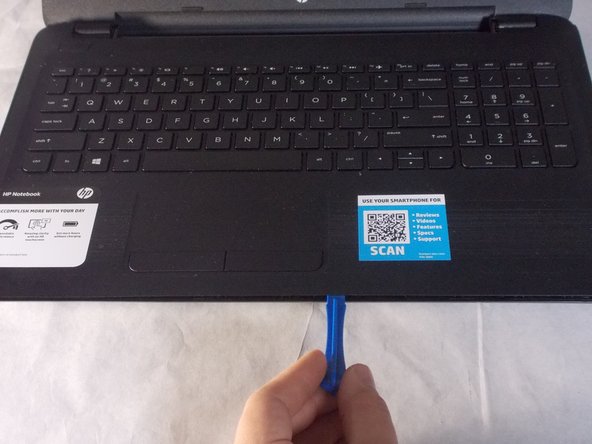
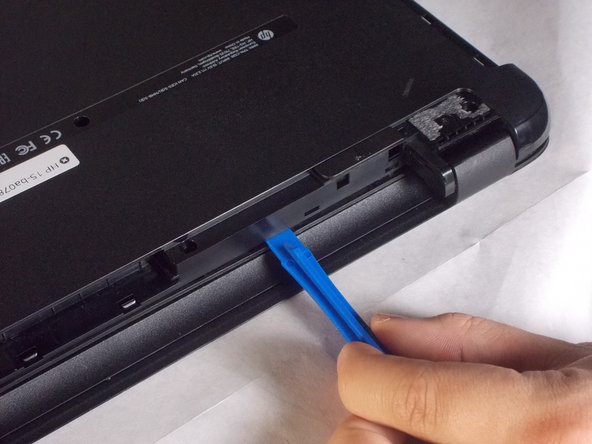
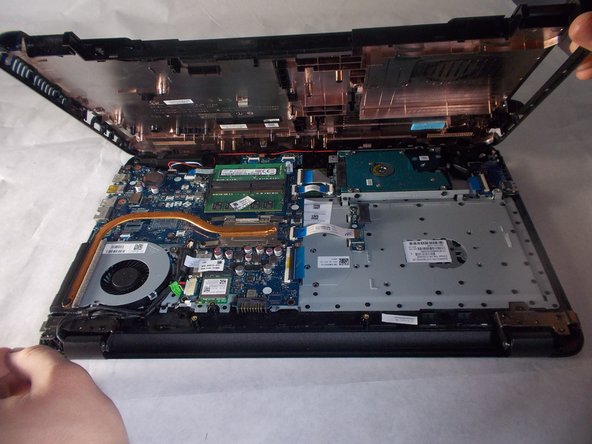
    • Carefully use the blue plastic opening tool to pry the clam shell of the laptop apart.

    • You may need to flip the laptop over to unlatch all of the internal clips.

  6. HP 15-BA078DX RAM Replacement: Schritt 6, Bild 1 von 3 HP 15-BA078DX RAM Replacement: Schritt 6, Bild 2 von 3 HP 15-BA078DX RAM Replacement: Schritt 6, Bild 3 von 3
    • Carefully pull the shell of the computer apart.

  7. HP 15-BA078DX RAM Replacement, RAM: Schritt 7, Bild 1 von 2 HP 15-BA078DX RAM Replacement, RAM: Schritt 7, Bild 2 von 2
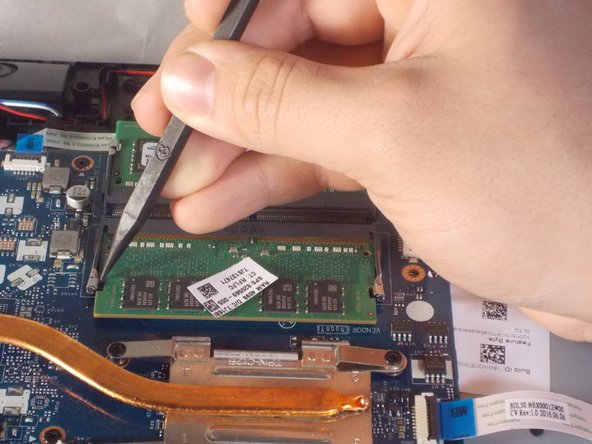
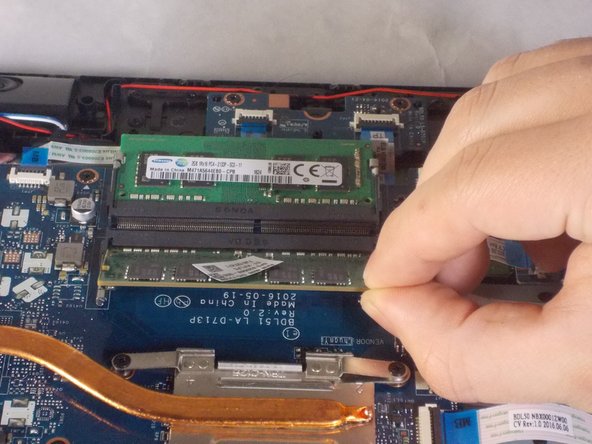
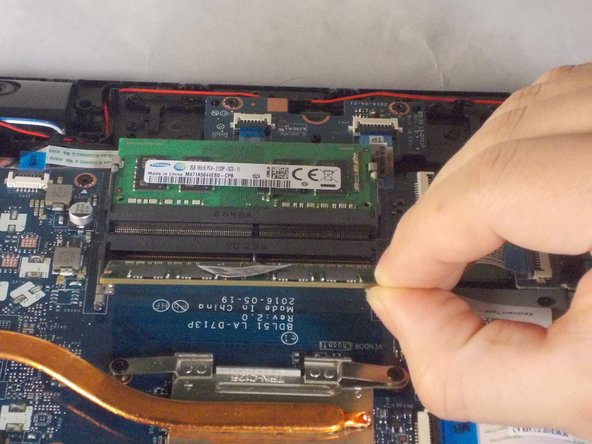
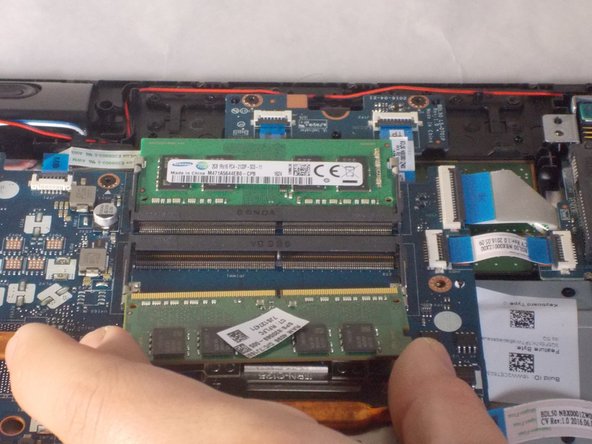
    • Using a plastic spudger, unclip the latch locking the RAM to the motherboard.

  8. HP 15-BA078DX RAM Replacement: Schritt 8, Bild 1 von 3 HP 15-BA078DX RAM Replacement: Schritt 8, Bild 2 von 3 HP 15-BA078DX RAM Replacement: Schritt 8, Bild 3 von 3
    • Gently tilt the RAM sticks up and slide out each stick.

Abschluss

To reassemble your device, follow these instructions in reverse order.

Ein:e weitere:r Nutzer:in hat diese Anleitung absolviert.

Team

UMass Dartmouth, Team S3-G4, Peak Spring 2018 Mitglied von UMass Dartmouth, Team S3-G4, Peak Spring 2018

UMASSD-PEAK-S18S3G4

3 Mitglieder

6 Anleitungen geschrieben

0 Kommentare

Kommentar hinzufügen

Seitenaufrufe:

Letzte 24 Stunden: 0

Letzte 7 Tage: 0

Letzte 30 Tage: 1

Insgesamt: 527