Diese Anleitung enthält neuere Änderungen. Wechsel zur neuesten unüberprüften Version.
Einleitung
These are the required steps for disassembly in order to access internal components that may need replacement.
Was du brauchst
-
-
Eject the battery from the computer by sliding the two clips on the bottom of the computer toward the center of the computer.
-
Slide the battery out as shown in the picture.
-
-
-
Using a Phillips #1 screwdriver, remove the small screw next to the disc engraving shown in the picture.
-
-
-
-
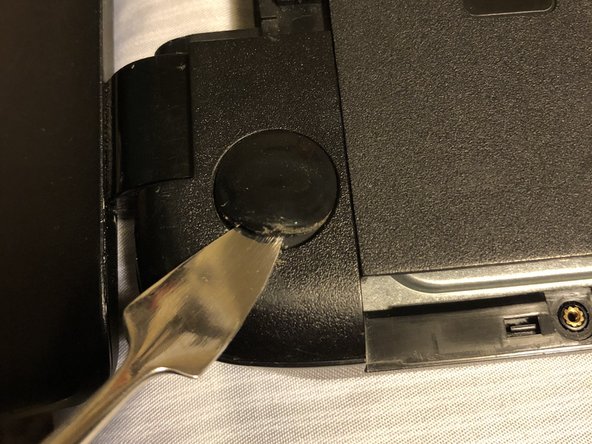
Locate the two corner grips on the hinge side of the computer.
-
Using a metal spudger, remove the two corner grips to reveal the screws.
-
-
-
Remove the 11 small screws on the bottom of the computer that are shown in the picture.
-
-
-
Using a spudger, pry around the edges of the keyboard until all clips are disengaged and the keyboard is loose from the computer.
-
To disconnect the ribbon connector, flip up the black clip shown in the picture.
-
Gently pull the ribbon until disconnected.
-
-
-
Disconnect the other two ribbon connectors underneath the keyboard by fliping up the black clips.
-
Remove the 4 small screws shown in the picture.
-
-
-
Disengage the face plate clips by prying the case away from around the outer edge of the face plate with a metal wedge.
-
The face plate can then be lifted away from the computer.
-


To reassemble your device, follow these instructions in reverse order.
To reassemble your device, follow these instructions in reverse order.
Rückgängig: Ich habe diese Anleitung nicht absolviert.
10 weitere Nutzer:innen haben diese Anleitung absolviert.
Team

Washington State, Team S2-G3, Lobnitz Spring 2018 Mitglied von Washington State, Team S2-G3, Lobnitz Spring 2018
WSU-LOBNITZ-S18S2G3
8 Mitglieder
7 Anleitungen geschrieben