Einleitung
If the laptop does not boot correctly after running the "Startup Repair" from the Windows 10 DVD, use this guide to remove and replace your SSD. You will need a plastic opening tool and a Phillips #1 screwdriver head.
Was du brauchst
-
-
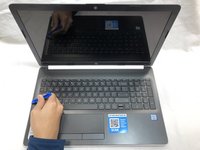
Turn your laptop over so that the Laptop Identification Tag on the underside of the laptop faces the ceiling.
-
-
-
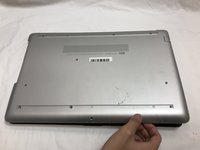
Using the plastic opening tools, peel back the plastic feet from the underside of the laptop.
-
-
-
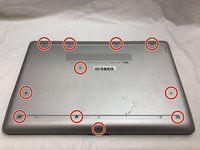
Using a Phillips #1 screwdriver, remove the eleven 9.0 mm screws holding the back cover in place.
-
-
-
-
Flip the computer over and open the screen.
-
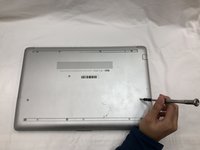
Start from a corner and run the plastic opening tools along the edge of the back cover.
-
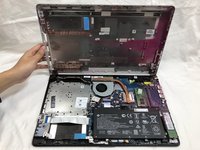
After the cover has been completely loosened around the entire perimeter, close the screen and flip the computer over.
-
Gently pry back the cover starting from the middle, bottom edge.
-
-
-
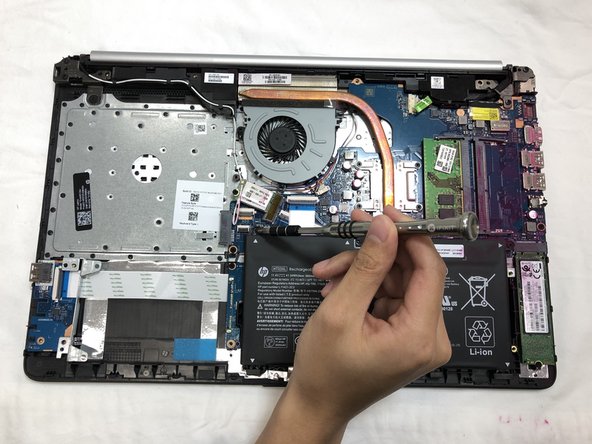
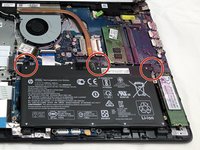
Using the Phillips #1 screwdriver, remove the three 8.0 mm screws holding the battery in place.
-
-
-
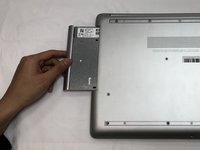
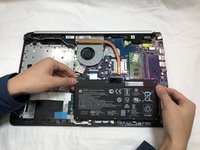
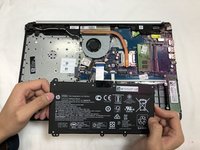
Remove the battery by tilting the top of the battery towards you and pulling the battery away from the mounting tabs.
-
-
-
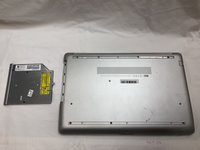
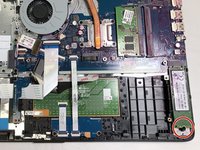
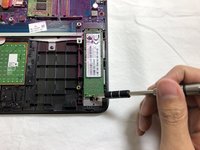
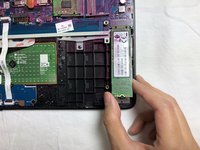
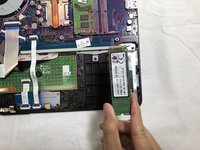
Using the Phillips #1 screwdriver, remove the single 3.0 mm screw holding the SSD module in place.
-


To reassemble your device, follow these instructions in reverse order.
To reassemble your device, follow these instructions in reverse order.
Rückgängig: Ich habe diese Anleitung nicht absolviert.
6 weitere Personen haben diese Anleitung absolviert.
Team

UC Davis, Team S20-G4, Lore Winter 2019 Mitglied von UC Davis, Team S20-G4, Lore Winter 2019
UCD-LORE-W19S20G4
3 Mitglieder
7 Anleitungen geschrieben
1Leitfaden Kommentar
Nice explanation about how to disassemble of hp laptop and assembly of SSD again in this video. Thanks this help me a lot. If you need assistance in Delhi ncr. Kindly call us