Zum Hauptinhalt wechseln

HP Chromebook 14-Q070NR Display Replacement

Was du brauchst

  1. HP Chromebook 14-Q070NR Display Replacement, Keyboard: Schritt 1, Bild 1 von 1
    • At this point, the white caps that hide the top-most screws marked with red circles have been removed.

    • Using the Phillips #1 screwdriver, remove the (10) ten screws from the bottom of the device.

    • After removing the white caps covering the screws, use the Phillips #1 screwdriver to remove the (3) three screws indicated with red circles.

  2. HP Chromebook 14-Q070NR Display Replacement: Schritt 2, Bild 1 von 3 HP Chromebook 14-Q070NR Display Replacement: Schritt 2, Bild 2 von 3 HP Chromebook 14-Q070NR Display Replacement: Schritt 2, Bild 3 von 3
    • Open the laptop and place it upright. Remove the keyboard from the device using a plastic spudger or opening tool.

    • Carefully remove as there are ribbons attached to the keyboard that is connected to the components inside.

    • Gently lift the keyboard just enough to expose the ribbons.

  3. HP Chromebook 14-Q070NR Display Replacement: Schritt 3, Bild 1 von 3 HP Chromebook 14-Q070NR Display Replacement: Schritt 3, Bild 2 von 3 HP Chromebook 14-Q070NR Display Replacement: Schritt 3, Bild 3 von 3
    • Hold the keyboard up to remove the ribbons from the circuit board.

    • To remove each individual ribbon, grab the blue portion of each ribbon and pull it towards your direction until it is fully detached.

  4. HP Chromebook 14-Q070NR Display Replacement: Schritt 4, Bild 1 von 3 HP Chromebook 14-Q070NR Display Replacement: Schritt 4, Bild 2 von 3 HP Chromebook 14-Q070NR Display Replacement: Schritt 4, Bild 3 von 3
    • Once the ribbons are detached, remove the keyboard from the device.

  5. HP Chromebook 14-Q070NR Display Replacement, Display: Schritt 5, Bild 1 von 1
    • Unplug the cable located in the upper left corner of the device.

  6. HP Chromebook 14-Q070NR Display Replacement: Schritt 6, Bild 1 von 1
    • Remove these tabs located at each of the bottom corners of the display.

    • It is not necessary for the display to be completely removed from the device in order to complete this guide.

    • Using the Phillips #1 screwdriver, remove the single screw located under each of the two tabs.

  7. HP Chromebook 14-Q070NR Display Replacement: Schritt 7, Bild 1 von 1
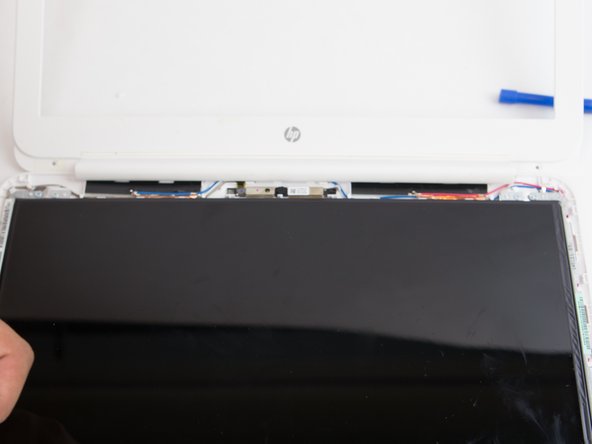
    • Insert the plastic opening tool and work it around the entire frame of the display.

  8. HP Chromebook 14-Q070NR Display Replacement: Schritt 8, Bild 1 von 2 HP Chromebook 14-Q070NR Display Replacement: Schritt 8, Bild 2 von 2
    • As you work the plastic opening tool around the edge, remove the front frame of the device.

  9. HP Chromebook 14-Q070NR Display Replacement: Schritt 9, Bild 1 von 3 HP Chromebook 14-Q070NR Display Replacement: Schritt 9, Bild 2 von 3 HP Chromebook 14-Q070NR Display Replacement: Schritt 9, Bild 3 von 3
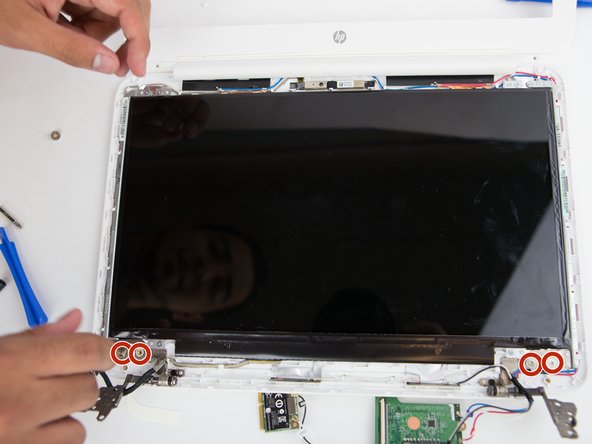
    • Using the Phillips #1 screwdriver, remove the (4) four screws located at the bottom of the display.

    • Once the screws are removed, lift the display out of the device.

Abschluss

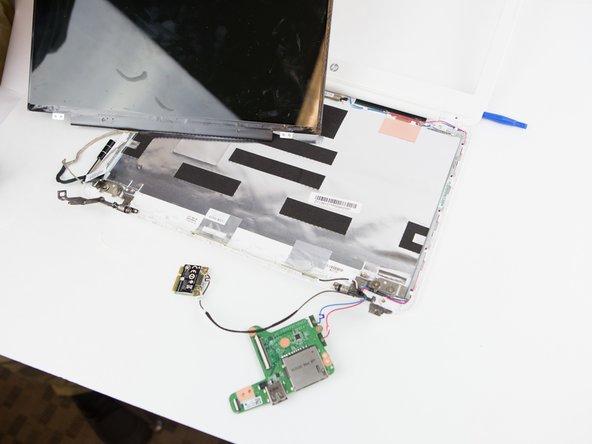
To reassemble your device, follow these instructions in reverse order.

Team

USF Tampa, Team S9-G5, Remmell Fall 2017 Mitglied von USF Tampa, Team S9-G5, Remmell Fall 2017

USFT-REMMELL-F17S9G5

5 Mitglieder

5 Anleitungen geschrieben

Ein Kommentar

This was very helpful, I broke the screen to my chromebook whilst shutting the lid and the screen cracked. I didn’t want to spend the money on a new screen so I decided to take the whole top half off the chomebook and basically make a chromebox.

quardpd - Antwort

Kommentar hinzufügen

Seitenaufrufe:

Letzte 24 Stunden: 0

Letzte 7 Tage: 0

Letzte 30 Tage: 4

Insgesamt: 265