Einleitung
The HP Chromebook 14-ak013dx has a removable battery located beneath the keyboard. This battery is easily removable to allow replacement of the battery after degradation. A new battery can restore the original battery life of the device.
Was du brauchst
-
-
Turn the Chromebook upside down, as shown in the first image.
-
Remove the five rubber feet pieces as shown using a metal spudger.
-
-
-
Begin removal of the back panel by unscrewing all exposed screws using a small Phillips screwdriver.
-
Use a plastic prying tool to split the back panel from the keyboard.
-
Move the prying tool around the sides of the back panel to detach it. Do not fully remove the panel, taking note of the two ribbon cables.
-
-
-
-
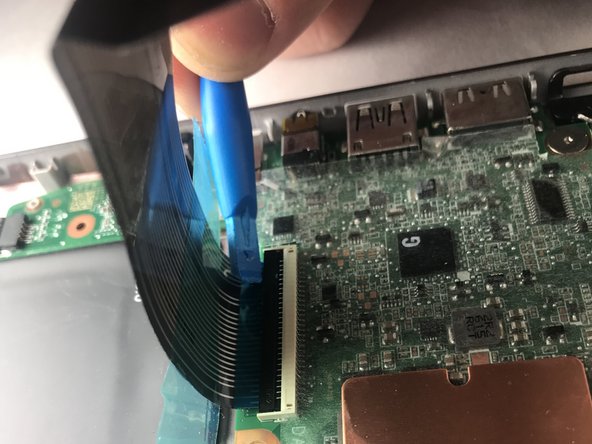
Remove both ribbon cables attaching the separated keyboard to the motherboard.
-
The large black ribbon cable was a tab that should be pried open to loosen the ribbon from its hub. Use the plastic opening tool as shown.
-
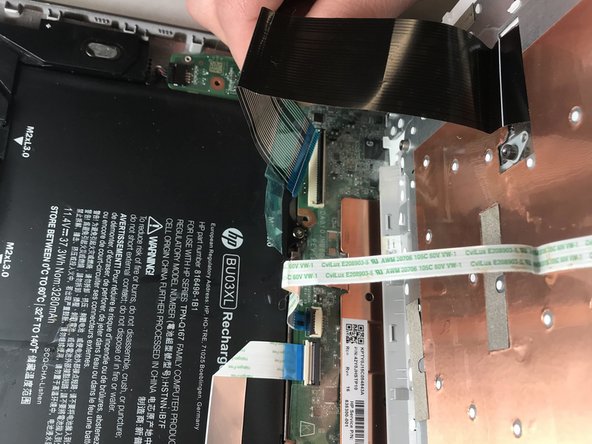
Gently pull out the short white ribbon cable out of its hub.
-
-
-
Peel up the adhered ribbon cable. This cable does not need to be detached from the motherboard.
-
Use a plastic opening tool to disconnect the battery before going any further by inserting the tool between the plug and the hub where the recesses are on either side of the plug.
-
-
-
Unscrew the four M2xL3 screws , shown in the picture, using a Phillips screwdriver.
-
Carefully lift the battery out of its place, avoiding the previously adhered silver ribbon cable in the process.
-


To reassemble your device, follow these instructions in reverse order.
To reassemble your device, follow these instructions in reverse order.
Team

IUPUI, Team S3-G5, Harley Fall 2018 Mitglied von IUPUI, Team S3-G5, Harley Fall 2018
IUPUI-HARLEY-F18S3G5
3 Mitglieder
2 Anleitungen geschrieben