Einleitung
Nowadays, laptop screens can be easily damaged. The HP Chromebook 14-ca061dx screen could be physically damaged, with broken glass, or black splotches on the display, or could be defective, without any signs of physical damage. A defective screen could display resolution lines, distorted coloring, or nothing at all. If you know these problems are caused by a broken, or defective a screen, you may just need a replacement. Follow this guide to help with your screen/display replacement.
Was du brauchst
-
-
Flip the Chromebook so that the underside is facing upwards.
-
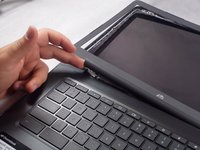
Follow along the edge with the iFixit opening tool to unhinge the display frame.
-
-
-
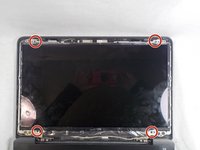
Use the iFixit opening tool to pry open the bezel. Start from the bottom of the screen and work your way around the sides.
-
-
-
-
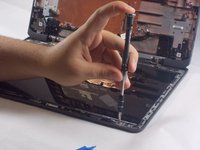
Use spudger or the iFixit opening tool to remove the bezel.
-
Pull bezel from the bottom, once all clips are detached.
-
Remove bezel.
-
-
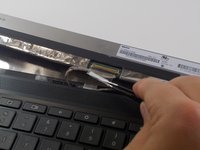
In diesem Schritt verwendetes Werkzeug:Tweezers$4.99
-
Use tweezers to pull the tape back and remove the connector attached to the back of the LCD panel.
-


To reassemble your device, follow these instructions in reverse order.
To reassemble your device, follow these instructions in reverse order.
Rückgängig: Ich habe diese Anleitung nicht absolviert.
Eine weitere Person hat diese Anleitung absolviert.
Team

UMass Dartmouth, Team S2-G5, Barthe Fall 2019 Mitglied von UMass Dartmouth, Team S2-G5, Barthe Fall 2019
UMASSD-BARTHE-F19S2G5
3 Mitglieder
6 Anleitungen geschrieben