Was du brauchst
-
-
Orient the monitor screen down on a table. Be careful the work surface is not going to damage the screen when laying flat.
-
Remove the 4 12 mm screws from the base using a PH2 bit and driver.
-
Make sure to hold the screen at the bezel when the last stand screw is removed, gently lay the monitor flush with the table after the stand is removed.
-
-
-
With the monitor laying flush against a table remove the 12mm 1cm head screws using a PH1 bit.
-
-
-
Find the rectangular indentations in the front bezel. They are located to the right and left of the HP logo below the bezel.
-
Using the plastic spudger insert it into the indentations and twist left and right like a screwdriver.
-
-
-
Place the monitor screen down with the front bezel removed.
-
With the monitor laying flat lift up from where the stand originally was.
-
-
-
-
Peel back tape carefully, from all sides but not the top and where tape covers cables.
-
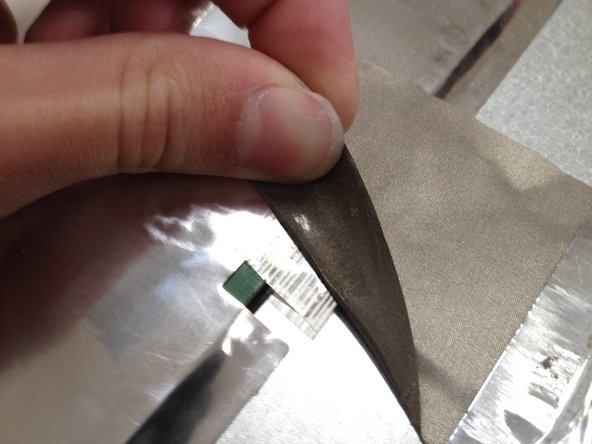
Peel back aluminum tape carefully because it protects ribbon cable.
-
-
-
Peel back tape from all visible cables.
-
Remove the interface cable from the buttons by pulling away from you with the monitor power port facing you.
-
Remove the back light power cable by pulling up
-
-
-
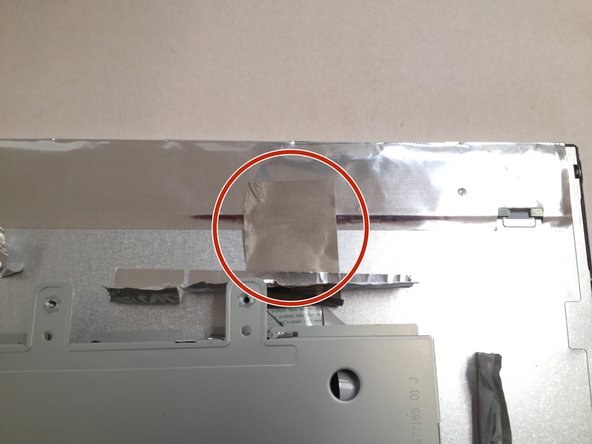
Locate the metal-cloth tape at the top of the monitor and slowly peel it back just enough to remove the ribbon cable connector.
-
-
-
With all tape and cables disconnected flip the case over to reveal the backs of the power supply and control boards.
-
Remove the 3 10mm screws with a PH1 bit and driver.
-
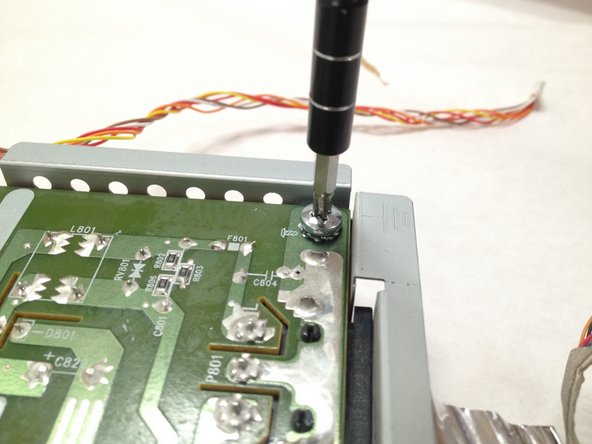
Remove the large grounding screw in the bottom left corner with a PH1 bit and driver.
-
-
-
Flip the power supply board over so the components are visible.
-
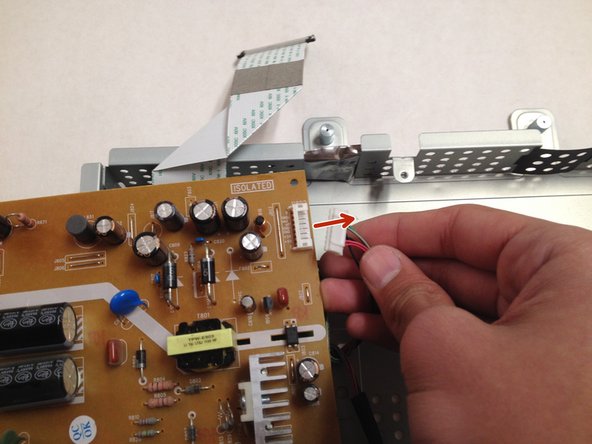
Remove the cable connecting to the logic board and lift the power supply board away.
-


To reassemble your device, follow these instructions in reverse order.
To reassemble your device, follow these instructions in reverse order.
Rückgängig: Ich habe diese Anleitung nicht absolviert.
3 weitere Nutzer:innen haben diese Anleitung absolviert.

Team

Central Coast New Tech High, Team 5-1, Rushing Spring 2017 Mitglied von Central Coast New Tech High, Team 5-1, Rushing Spring 2017
CCNTH-RUSHING-S17S5G1
2 Mitglieder
1 Anleitung geschrieben