Diese Version enthält möglicherweise inkorrekte Änderungen. Wechsle zur letzten geprüften Version.
Was du brauchst
-
Dieser Schritt ist noch nicht übersetzt. Hilf mit, ihn zu übersetzen!
-
Press your thumb down on the center of the button plate located on the left side of the printer.
-
Hook your fingers underneath the front edge of the button plate and pull upwards making sure to keep pressure on the middle of the plate with your thumb.
-
-
Dieser Schritt ist noch nicht übersetzt. Hilf mit, ihn zu übersetzen!
-
Once the front of the plate is loose, lift it up a few inches making sure to hold the back (paper feeding side) of the plate down.
-
Slide the plate towards the back of the printer and then lift up on the back of the plate.
-
The plate should now be disconnected from the tabs on the printer.
-
-
Dieser Schritt ist noch nicht übersetzt. Hilf mit, ihn zu übersetzen!
-
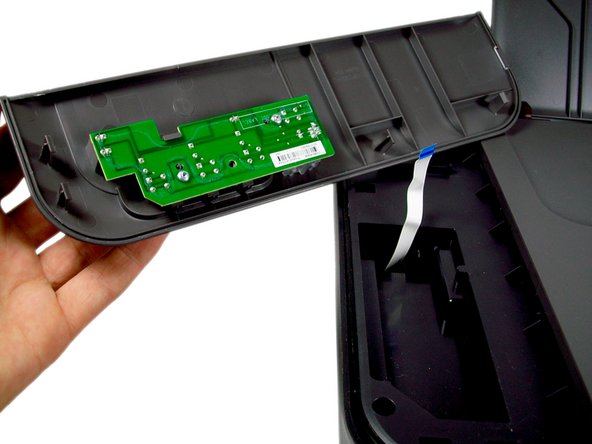
Turn the plate over to reveal the white strip of connecting tape that connects the plate to the printer.
-
Find where the tape is connected to the green button circuit board (Location circled in red)
-
Place two fingers on the tape right where it connects to the plate and gently pull the tape out of the circuit board.
-
-
-
Dieser Schritt ist noch nicht übersetzt. Hilf mit, ihn zu übersetzen!
-
Place the plate down on a flat surface with the button circuit board facing up.
-
Remove the three(3) T-10 Torx Screws from the circuit board.
-
-
Dieser Schritt ist noch nicht übersetzt. Hilf mit, ihn zu übersetzen!
-
Lift the button circuit board up and off of the button plate
-
-
Dieser Schritt ist noch nicht übersetzt. Hilf mit, ihn zu übersetzen!
-
After Removing the circuit board you will be able to see the backside of the set of function buttons.
-
Lightly push each of the six tabs away from the clips holding them in.
-
Once all of the tabs are loose from their clips, push the set of buttons down and out of the button plate.
-
-
Dieser Schritt ist noch nicht übersetzt. Hilf mit, ihn zu übersetzen!
-
The power button is not clipped in and should easily slide off of the plate once the button circuit board is removed.
-


Rückgängig: Ich habe diese Anleitung nicht absolviert.
Ein:e weitere:r Nutzer:in hat diese Anleitung absolviert.
Team

Cal Poly, Team 9-18, Amido Fall 2012 Mitglied von Cal Poly, Team 9-18, Amido Fall 2012
CPSU-AMIDO-F12S9G18
4 Mitglieder
10 Anleitungen geschrieben