Diese Version enthält möglicherweise inkorrekte Änderungen. Wechsle zur letzten geprüften Version.
Was du brauchst
-
Dieser Schritt ist noch nicht übersetzt. Hilf mit, ihn zu übersetzen!
-
Turn on the printer by pressing the power button.
-
-
Dieser Schritt ist noch nicht übersetzt. Hilf mit, ihn zu übersetzen!
-
Place your index finger in the opening on the front of the printer (right side below scanner/copier) and pull the door down.
-
Pull down on the tab that lies in the middle of the newly-exposed gray cover.
-
-
Dieser Schritt ist noch nicht übersetzt. Hilf mit, ihn zu übersetzen!
-
Grab the cartridge from the top and bottom and pull down until it clicks.
-
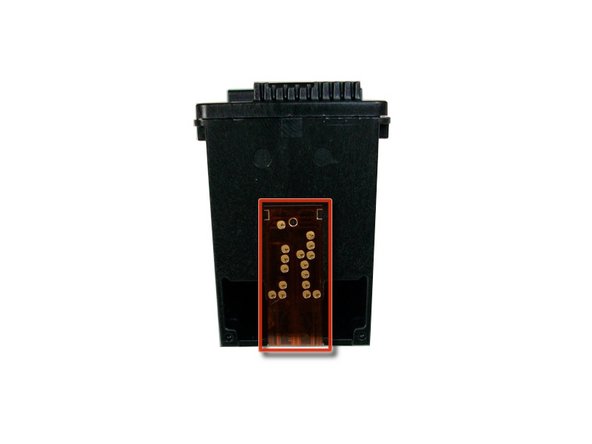
Pull out the freed cartridge.
-
-
-
Dieser Schritt ist noch nicht übersetzt. Hilf mit, ihn zu übersetzen!
-
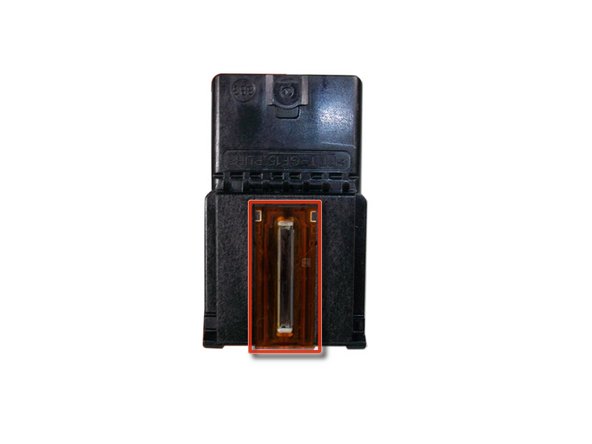
Take the replacement cartridge out of its packaging and pull off the plastic tab.
-
-
Dieser Schritt ist noch nicht übersetzt. Hilf mit, ihn zu übersetzen!
-
Slide the cartridge directly into open slot (tri-color on the left, black on the right).
-
Push it forward until you hear it snap.
-
-
Dieser Schritt ist noch nicht übersetzt. Hilf mit, ihn zu übersetzen!
-
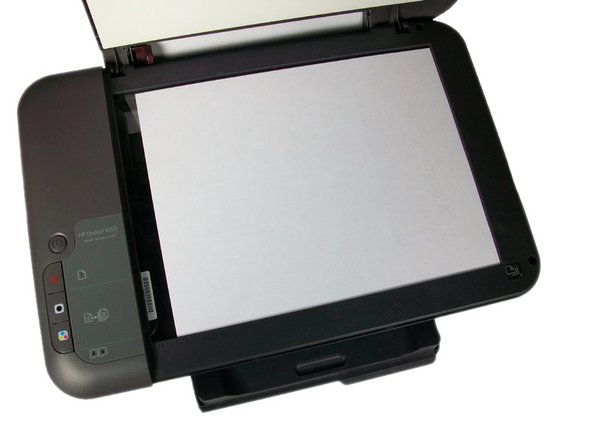
Open up the scanner lid and place the alignment page face-down in the right-front corner of the glass.
-
Close the lid.
-
-
Dieser Schritt ist noch nicht übersetzt. Hilf mit, ihn zu übersetzen!
-
Press the color copy button to begin scan.
-


Rückgängig: Ich habe diese Anleitung nicht absolviert.
4 weitere Nutzer:innen haben diese Anleitung absolviert.
Team

Cal Poly, Team 9-18, Amido Fall 2012 Mitglied von Cal Poly, Team 9-18, Amido Fall 2012
CPSU-AMIDO-F12S9G18
4 Mitglieder
10 Anleitungen geschrieben