Einleitung
If you are having difficulties scanning or your scanner glass is broken, use this replacement guide to resolve the issue. The scanner glass is used to scan or copy pages.
Was du brauchst
-
-
Unplug all cords from the printer, and remove all the paper from the tray.
-
-
-
Remove the four screws securing the scanner bed module to the printer body with a Torx T5 screwdriver.
-
-
-
-
Lift up the scanner bed module and remove the two ribbon cables by pulling them straight out.
-
Set the printer body aside.
-
-
-
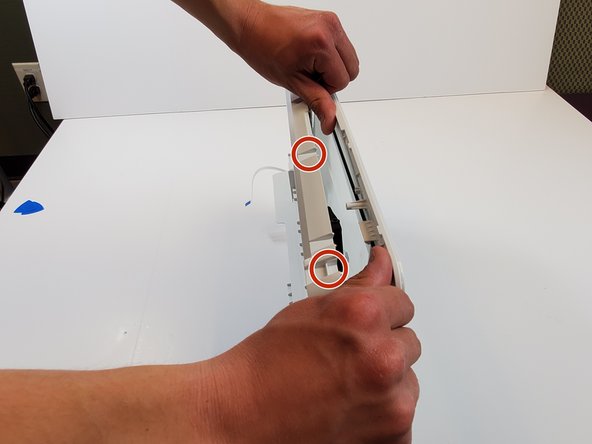
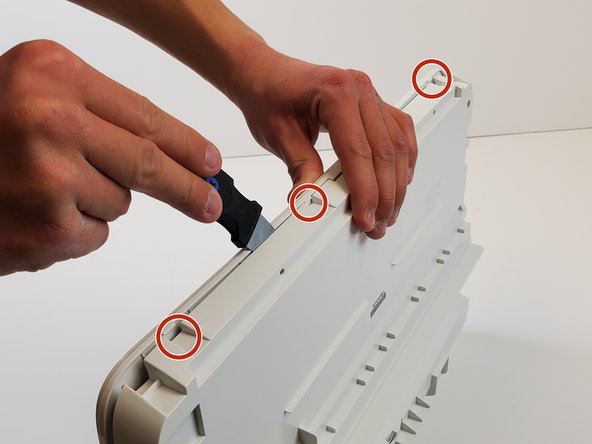
Separate the plastic halves of the scanner bed by gently pulling the tabs on the clips holding the halves together.
-
-
-
Remove the glass pane from the plastic shell by prying the tabs back that secure the glass, as well as peeling the adhesive apart slowly.
-


To reassemble your device, follow these instructions in reverse order.
To reassemble your device, follow these instructions in reverse order.
Rückgängig: Ich habe diese Anleitung nicht absolviert.
Ein:e weitere:r Nutzer:in hat diese Anleitung absolviert.

Team

Embry-Riddle Aeronautical University, Team S6-G12, Rauch Spring 2020 Mitglied von Embry-Riddle Aeronautical University, Team S6-G12, Rauch Spring 2020
ERAU-RAUCH-S20S6G12
4 Mitglieder
10 Anleitungen geschrieben