Diese Version enthält möglicherweise inkorrekte Änderungen. Wechsle zur letzten geprüften Version.
Was du brauchst
-
Dieser Schritt ist noch nicht übersetzt. Hilf mit, ihn zu übersetzen!
-
Carefully pry off the button board cover with a flat-head screwdriver.
-
Unplug and remove the button board.
-
Remove two screws that hold the printer's top piece in place with a TR8 Torx Security screwdriver.
-
-
Dieser Schritt ist noch nicht übersetzt. Hilf mit, ihn zu übersetzen!
-
Remove the printer's lid.
-
Push in the tab shown to remove the top plastic assembly of the printer.
-
-
Dieser Schritt ist noch nicht übersetzt. Hilf mit, ihn zu übersetzen!
-
Remove the paper jam door from the printer by turning the dial from the locked position to the unlocked position.
-
-
-
Dieser Schritt ist noch nicht übersetzt. Hilf mit, ihn zu übersetzen!
-
Push and lift the tabs shown with a flat-head screwdriver.
-
-
Dieser Schritt ist noch nicht übersetzt. Hilf mit, ihn zu übersetzen!
-
Remove the top casing from the printer.
-
Unclip and pry off the side cover with a TR8 Torx Security Screwdriver.
-
Pry off the plastic casing with force; the TR8 Torx Security Screwdriver can help here.
-
-
Dieser Schritt ist noch nicht übersetzt. Hilf mit, ihn zu übersetzen!
-
Remove the plastic piece covering the motor that controls the waste ink assembly.
-
Disconnect the motor connection.
-
-
Dieser Schritt ist noch nicht übersetzt. Hilf mit, ihn zu übersetzen!
-
With the motor unplugged, move the ink cartridge carrier to the middle of the printer.
-
Remove four screws from the back panel.
-
-
Dieser Schritt ist noch nicht übersetzt. Hilf mit, ihn zu übersetzen!
-
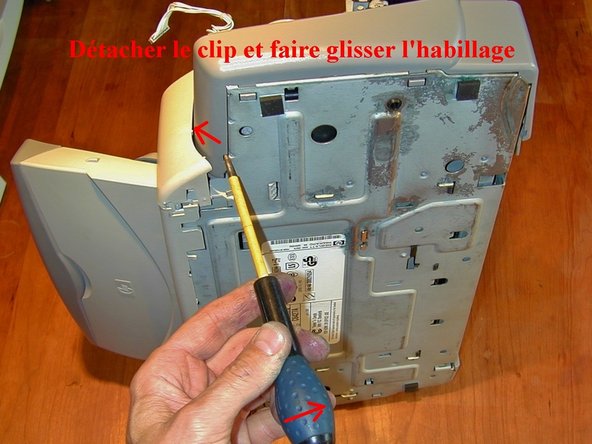
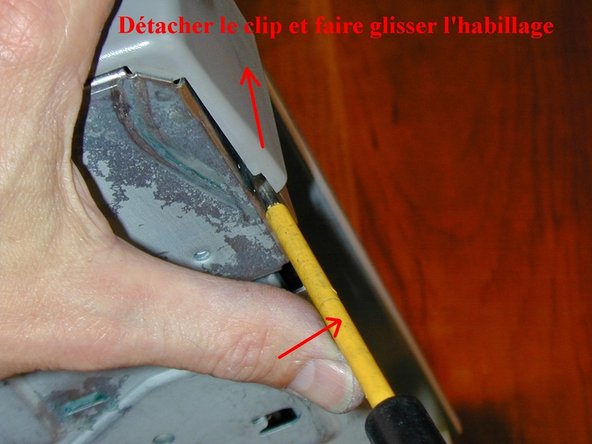
Press the clip marked in red.
-
Slide it to the right.
-
Lift and remove this side.
-
-
Dieser Schritt ist noch nicht übersetzt. Hilf mit, ihn zu übersetzen!
-
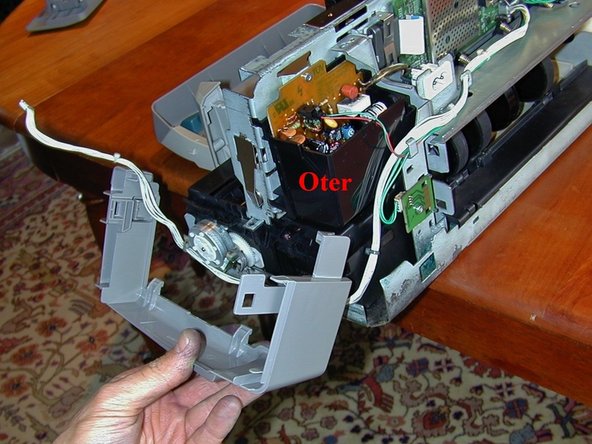
Press where marked with the arrow and lift the waste ink reservoir.
-
Remove the motor and clean with high-pressured water.
-


Rückgängig: Ich habe diese Anleitung nicht absolviert.
14 weitere Nutzer:innen haben diese Anleitung absolviert.
9 Kommentare
Thanks so much, I was able to fix my bad paper feed jam on my Deskjet 952C using your disassembly instructions. Apparently you can take apart the 930C 932C 950C and 952C using similar methods.
I have no idea. I don’t have a HP deskjet 9300 printer.
Many thanks for your instruction, Bernard. I was able to clean my DeskJet 970 cxi, because the waste ink leaked off the reservoir, as I transported the printer upside down :-( I’ve only got two additions, that I commented within the steps.