Diese Version enthält möglicherweise inkorrekte Änderungen. Wechsle zur letzten geprüften Version.
Was du brauchst
-
Dieser Schritt ist noch nicht übersetzt. Hilf mit, ihn zu übersetzen!
-
Open the front access panel by placing your finger in the front slot and pulling gently.
-
-
Dieser Schritt ist noch nicht übersetzt. Hilf mit, ihn zu übersetzen!
-
Open the protective lid that is covering the glass. Press gently against the base of the panel to remove the lid from the rest of the printer.
-
-
Dieser Schritt ist noch nicht übersetzt. Hilf mit, ihn zu übersetzen!
-
Remove the four 9mm T10 Torx screws on the top.
-
-
-
Dieser Schritt ist noch nicht übersetzt. Hilf mit, ihn zu übersetzen!
-
Carefully lift the top panel off of the printer.
-
Do not tear or damage the two cables that connect the top lid to the motherboard.
-
-
Dieser Schritt ist noch nicht übersetzt. Hilf mit, ihn zu übersetzen!
-
Remove the two cables by gripping each one close to their connection ports on the motherboard and gently disconnecting them.
-
-
Dieser Schritt ist noch nicht übersetzt. Hilf mit, ihn zu übersetzen!
-
The mother board is located at the back of the printer.
-
-
Dieser Schritt ist noch nicht übersetzt. Hilf mit, ihn zu übersetzen!
-
Remove all of the wires connected to the mother board. There are seven in total.
-
-
Dieser Schritt ist noch nicht übersetzt. Hilf mit, ihn zu übersetzen!
-
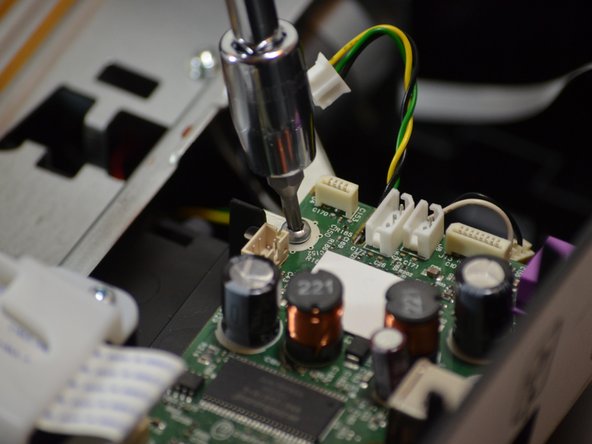
Remove the three 9mm T10 Torx screws that hold the motherboard to the body of the printer
-
-
Dieser Schritt ist noch nicht übersetzt. Hilf mit, ihn zu übersetzen!
-
At this point, the mother board should be free of all connections from the rest of the printer.
-
Remove and replace the mother board with the new one.
-


Rückgängig: Ich habe diese Anleitung nicht absolviert.
7 weitere Nutzer:innen haben diese Anleitung absolviert.
Team

Cal Poly, Team 18-35, Regan Winter 2013 Mitglied von Cal Poly, Team 18-35, Regan Winter 2013
CPSU-REGAN-W13S18G35
5 Mitglieder
15 Anleitungen geschrieben
3 Kommentare
ok so ineed to replace the Motherboard -- where do I get this board and what is the cost?
ou est localiser le sensor encoder module cb781-8006 merci
ou est installer le sensor encoder CB781-8006 Merci