Einleitung
This guide will show you how to remove the screen from the HP Elite X2 1013 G3. The screen is used as the display for the images for the tablet and can either be broken from being cracked from falling on a surface or being hit by another object because it is a fragile component of the tablet.
Was du brauchst
-
-
Flip the device over so the base is facing the ceiling.
-
Lift up the tablet stand.
-
Remove the four 2 mm screws from the tablet using a T5 Torx screwdriver.
-
-
-
Flip the tablet over with the screen facing upwards.
-
Place the suction handle in the center of the screen and slowly lift off the screen until it is at a 30 degree angle, starting by gently prying up the bottom.
-
-
-
-
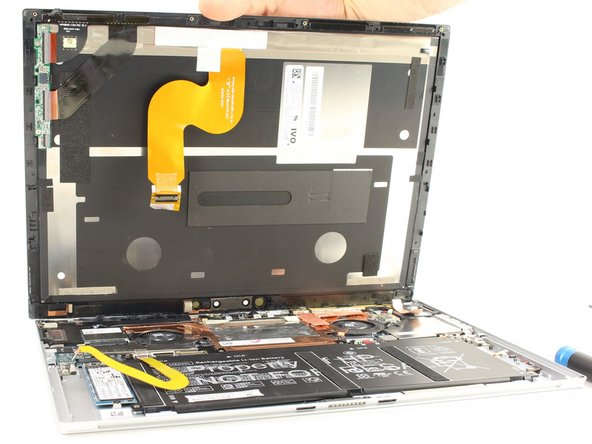
With the screen lifted at a 30 degree angle, gently disconnect the yellow ribbon cable at the end connected to the screen.
-
Gently disconnect the orange ribbon cable at the end connected to the bottom plate.
-


To reassemble your device, follow these instructions in reverse order.
To reassemble your device, follow these instructions in reverse order.
Rückgängig: Ich habe diese Anleitung nicht absolviert.
Ein:e weitere:r Nutzer:in hat diese Anleitung absolviert.

Team

The Citadel Military College of South Carolina, Team 2-18, Eggleston Fall 2021 Mitglied von The Citadel Military College of South Carolina, Team 2-18, Eggleston Fall 2021
CMCSC-EGGLESTON-F21S2G18
2 Mitglieder
3 Anleitungen geschrieben