Zum Hauptinhalt wechseln

HP Elite x2 1012 G2 Wi-Fi Card Replacement

Was du brauchst

  1. HP Elite x2 1012 G2 Wi-Fi Card Replacement, Screen: Schritt 1, Bild 1 von 1
    • Make sure the device is turned off before starting.

    • Orient the device so the back is facing you, with the kickstand up.

  2. HP Elite x2 1012 G2 Wi-Fi Card Replacement: Schritt 2, Bild 1 von 3 HP Elite x2 1012 G2 Wi-Fi Card Replacement: Schritt 2, Bild 2 von 3 HP Elite x2 1012 G2 Wi-Fi Card Replacement: Schritt 2, Bild 3 von 3
    • Remove the six 3mm Torx T5 screws underneath the kickstand.

  3. HP Elite x2 1012 G2 Wi-Fi Card Replacement: Schritt 3, Bild 1 von 2 HP Elite x2 1012 G2 Wi-Fi Card Replacement: Schritt 3, Bild 2 von 2
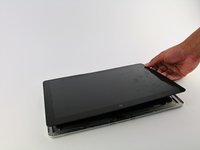
    • Turn the device over so the screen is facing you.

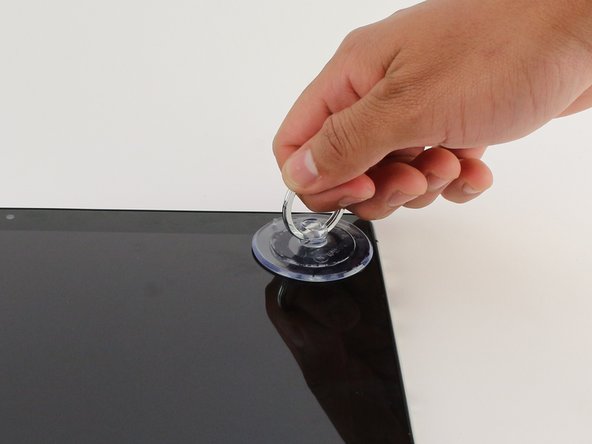
    • Place a suction cup firmly onto a corner of the screen.

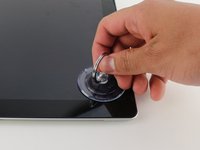
    • Lift up gently until you see the screen separate from the casing.

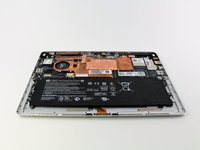
    • Repeat this process for all four corners.

  4. HP Elite x2 1012 G2 Wi-Fi Card Replacement: Schritt 4, Bild 1 von 1
    • Lift the screen up and off of the device.

    • Pry each corner up first, otherwise you may damage or crack the screen.

  5. HP Elite x2 1012 G2 Wi-Fi Card Replacement: Schritt 5, Bild 1 von 3 HP Elite x2 1012 G2 Wi-Fi Card Replacement: Schritt 5, Bild 2 von 3 HP Elite x2 1012 G2 Wi-Fi Card Replacement: Schritt 5, Bild 3 von 3
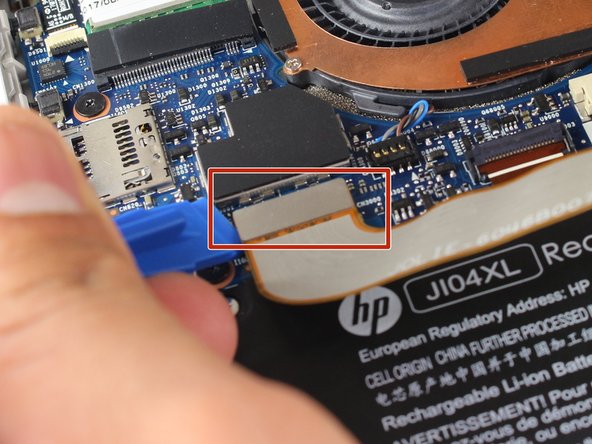
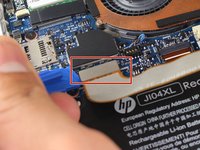
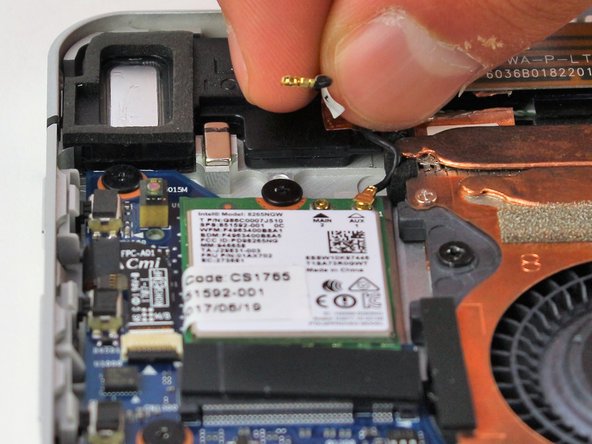
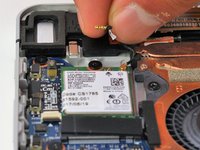
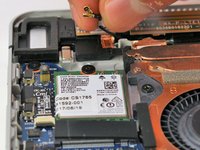
    • Remove the two connectors on the back of the screen by lifting the connector tabs on the motherboard with a plastic opening tool and pulling gently.

  6. HP Elite x2 1012 G2 Wi-Fi Card Replacement: Schritt 6, Bild 1 von 2 HP Elite x2 1012 G2 Wi-Fi Card Replacement: Schritt 6, Bild 2 von 2
    • Remove the screen by gently lifting it off of the device.

  7. HP Elite x2 1012 G2 Wi-Fi Card Replacement, Wi-Fi Card: Schritt 7, Bild 1 von 1
    • Orient the device so that the battery is closest to you.

    • The battery is the large, black rectangle at the bottom of the device.

  8. HP Elite x2 1012 G2 Wi-Fi Card Replacement: Schritt 8, Bild 1 von 3 HP Elite x2 1012 G2 Wi-Fi Card Replacement: Schritt 8, Bild 2 von 3 HP Elite x2 1012 G2 Wi-Fi Card Replacement: Schritt 8, Bild 3 von 3
    • Detach the two wire connections on the upper right of the wi-fi card by hand.

  9. HP Elite x2 1012 G2 Wi-Fi Card Replacement: Schritt 9, Bild 1 von 2 HP Elite x2 1012 G2 Wi-Fi Card Replacement: Schritt 9, Bild 2 von 2
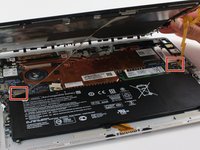
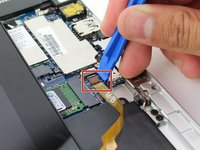
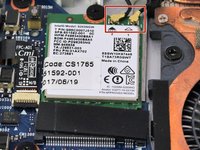
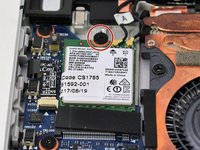
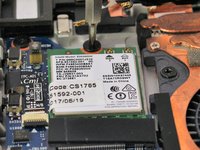
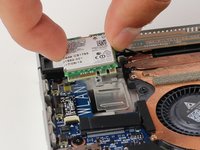
    • Use a Phillips 2mm screwdriver to remove the single M2 2.0x2.0 screw holding the wi-fi card in place. Turn the screwdriver counterclockwise to remove the screw.

  10. HP Elite x2 1012 G2 Wi-Fi Card Replacement: Schritt 10, Bild 1 von 2 HP Elite x2 1012 G2 Wi-Fi Card Replacement: Schritt 10, Bild 2 von 2
    • Slide the wi-fi card out by hand, lifting the card up and out of the device.

    • If it doesn't come out immediately, slowly wiggle the card side to side until it slides out of its connector.

Abschluss

To reassemble your device, follow these instructions in reverse order.

3 weitere Nutzer:innen haben diese Anleitung absolviert.

Team

Cal Poly, Team S18-G5, Livingston Spring 2018 Mitglied von Cal Poly, Team S18-G5, Livingston Spring 2018

CPSU-LIVINGSTON-S18S18G5

4 Mitglieder

13 Anleitungen geschrieben

Ein Kommentar

Hi is it to upgrade the broadband to support 4g lte? Mine unit when inserted 4g data sim card, only can run edge signal. Spec of the broadband is hp hs3210 hspa+

Kenny Liew - Antwort

Kommentar hinzufügen

Seitenaufrufe:

Letzte 24 Stunden: 3

Letzte 7 Tage: 6

Letzte 30 Tage: 31

Insgesamt: 2,246