Zum Hauptinhalt wechseln
Gemeinsam reparieren - Jetzt registrieren

HP Elite x2 G1 1012 Motherboard Replacement Guide

Was du brauchst

  1. HP Elite x2 G1 1012 Motherboard Replacement Guide, Motherboard: Schritt 1, Bild 1 von 2 HP Elite x2 G1 1012 Motherboard Replacement Guide, Motherboard: Schritt 1, Bild 2 von 2
    • Detach the keyboard from the screen.

    Frag FixBot
  2. HP Elite x2 G1 1012 Motherboard Replacement Guide: Schritt 2, Bild 1 von 1
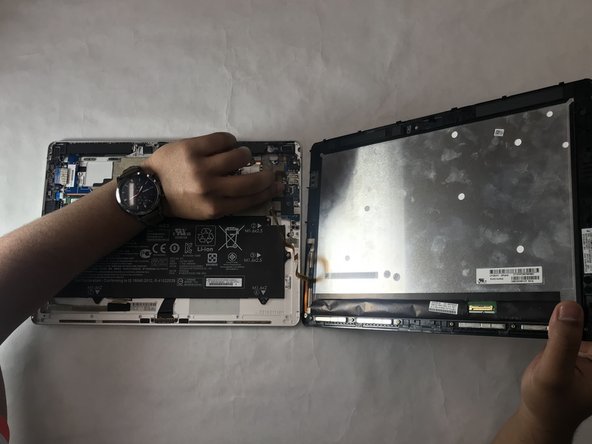
    • While the screen is facing down, remove six 3.0 mm Torx T5 screws under the stand.

    • The screws were not available when we received our device.

    Frag FixBot
  3. HP Elite x2 G1 1012 Motherboard Replacement Guide: Schritt 3, Bild 1 von 3 HP Elite x2 G1 1012 Motherboard Replacement Guide: Schritt 3, Bild 2 von 3 HP Elite x2 G1 1012 Motherboard Replacement Guide: Schritt 3, Bild 3 von 3
    • Use a suction cup to remove the screen panel.

    Frag FixBot
  4. HP Elite x2 G1 1012 Motherboard Replacement Guide: Schritt 4, Bild 1 von 3 HP Elite x2 G1 1012 Motherboard Replacement Guide: Schritt 4, Bild 2 von 3 HP Elite x2 G1 1012 Motherboard Replacement Guide: Schritt 4, Bild 3 von 3
    In diesem Schritt verwendetes Werkzeug:
    Tweezers
    $4.99
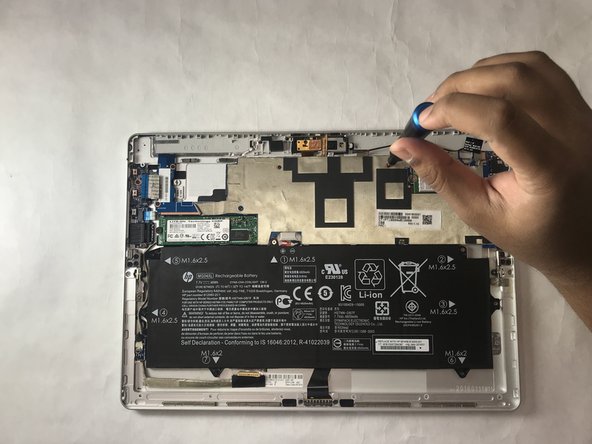
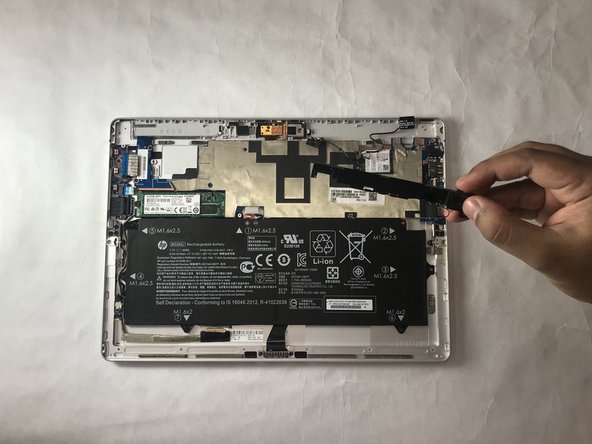
    • Detach flex cable from motherboard using tweezers.

    Frag FixBot
  5. HP Elite x2 G1 1012 Motherboard Replacement Guide: Schritt 5, Bild 1 von 1
    • Unplug the battery wire attached to the motherboard using tweezers.

    Frag FixBot
  6. HP Elite x2 G1 1012 Motherboard Replacement Guide: Schritt 6, Bild 1 von 3 HP Elite x2 G1 1012 Motherboard Replacement Guide: Schritt 6, Bild 2 von 3 HP Elite x2 G1 1012 Motherboard Replacement Guide: Schritt 6, Bild 3 von 3
    • Remove ten 2.7mm screws using the Phillips #0 screwdriver.

    Frag FixBot
  7. HP Elite x2 G1 1012 Motherboard Replacement Guide: Schritt 7, Bild 1 von 2 HP Elite x2 G1 1012 Motherboard Replacement Guide: Schritt 7, Bild 2 von 2
    • Unplug the speaker wire attached to the motherboard.

    Frag FixBot
  8. HP Elite x2 G1 1012 Motherboard Replacement Guide: Schritt 8, Bild 1 von 2 HP Elite x2 G1 1012 Motherboard Replacement Guide: Schritt 8, Bild 2 von 2
    • Detach the left speaker.

    Frag FixBot
  9. HP Elite x2 G1 1012 Motherboard Replacement Guide: Schritt 9, Bild 1 von 2 HP Elite x2 G1 1012 Motherboard Replacement Guide: Schritt 9, Bild 2 von 2
    • Detach the two stickers highlighted from the right speaker.

    Frag FixBot
  10. HP Elite x2 G1 1012 Motherboard Replacement Guide: Schritt 10, Bild 1 von 1
    • Detach the right speaker cables from the motherboard using tweezers.

    Frag FixBot
  11. HP Elite x2 G1 1012 Motherboard Replacement Guide: Schritt 11, Bild 1 von 2 HP Elite x2 G1 1012 Motherboard Replacement Guide: Schritt 11, Bild 2 von 2
    • Detach the right speaker.

    Frag FixBot
  12. HP Elite x2 G1 1012 Motherboard Replacement Guide: Schritt 12, Bild 1 von 1
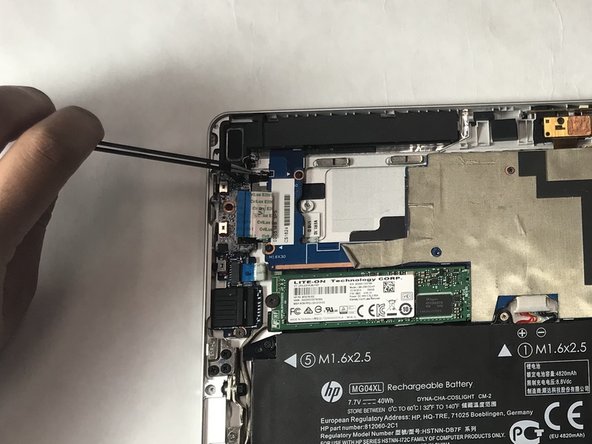
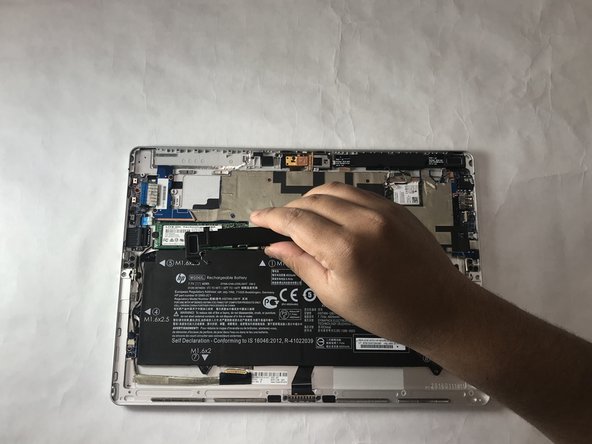
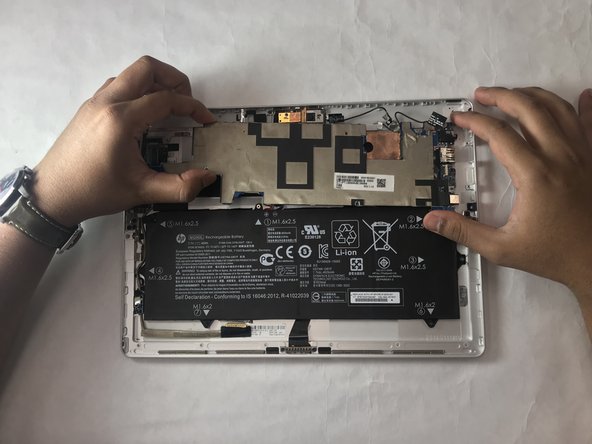
    • Detach the WWAN card from the motherboard by pulling it to the left using tweezers.

    Frag FixBot
  13. HP Elite x2 G1 1012 Motherboard Replacement Guide: Schritt 13, Bild 1 von 1
    • Detach the SSD from motherboard by pulling it to the left using tweezers.

    Frag FixBot
  14. HP Elite x2 G1 1012 Motherboard Replacement Guide: Schritt 14, Bild 1 von 1
    • Use the plastic opening tool to loosen the motherboard.

    Frag FixBot
  15. HP Elite x2 G1 1012 Motherboard Replacement Guide: Schritt 15, Bild 1 von 3 HP Elite x2 G1 1012 Motherboard Replacement Guide: Schritt 15, Bild 2 von 3 HP Elite x2 G1 1012 Motherboard Replacement Guide: Schritt 15, Bild 3 von 3
    • Detach the motherboard from the casing.

    • Apply pulling force to the left to pull out the ports from the casing safely.

    Frag FixBot
Abschluss

To reassemble your device, follow these instructions in reverse order.

4 weitere Personen haben diese Anleitung absolviert.

Team

IUPUI, Team S1-G5, Harley Summer 2019 Mitglied von IUPUI, Team S1-G5, Harley Summer 2019

IUPUI-HARLEY-SU19S1G5

4 Mitglieder

2 Anleitungen geschrieben

1 Kommentar zur Anleitung

¿basta con esto para cambiar el cable LCD?

Is this enough to replace the LCD wire?

Pablo Sánchez-Simón - Antwort Teilen

Kommentar hinzufügen

Seitenaufrufe:

Letzte 24 Stunden: 1

Letzte 7 Tage: 12

Letzte 30 Tage: 70

Insgesamt: 4,392