Einleitung
This guide is to instruct you in the proper removal and replacement of the Trackpad in an HP EliteBook 840 G7. Use this guide if your computers Trackpad stops working.
Was du brauchst
-
-
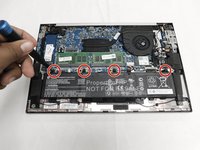
Use the Phillips # 1 screwdriver to remove the five 1.2 mm screws from the back cover of the laptop.
Den Phillips #1 Schraubenzieher benutzen um die fünf schrauben auf der Rückseite des Laptops zu entfernen
-
-
-
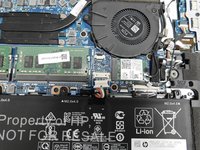
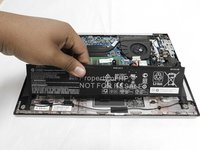
Remove the back cover to expose the hardware.
-
-
-
-
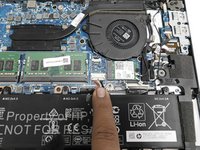
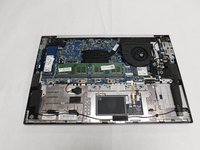
Use your Phillips #1 screwdriver and remove the four 1.2 mm screws that secures the battery into place.
-
Remove the connector that connects the battery to the motherboard.
-
-
-
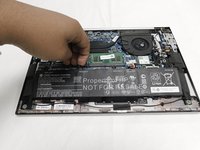
Lift up the battery with you hands or tools.
-
-
-
Use the Philips # 1 screwdriver to remove the four 2.2mm screws securing the track pad assembly.
-


To reassemble your device, follow these instructions in reverse order.
To reassemble your device, follow these instructions in reverse order.
Rückgängig: Ich habe diese Anleitung nicht absolviert.
Eine weitere Person hat diese Anleitung absolviert.

Team

The Citadel Military College of South Carolina, Team 3-18, Eggleston Fall 2022 Mitglied von The Citadel Military College of South Carolina, Team 3-18, Eggleston Fall 2022
CMCSC-EGGLESTON-F22S3G18
3 Mitglieder
4 Anleitungen geschrieben
Ein Kommentar
laptop treckpad automatically get clicked while speaker produced a sound
Auf den Rücken drehen
Luis-Oliver Bota - Antwort