Zum Hauptinhalt wechseln

HP Envy 15-u001dx Battery Replacement

Archivierte Anleitung
Diese Anleitung wurde ausschließlich für historische Zwecke erhalten. Verwende die aktualisierte Version dieser Anleitung, um deine Reparatur durchzuführen.

Was du brauchst

  1. HP Envy 15-u001dx Battery Replacement, HP Envy 15-u001dx Disassembly: Schritt 1, Bild 1 von 1
    • Remove the two no-slip covers on the rear, bottom side using spudger shown in top center of picture.

    • The two in the front do not have to be removed as there are no screws underneath them.

  2. HP Envy 15-u001dx Battery Replacement: Schritt 2, Bild 1 von 1
    • Remove the two cover tabs towards center of the bottom as there are screws underneath them.

  3. HP Envy 15-u001dx Battery Replacement: Schritt 3, Bild 1 von 1
    • Remove all fourteen 4.5 mm screws from the bottom using a Phillips #0 screwdriver. Each location is marked by a red circle in the picture.

  4. HP Envy 15-u001dx Battery Replacement: Schritt 4, Bild 1 von 1
    • Separate the top cover by using a spudger to go around the sides freeing the inside latches.

    • Once the bottom is free, carefully open to the inside as there are two ribbons that connect your keyboard and touch pad to the top cover.

  5. HP Envy 15-u001dx Battery Replacement: Schritt 5, Bild 1 von 2 HP Envy 15-u001dx Battery Replacement: Schritt 5, Bild 2 von 2
    • Use the spudger to detach the two ribbons from their connectors.

    • The regular black nylon spudger should be used whenever possible, especially around sensitive internal components.

  6. HP Envy 15-u001dx Battery Replacement, Battery: Schritt 6, Bild 1 von 3 HP Envy 15-u001dx Battery Replacement, Battery: Schritt 6, Bild 2 von 3 HP Envy 15-u001dx Battery Replacement, Battery: Schritt 6, Bild 3 von 3
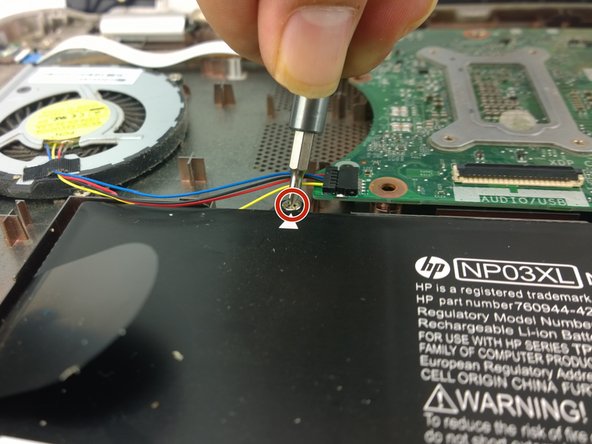
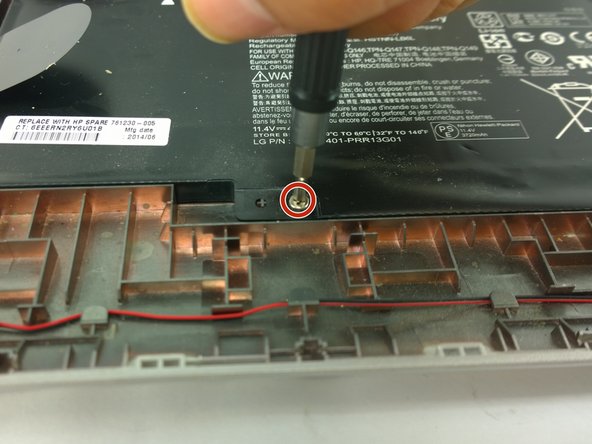
    • Remove the three 3 mm screws from the battery using Phillips #0 screwdriver.

  7. HP Envy 15-u001dx Battery Replacement: Schritt 7, Bild 1 von 1
    • Use a spudger to gently detach the battery connector.

    • The regular black nylon spudger should be used whenever possible, especially around sensitive internal components.

Abschluss

To reassemble your device, follow these instructions in reverse order.

3 weitere Nutzer:innen haben diese Anleitung absolviert.

Team

USF Tampa, Team 9-4, Lacy Fall 2016 Mitglied von USF Tampa, Team 9-4, Lacy Fall 2016

USFT-LACY-F16S9G4

4 Mitglieder

7 Anleitungen geschrieben

0 Kommentare

Kommentar hinzufügen

Seitenaufrufe:

Letzte 24 Stunden: 0

Letzte 7 Tage: 1

Letzte 30 Tage: 2

Insgesamt: 1,032