Diese Version enthält möglicherweise inkorrekte Änderungen. Wechsle zur letzten geprüften Version.
Was du brauchst
-
Dieser Schritt ist noch nicht übersetzt. Hilf mit, ihn zu übersetzen!
-
Lift the scanner to open up the printer cartridge access area.
-
-
Dieser Schritt ist noch nicht übersetzt. Hilf mit, ihn zu übersetzen!
-
Remove the two 12 mm screws with a T10 bit.
-
-
-
Dieser Schritt ist noch nicht übersetzt. Hilf mit, ihn zu übersetzen!
-
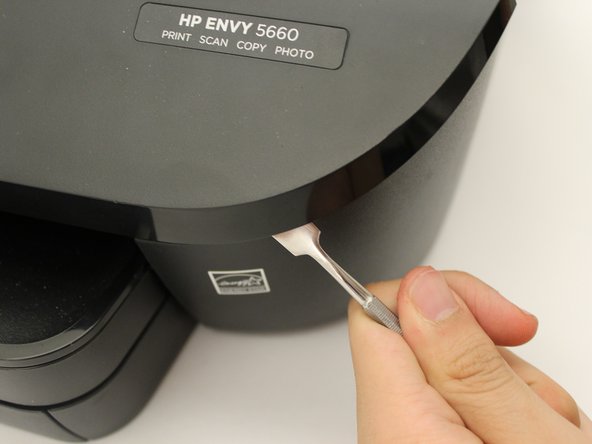
Use a metal spudger to pry open the front panel.
-
Work your way all the way around the front panel doing the same.
-
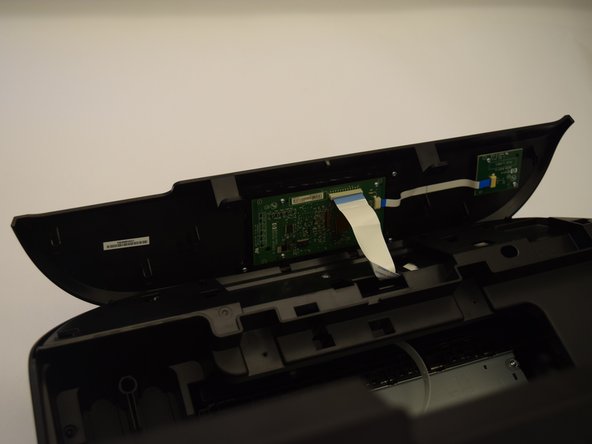
Gently flip the cover over, exposing the motherboard.
-
-
Dieser Schritt ist noch nicht übersetzt. Hilf mit, ihn zu übersetzen!
-
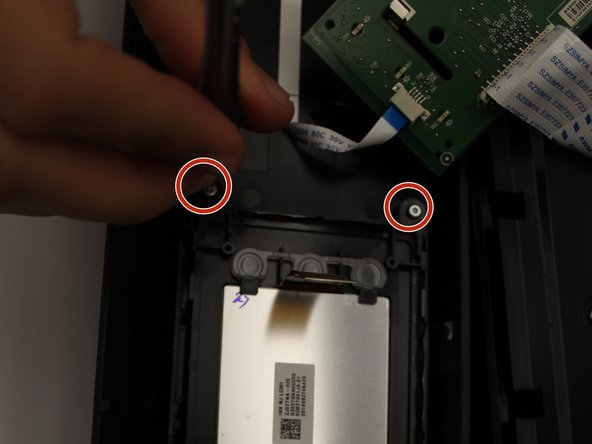
Remove the four 4.5 mm screws from the motherboard with a T6 bit.
-
Gently remove the motherboard from the top of the LCD, but make sure the ribbon cables are still attached.
-
-
Dieser Schritt ist noch nicht übersetzt. Hilf mit, ihn zu übersetzen!
-
Remove the four 5 mm screws with a T6 bit, allowing you to separate the LCD from the cover,
-
-
Dieser Schritt ist noch nicht übersetzt. Hilf mit, ihn zu übersetzen!
-
Place the metal spudger underneath the LCD and gently lift up to remove the LCD.
-


Rückgängig: Ich habe diese Anleitung nicht absolviert.
Ein:e weitere:r Nutzer:in hat diese Anleitung absolviert.
Team

Cal Poly, Team S1-G6, Livingston Winter 2018 Mitglied von Cal Poly, Team S1-G6, Livingston Winter 2018
CPSU-LIVINGSTON-W18S1G6
4 Mitglieder
10 Anleitungen geschrieben
2 Kommentare
Great description but there is a part needed - the LCD. Is that part available? How do I get it?
Thanks,
PJE
Ditto, I'm in the same position, did you ever find the part/LCD replacement screen?