Zum Hauptinhalt wechseln
Gemeinsam reparieren - Jetzt registrieren

HP Envy Sleekbook m6-k010dx LCD Replacement

Was du brauchst

    1. HP Envy Sleekbook m6-k010dx LCD Replacement, Battery: Schritt 1, Bild 1 von 1
      • Remove the twelve 9 mm Phillips #00 screws.

      Frag FixBot

      Kommentar hinzufügen

    2. HP Envy Sleekbook m6-k010dx LCD Replacement: Schritt 2, Bild 1 von 2 HP Envy Sleekbook m6-k010dx LCD Replacement: Schritt 2, Bild 2 von 2
      • Use the plastic opening tool and your hands to remove the bottom cover.

      Frag FixBot

      Kommentar hinzufügen

    3. HP Envy Sleekbook m6-k010dx LCD Replacement: Schritt 3, Bild 1 von 1
      • Disconnect the battery power cable from the motherboard.

      Frag FixBot

      Kommentar hinzufügen

    4. HP Envy Sleekbook m6-k010dx LCD Replacement: Schritt 4, Bild 1 von 1
      • Remove the six 6 mm Phillips #00 screws from the battery.

      Frag FixBot

      Kommentar hinzufügen

    5. HP Envy Sleekbook m6-k010dx LCD Replacement: Schritt 5, Bild 1 von 2 HP Envy Sleekbook m6-k010dx LCD Replacement: Schritt 5, Bild 2 von 2
      • Lift the battery out of the laptop.

      Frag FixBot

      Kommentar hinzufügen

    1. HP Envy Sleekbook m6-k010dx LCD Replacement, LCD: Schritt 6, Bild 1 von 2 HP Envy Sleekbook m6-k010dx LCD Replacement, LCD: Schritt 6, Bild 2 von 2
      • Remove the stickers from the bottom left and right corner of the device with a plastic opening tool.

      Frag FixBot

      Kommentar hinzufügen

    2. HP Envy Sleekbook m6-k010dx LCD Replacement: Schritt 7, Bild 1 von 1
      • Remove the two 2.5mm Phillips #00 screws found underneath the previously removed stickers.

      Frag FixBot

      Kommentar hinzufügen

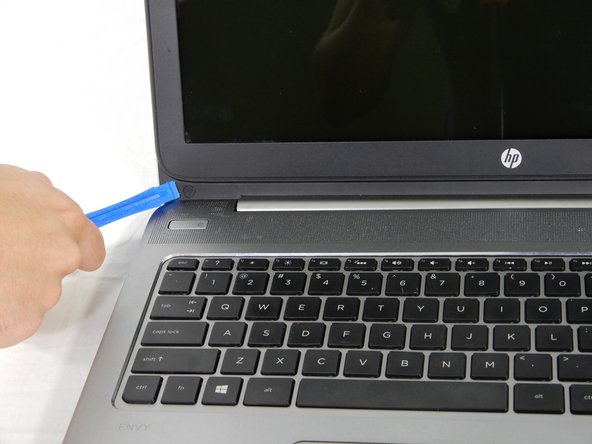
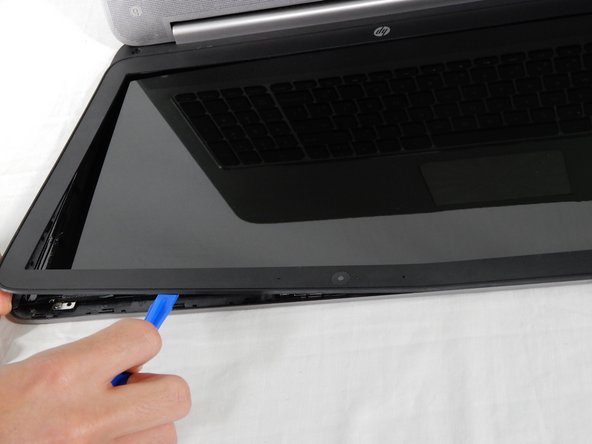
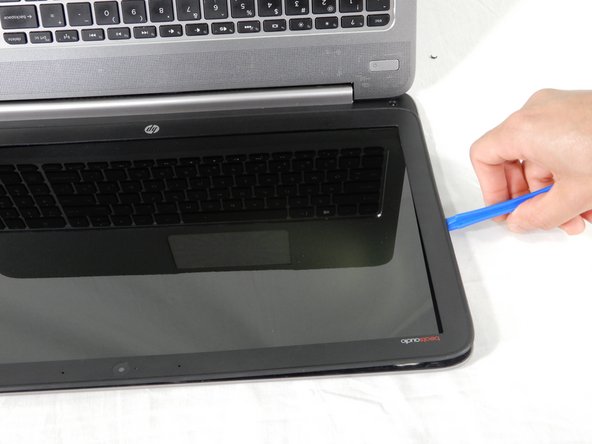
    3. HP Envy Sleekbook m6-k010dx LCD Replacement: Schritt 8, Bild 1 von 3 HP Envy Sleekbook m6-k010dx LCD Replacement: Schritt 8, Bild 2 von 3 HP Envy Sleekbook m6-k010dx LCD Replacement: Schritt 8, Bild 3 von 3
      • Use the plastic opening tool to pry the bezel free from the LCD housing.

      Frag FixBot

      Kommentar hinzufügen

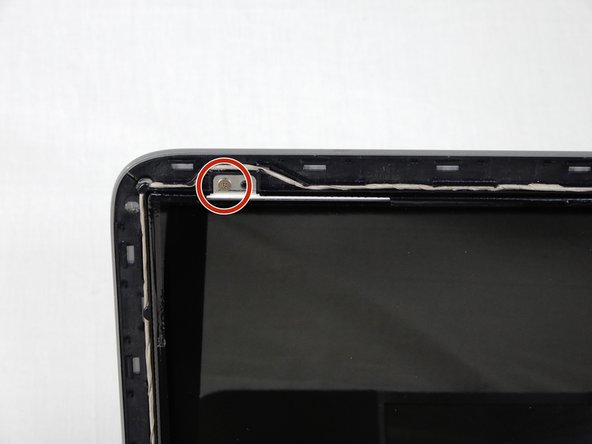
    4. HP Envy Sleekbook m6-k010dx LCD Replacement: Schritt 9, Bild 1 von 2 HP Envy Sleekbook m6-k010dx LCD Replacement: Schritt 9, Bild 2 von 2
      • Remove the four 2.5mm Phillips #00 screws located in each corner of the LCD screen.

      Frag FixBot

      Kommentar hinzufügen

    5. HP Envy Sleekbook m6-k010dx LCD Replacement: Schritt 10, Bild 1 von 2 HP Envy Sleekbook m6-k010dx LCD Replacement: Schritt 10, Bild 2 von 2
      • Use the plastic opening tool to remove the LCD screen from its housing.

      • Lay the LCD screen flat on the keyboard.

      Frag FixBot

      Kommentar hinzufügen

    6. HP Envy Sleekbook m6-k010dx LCD Replacement: Schritt 11, Bild 1 von 1
      • Disconnect the cable which connects the LCD to the motherboard.

      • Pul the LCD screen out.

      Frag FixBot

      Kommentar hinzufügen

Abschluss

To reassemble your device, follow these instructions in reverse order.

Rückgängig: Ich habe diese Anleitung nicht absolviert.

2 weitere Personen haben diese Anleitung absolviert.

Team

USF Tampa, Team S1-G4, Nance Spring 2018 Mitglied von USF Tampa, Team S1-G4, Nance Spring 2018

USFT-NANCE-S18S1G4

4 Mitglieder

60 Anleitungen geschrieben

0 Kommentare zur Anleitung

Kommentar hinzufügen

Seitenaufrufe:

Letzte 24 Stunden: 1

Letzte 7 Tage: 5

Letzte 30 Tage: 35

Insgesamt: 1,306