Einleitung
Removing and replacing the touch screen is an easy fix for a broken, scratched, or smudged touch screen that might have dead pixels as well.
Was du brauchst
-
-
Open the laptop.
-
Remove black tabs at bottom left and right corners and remove the two M2.5x2.5 screws behind the black tabs with the J0 screwdriver.
-
-
-
Insert pick between the black plastic screen panel and the silver plastic exterior case on the side of the device.
-
Slide pick around the border of the screen panel while keeping the pick between the mentioned panel and exterior case.
-
-
-
-
Remove the front panel from the rest of the device and set it aside.
-
Remove the ten M2.5x2.5 screws with the J0 screwdriver.
-
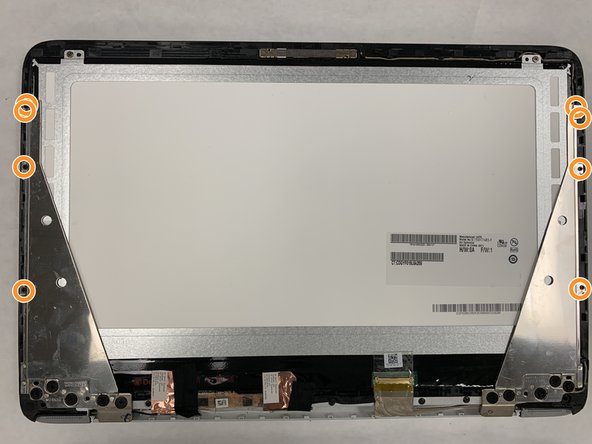
Remove the eight M2.0x2.0 screws with the J0 screwdriver.
-
-
-
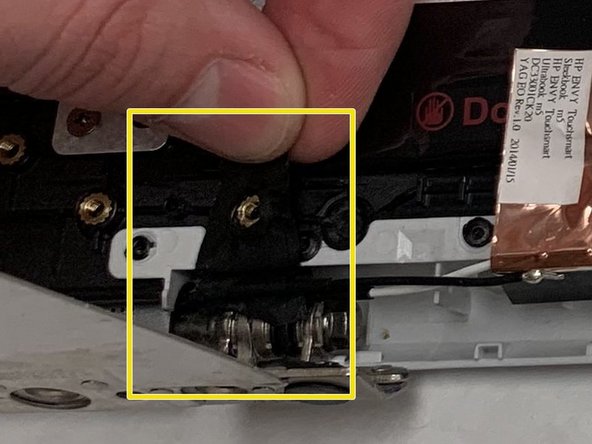
Flip hinges down and away from the rest of the panel.
-
Remove the four M2.5x2.5 screws with the J0 screwdriver.
-
Move 4 pieces of black tape across the bottom of the panel and any other accessory tape.
-
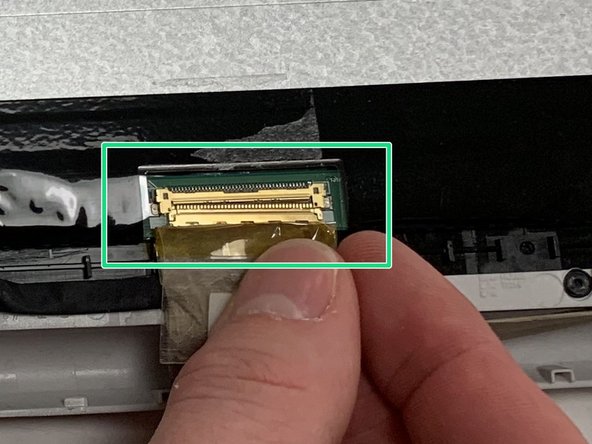
Disconnect the display cable connector that is located at the bottom right of the panel by pulling lightly.
-
To reassemble your device, follow these instructions in reverse order.
To reassemble your device, follow these instructions in reverse order.
Rückgängig: Ich habe diese Anleitung nicht absolviert.
2 weitere Personen haben diese Anleitung absolviert.


