Zum Hauptinhalt wechseln

HP Envy X2-15-C001Dx Hard Drive Replacement

Was du brauchst

  1. HP Envy X2-15-C001Dx Hard Drive Replacement, Back Panel: Schritt 1, Bild 1 von 1
    • Place the laptop face down on a table.

  2. HP Envy X2-15-C001Dx Hard Drive Replacement: Schritt 2, Bild 1 von 2 HP Envy X2-15-C001Dx Hard Drive Replacement: Schritt 2, Bild 2 von 2
    • Lift up the back stand.

  3. HP Envy X2-15-C001Dx Hard Drive Replacement: Schritt 3, Bild 1 von 2 HP Envy X2-15-C001Dx Hard Drive Replacement: Schritt 3, Bild 2 von 2
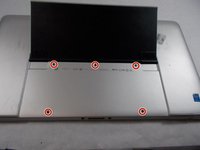
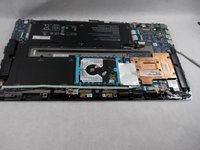
    • Remove the five screws from the bottom of the back plate using a Phillips #1 screwdriver.

  4. HP Envy X2-15-C001Dx Hard Drive Replacement: Schritt 4, Bild 1 von 1
    • Remove four screws from the back stand hinges using a Phillips #1 screwdriver.

  5. HP Envy X2-15-C001Dx Hard Drive Replacement: Schritt 5, Bild 1 von 2 HP Envy X2-15-C001Dx Hard Drive Replacement: Schritt 5, Bild 2 von 2
    • Remove the hinges and the back stand from the laptop.

  6. HP Envy X2-15-C001Dx Hard Drive Replacement: Schritt 6, Bild 1 von 1
    • Use a spudger to remove the thin panel where the back stand was.

  7. HP Envy X2-15-C001Dx Hard Drive Replacement: Schritt 7, Bild 1 von 1
    • Remove the screws from the back panel using a Phillips #1 screwdriver.

  8. HP Envy X2-15-C001Dx Hard Drive Replacement: Schritt 8, Bild 1 von 2 HP Envy X2-15-C001Dx Hard Drive Replacement: Schritt 8, Bild 2 von 2
    • Remove two side screws using a Phillips #1 screwdriver.

  9. HP Envy X2-15-C001Dx Hard Drive Replacement: Schritt 9, Bild 1 von 2 HP Envy X2-15-C001Dx Hard Drive Replacement: Schritt 9, Bild 2 von 2
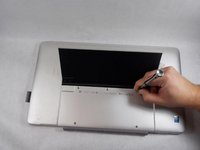
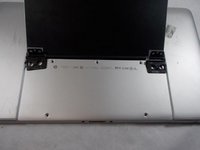
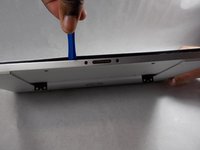
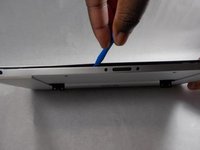
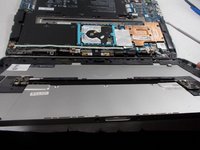
    • Pry apart the base from the screen by going around the entire perimeter with an opening tool.

  10. HP Envy X2-15-C001Dx Hard Drive Replacement: Schritt 10, Bild 1 von 2 HP Envy X2-15-C001Dx Hard Drive Replacement: Schritt 10, Bild 2 von 2
    • Remove the back panel from the laptop.

  11. HP Envy X2-15-C001Dx Hard Drive Replacement, Hard Drive: Schritt 11, Bild 1 von 3 HP Envy X2-15-C001Dx Hard Drive Replacement, Hard Drive: Schritt 11, Bild 2 von 3 HP Envy X2-15-C001Dx Hard Drive Replacement, Hard Drive: Schritt 11, Bild 3 von 3
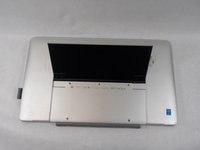
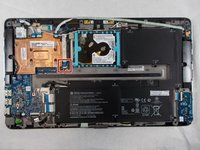
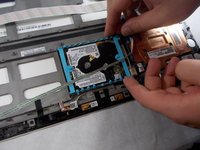
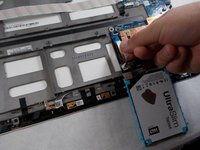
    • Lift the hard drive out from its slot, taking care not to tear the ribbon cable that is connecting it to the motherboard.

    • Unplug the hard drive from the motherboard.

    • Completely remove the hard drive from the laptop.

Abschluss

To reassemble your device, follow these instructions in reverse order.

2 weitere Nutzer:innen haben diese Anleitung absolviert.

Team

UMass Dartmouth, Team 2-6, Sinclaire Fall 2021 Mitglied von UMass Dartmouth, Team 2-6, Sinclaire Fall 2021

UMASSD-SINCLAIRE-F21S2G6

3 Mitglieder

6 Anleitungen geschrieben

0 Kommentare

Kommentar hinzufügen

Seitenaufrufe:

Letzte 24 Stunden: 5

Letzte 7 Tage: 11

Letzte 30 Tage: 22

Insgesamt: 564