Diese Version enthält möglicherweise inkorrekte Änderungen. Wechsle zur letzten geprüften Version.
Was du brauchst
-
Dieser Schritt ist noch nicht übersetzt. Hilf mit, ihn zu übersetzen!
-
Flip the laptop over onto it's top with the back facing you
-
-
Dieser Schritt ist noch nicht übersetzt. Hilf mit, ihn zu übersetzen!
-
Pull the slide release tab to the left to free the battery.
-
Once the slide release is all the way over, a red icon should be visible.
-
-
Dieser Schritt ist noch nicht übersetzt. Hilf mit, ihn zu übersetzen!
-
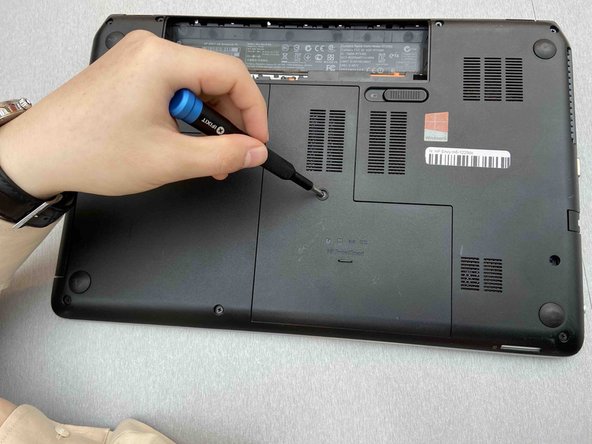
Remove the center screw using a Phillips #1 screwdriver.
-
-
Dieser Schritt ist noch nicht übersetzt. Hilf mit, ihn zu übersetzen!
-
Move the battery slide release latch to the side while pulling the service cover forward.
-
Pull the service cover straight up and out to remove.
-
-
Dieser Schritt ist noch nicht übersetzt. Hilf mit, ihn zu übersetzen!
-
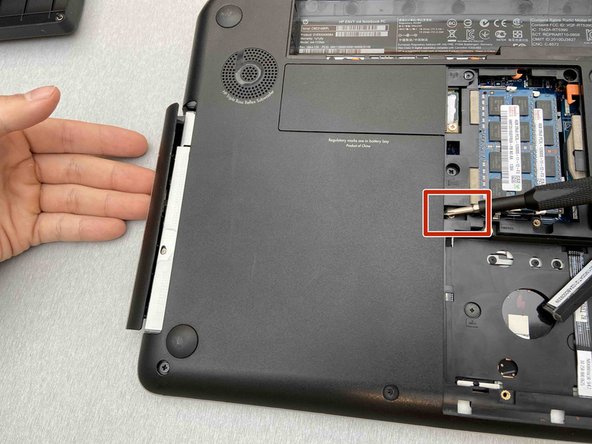
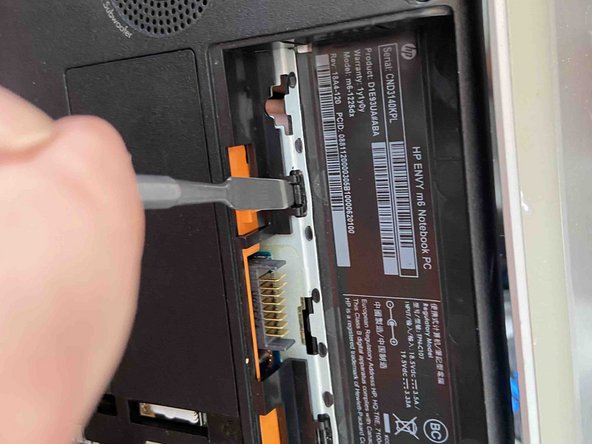
Use a Phillips #1 screwdriver to remove the single screw holding the optical drive
-
-
-
Dieser Schritt ist noch nicht übersetzt. Hilf mit, ihn zu übersetzen!
-
Use a spudger to apply pressure to the tab, while simultaneously pulling out the optical drive.
-
-
Dieser Schritt ist noch nicht übersetzt. Hilf mit, ihn zu übersetzen!
-
Pull the optical drive out of the base of the laptop.
-
-
Dieser Schritt ist noch nicht übersetzt. Hilf mit, ihn zu übersetzen!
-
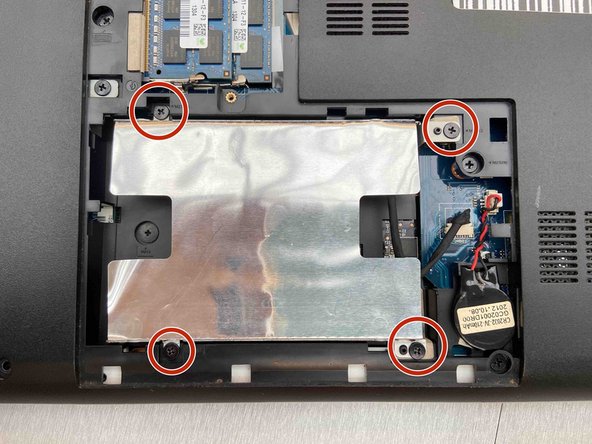
Remove the 4 screws from the hard drive bracket with a Phillips #1 screwdriver.
-
-
Dieser Schritt ist noch nicht übersetzt. Hilf mit, ihn zu übersetzen!
-
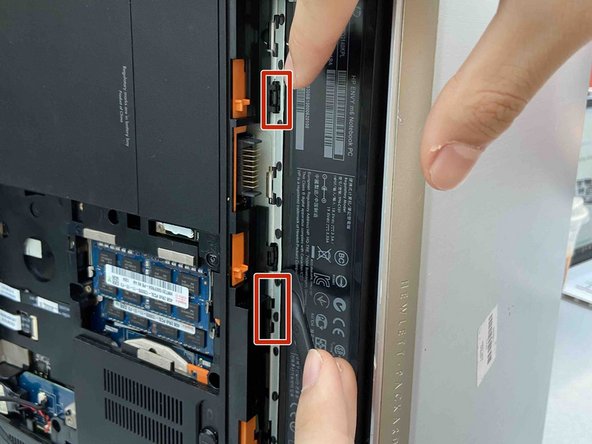
Disconnect the cable from the side of the hard drive and move it to the side
-
Remove the hard drive from the laptop.
-
-
Dieser Schritt ist noch nicht übersetzt. Hilf mit, ihn zu übersetzen!
-
Remove the two screws that secure the keyboard to the laptop using a Phillips #1 screwdriver.
-
-
Dieser Schritt ist noch nicht übersetzt. Hilf mit, ihn zu übersetzen!
-
Move the laptop onto its left side with it open.
-
Turn the laptop and look into the empty battery slot for two release holes.
-
Insert a metal spudger into the release holes and apply pressure to the back of the keyboard till it comes loose of the laptop.
-
-
Dieser Schritt ist noch nicht übersetzt. Hilf mit, ihn zu übersetzen!
-
Gently lift the keyboard away from the laptop.
-
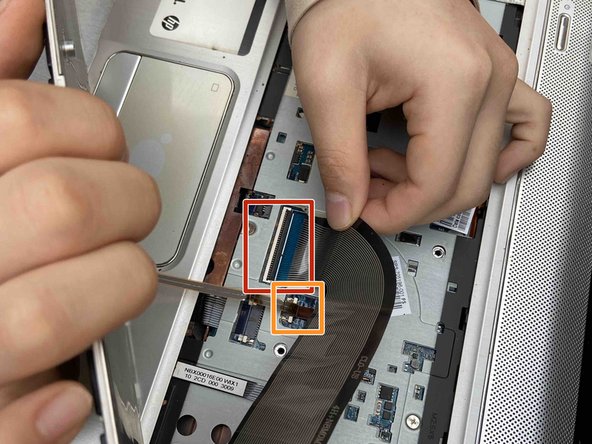
Remove the cable connection from the base of the laptop.
-
Remove the keyboard backlight cable.
-
-
Dieser Schritt ist noch nicht übersetzt. Hilf mit, ihn zu übersetzen!
-
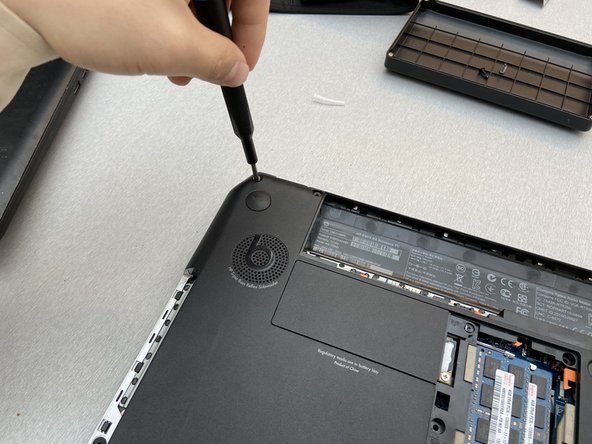
Remove the 13 screws on the bottom of the laptop using a Phillips #1 screwdriver.
-
-
Dieser Schritt ist noch nicht übersetzt. Hilf mit, ihn zu übersetzen!
-
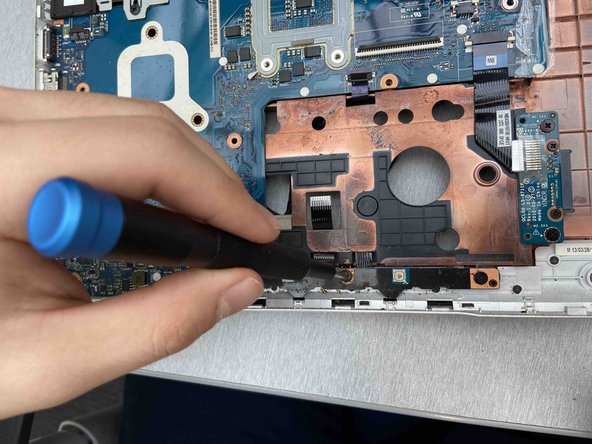
Disconnect the power button board cable using a pair of tweezers.
-
Disconnect the touchpad button board cable using tweezers.
-
Disconnect the fingerprint reader board cable using tweezers.
-
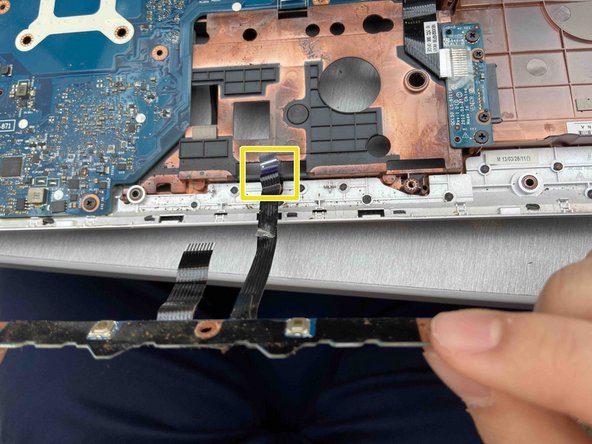
Disconnect the right speaker cable using tweezers.
-
Remove the 4 screws using a Phillips #1 screwdriver.
-
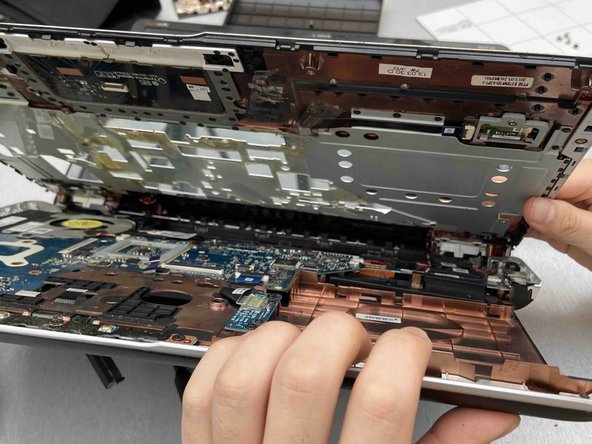
Apply force to the base of the cover to pop if off from the laptop base.
-
-
Dieser Schritt ist noch nicht übersetzt. Hilf mit, ihn zu übersetzen!
-
Turn the top cover with the touchpad area facing you.
-
Remove the one screw holding the touchpad buttons down with a Phillips #1 screwdriver.
-
Disconnect the cable holding the touchpad buttons to the top cover
-


Team

Embry-Riddle Aeronautical University, Team S14-G3, Lamothe Spring 2020 Mitglied von Embry-Riddle Aeronautical University, Team S14-G3, Lamothe Spring 2020
ERAU-LAMOTHE-S20S14G3
5 Mitglieder
5 Anleitungen geschrieben