Einleitung
These instructions will guide you through the process to remove and replace the motherboard on the HP Envy x2 13-j002dx (Model #J9M64UA). In step 1 of this guide, you will remove the tablet’s outer shell to access the motherboard. The rest of guide shows you how to remove and replace the motherboard.
Was du brauchst
-
-
Remove five 4mm Phillips #0 screws securing the lower case to the HP Envy x2 13-j002dx.
-
-
-
Use a Phillips #00 screwdriver to remove the two 3.5 mm screws from the bottom of the device—one on each side of the keyboard dock.
-
-
In diesem Schritt verwendetes Werkzeug:Tweezers$4.99
-
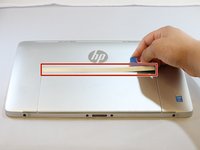
Use a pair of tweezers to remove the screw covers on the bottom of the device.
-
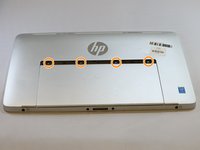
Use a Phillips #0 screwdriver to remove the two 4mm screws.
-
-
-
Use an opening pick to remove the plastic cover above the back stand.
-
Pry the cover off.
-
Use a Phillips #0 screwdriver to remove the four 4 mm screws.
-
-
-
Use an opening pick and a prying tool, and go around the device to remove the back cover from the rest of the assembly.
-
-
-
-
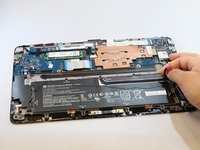
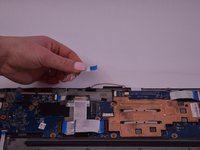
Carefully pull up on the battery connector from the speaker.
-
Use a pair of tweezers and remove the taped down wire for the speaker.
-
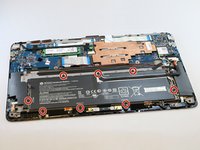
Use a Phillips #00 screwdriver to remove the seven 3mm screws around the battery.
-
-
-
Before removing the motherboard, clear away any dust, and ensure that the battery is already removed.
-
-
-
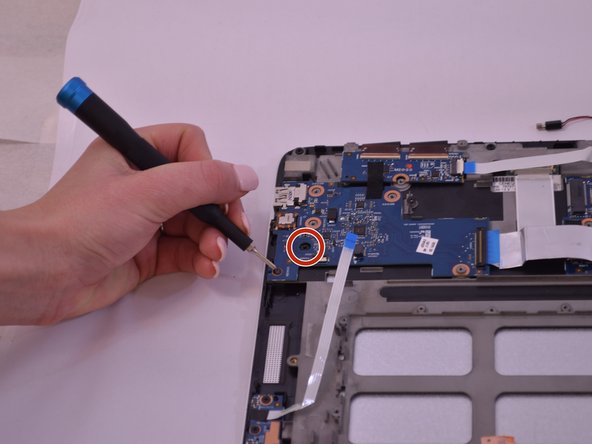
Using a Phillips #0 screwdriver, remove the three 3.8 mm screws along the edge of the motherboard.
-
-
In diesem Schritt verwendetes Werkzeug:Tweezers$4.99
-
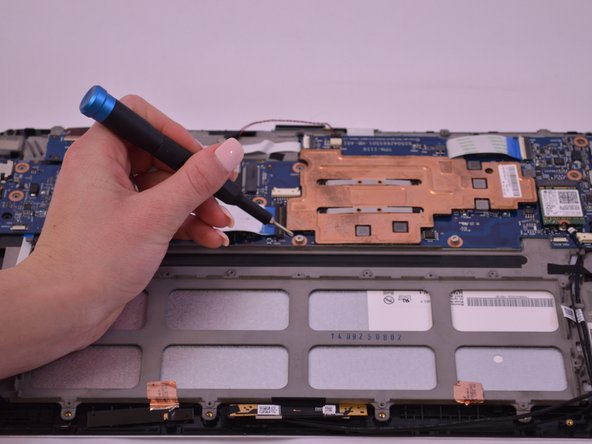
Disconnect the cable connectors from the motherboard. This can be done with either tweezers or with your fingers.
-
-
-
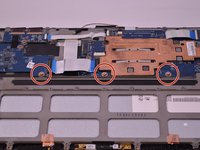
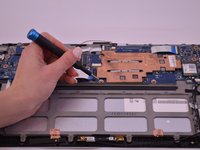
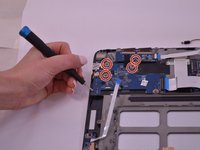
Using the Phillips #0 screwdriver, remove the 3.2mm screws within the copper rings in the circuit board.
-
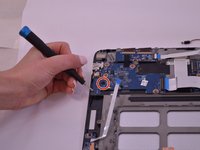
Using the Phillips #0 screwdriver, remove the 2.5mm and 4.25mm black screws on the motherboard.
-
-
-
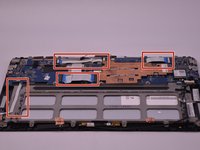
Once the screws and cables are disconnected and removed, remove the motherboard from the frame.
-


To reassemble your device, follow these instructions in reverse order.
To reassemble your device, follow these instructions in reverse order.
Rückgängig: Ich habe diese Anleitung nicht absolviert.
Eine weitere Person hat diese Anleitung absolviert.

Team

Idaho State University, Team S1-G3, Watkins Fall 2019 Mitglied von Idaho State University, Team S1-G3, Watkins Fall 2019
ISU-WATKINS-F19S1G3
3 Mitglieder
2 Anleitungen geschrieben