Einleitung
This guide will demonstrate how to replace the fan and heatsink in the HP Envy x360 15m-cn0011dx laptop. The fan in this computer is connected to a heating pipe/heat sink. Be careful when removing the fan along with the heatsink as these parts are very fragile with a fair amount of force.
Make sure your device is fully powered off before attempting this guide.
Was du brauchst
-
-
Remove the six 5.6 mm screws from the back cover using a Phillips #00 screwdriver.
-
Remove the single 4.3 mm screw in the bottom middle section of the back cover using a T5 Torx screwdriver.
-
-
-
-
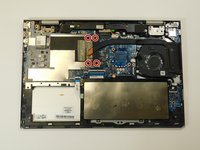
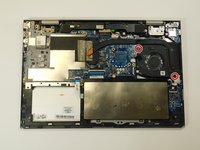
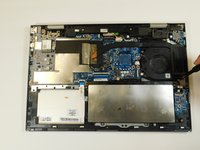
Loosen the four captive screws on the heat sink using a Phillips #00 screwdriver.
-
-
-
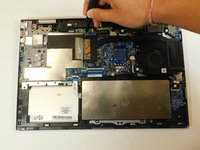
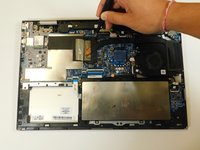
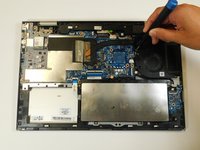
Unplug the fan from the motherboard and lift the fan and heatsink out of the laptop.
-


To reassemble your device, follow these instructions in reverse order.
To reassemble your device, follow these instructions in reverse order.

Team

Gateway, Team 1-4, Class Fall 2022 Mitglied von Gateway, Team 1-4, Class Fall 2022
GCC-CLASS-F22S1G4
4 Mitglieder
5 Anleitungen geschrieben