Einleitung
The fan is the main source of cooling for the laptop. It is the component that keeps your device from overheating, and can be the main source of noise from the laptop. This guide will show the proper removal of the laptop's hard drive.
Was du brauchst
-
-
Use the plastic opening tool to remove the gray rubber pads on the bottom of the laptop. For our device we only needed to remove the two at the top.
-
-
-
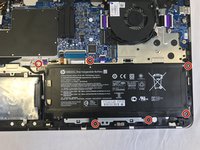
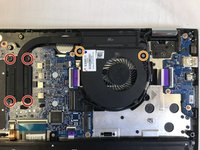
Use a Torx T5 screwdriver to remove the six 5.1 mm screws.
-
Use a JIS #1 screwdriver to remove the two 7.2mm screws.
-
-
-
Use a plastic opening tool to pry open the case. Go slowly around the edge. You will hear popping noises, such are due to popping open the small joints that keep the cover attached.
-
-
-
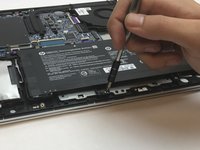
In diesem Schritt verwendetes Werkzeug:Tweezers$4.99
-
Use tweezers to disconnect the battery from the motherboard.
-
-
-
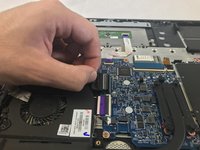
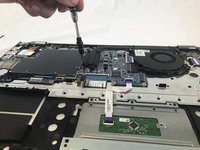
Use your fingers to lightly pull the cable and disconnect it from the motherboard.
-
-
-
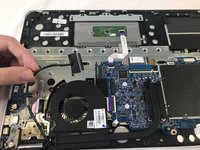
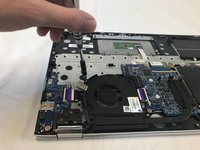
Use a Phillips #0 screwdriver to loosen the four 6.5 mm screws.
-
Use a JIS #1 screwdriver to remove the two 7.7 mm screws.
-


To reassemble your device, follow these instructions in reverse order.
To reassemble your device, follow these instructions in reverse order.
Rückgängig: Ich habe diese Anleitung nicht absolviert.
Eine weitere Person hat diese Anleitung absolviert.
Team

USF Tampa, Team S13-G17, Cagle Fall 2017 Mitglied von USF Tampa, Team S13-G17, Cagle Fall 2017
USFT-CAGLE-F17S13G17
4 Mitglieder
7 Anleitungen geschrieben