Einleitung
Are you unhappy with the performance of your HP Envy x360 m6-aq103dx? If so, here is the guide to replace your motherboard. With just a few tools, you can replace your HP Envy x360 m6-aq103dx's motherboard today.
Was du brauchst
-
-
Flip the laptop over to expose the underside.
-
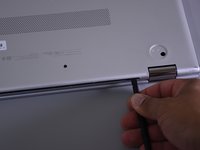
Remove the two grip pads with blue plastic opening tool by inserting the tool between the laptop and the pads and slowly lifting up.
-
-
-
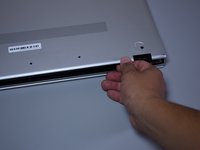
Remove the two 8 mm Phillips Head screws that were under the grip pads using a Phillip's Head 1 Screwdriver.
-
-
-
Use the nylon spudger to pop off the bottom cover by inserting it into the heat vent and twisting to the left or right.
The case is secured by plastic hooks at 1” intervals. Use the nylon spudger and the opening tool to lever around the rim of the case. Start at the edge of the heat vent and work around the rim. Each plastic fastener will make a popping noise as they release.
-
-
-
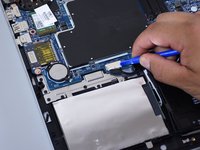
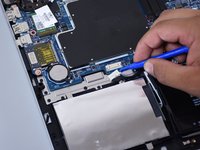
Disconnect the battery port from the motherboard by gently lifting it on both sides with the plastic opening tool.
-
Lift up the port with the tool.
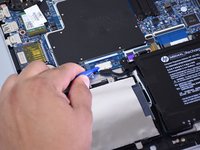
Backup battery is a CR2032 Lithium button cell. Might as well replace it while you’re in there…
would’ve never noticed it without your comment. David the real MVP with this comment.
-
-
-
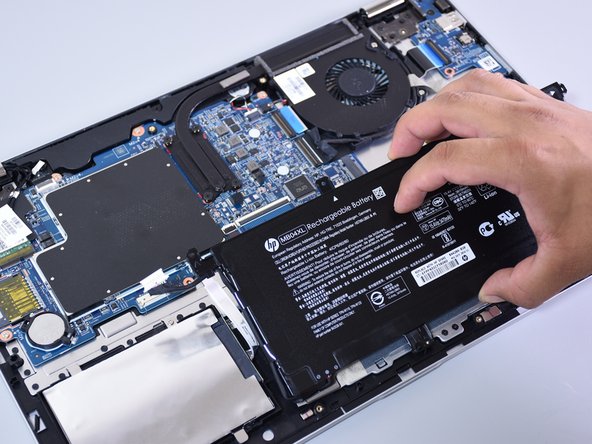
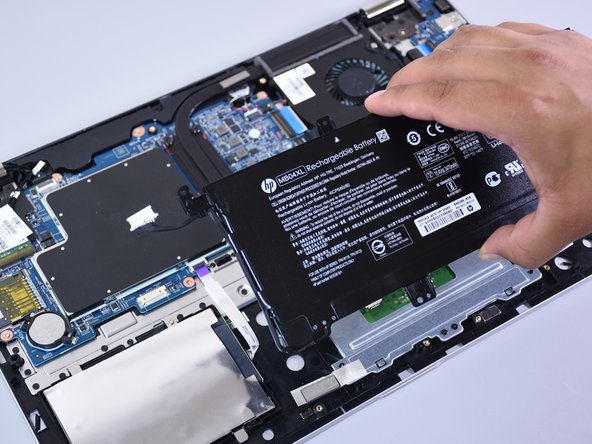
Lift the battery out of the laptop with your hands.
After the battery is replaced, snap the case back together. Work around the rim from the front edge toward the heat vent. Squeeze firmly and make sure each plastic catch is engaged. Use the nylon spudger as needed to make sure each catch is closed before replacing screws.
-
-
In diesem Schritt verwendetes Werkzeug:Anti-Static Wrist Strap$7.95
-
Make sure you are wearing an anti-static wrist strap.
-
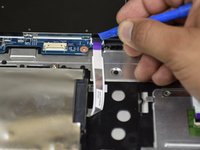
Remove the four screws from the blue board that contains the headphone jack using the Phillips head 1 screwdriver (one 4 mm black screw, one 3 mm black screw, and two 4.5 mm silver screws).
-
-
-
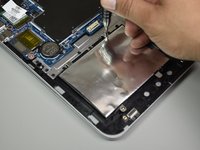
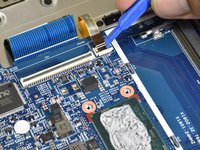
Insert the plastic opening tool underneath the connector on the black flexible flat cable with the blue plastic stripe.
-
Lift the opening tool to open the connector.
-
Use your fingers to slide the ribbon cable out of the connector.
-
-
-
-
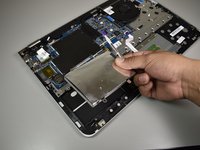
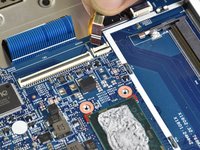
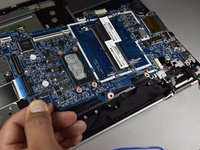
Hold the left side of the board between your fingers.
-
Lift the edge upwards enough to clear the other components in the way.
-
Slide and rotate to lift the board out of the designated slot for the board.
-
-
-
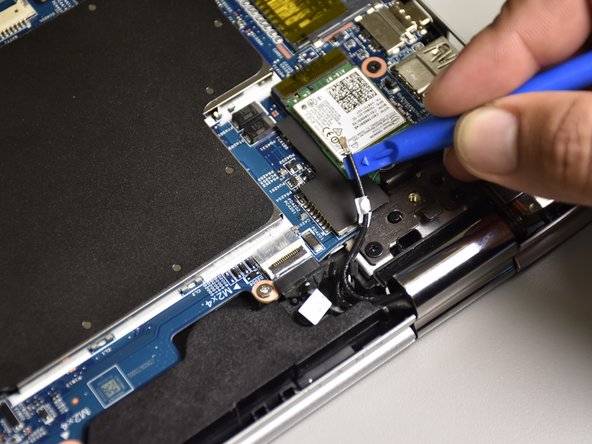
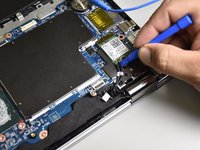
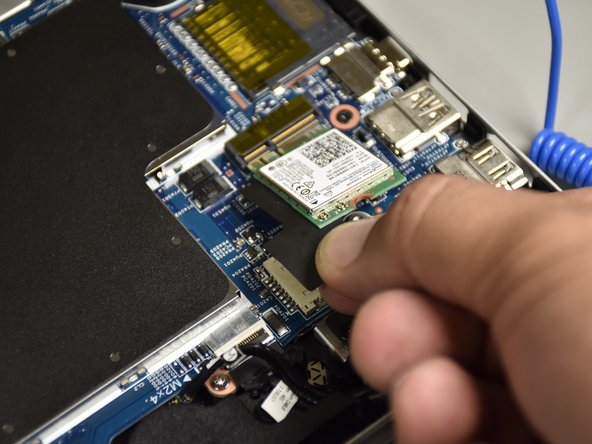
Remove the two antenna cables connected to the wireless module by wedging the small plastic opening tool between the cables and the wireless module and lifting up.
-
-
-
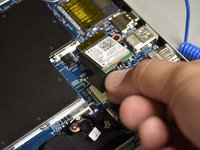
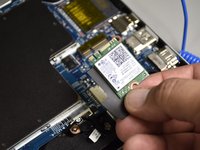
Slide the wireless module towards the back of the computer to remove it.
-
-
-
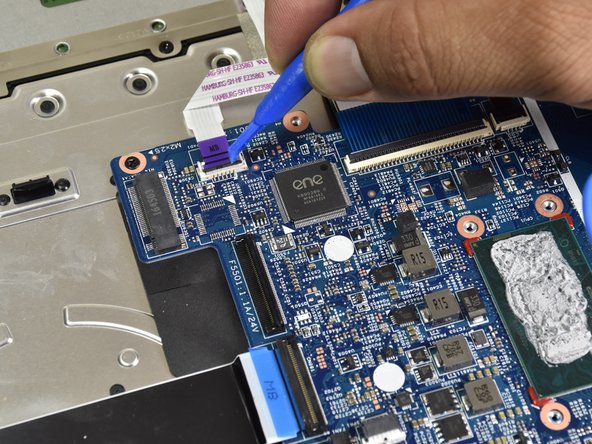
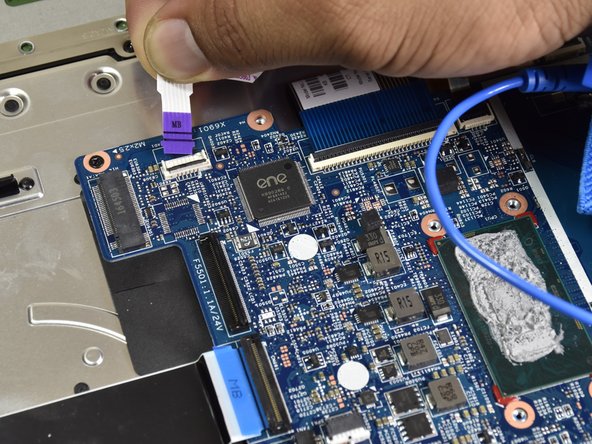
Disconnect the ribbon cable with the purple tag by flipping the black tab with the plastic opening tool.
-
Disconnect the ribbon cable by gently pulling it away from the connector with your fingers.
-
-
-
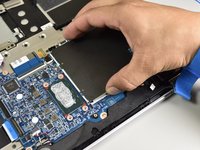
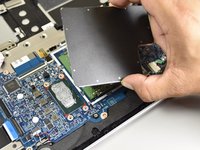
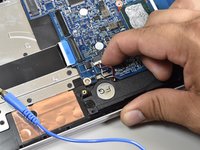
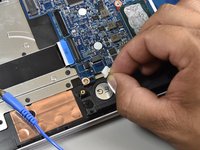
Remove the two Phillips head screws (5 mm) using the Phillip's head #1 screwdriver.
-
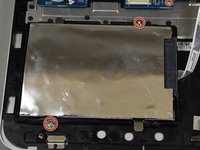
Use your hands to lift the hard drive up and remove it.
-
-
In diesem Schritt verwendetes Werkzeug:Anti-Static Wrist Strap$7.95
-
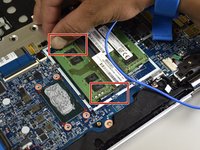
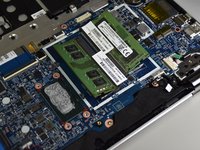
Remove the ram’s metal cover with your hand.
-
-
-
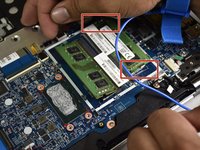
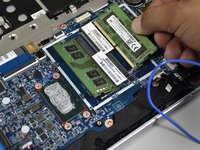
Pull the two outer pins on either side of the ram chip outward with your hands.
-
Do this for both chips.
-
-
-
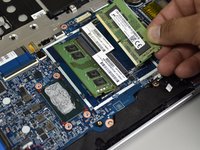
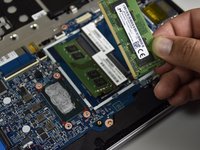
Remove the chips one at a time, by sliding them towards the side of the computer they are pointing towards.
-
-
-
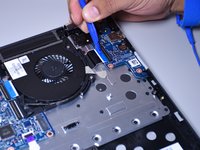
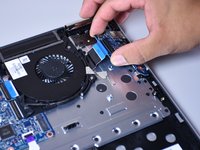
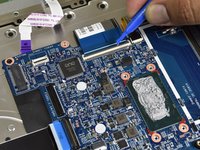
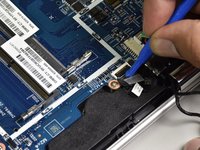
Use the small plastic opening tool to disconnect the port attached to the white ribbon cable with purple tips.
-
Press the tool to the top of the tip of the cable and pull it outwards.
-
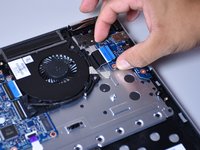
Press the tool to the side of the tip of the cable and slide it outwards.
-
Use your hand to lift the cable up and out of the way.
-
-
-
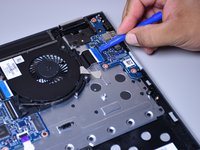
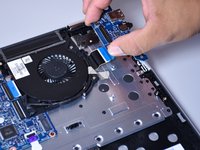
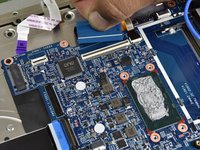
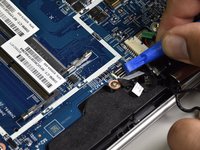
Use the small plastic opening tool to disconnect the port attached to the blue ribbon cable with a black stripe.
-
Press the tool to the top of the tip of the cable and pull it outwards.
-
Press the tool to the side of the tip of the cable and slide it outwards.
-
Use your hand to lift the cable up and out of the way.
-
-
-
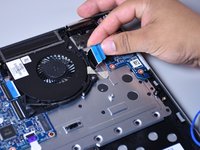
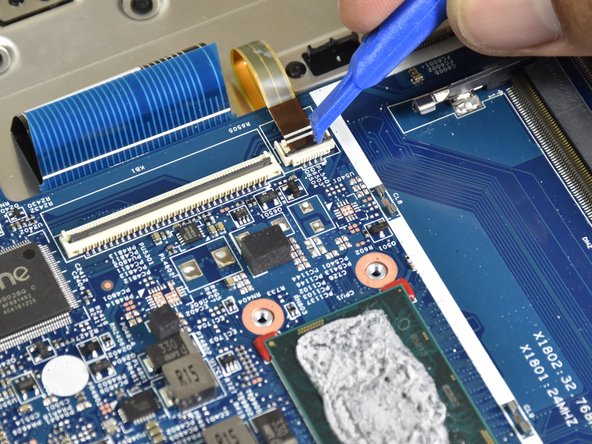
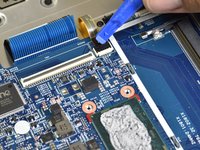
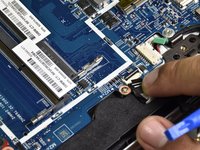
Use the small plastic opening tool to disconnect the port attached to the golden brown ribbon cable with the yellow underside.
-
Press the tool to the top of the tip of the cable and pull it outwards.
-
Press the tool to the side of the tip of the cable and slide it outwards.
-
Use your hand to lift the cable up and out of the way.
-
-
-
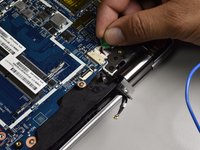
Remove the clear tape near the charging port with your hand in order to flip the tab up with the small plastic opening tool.
-
-
-
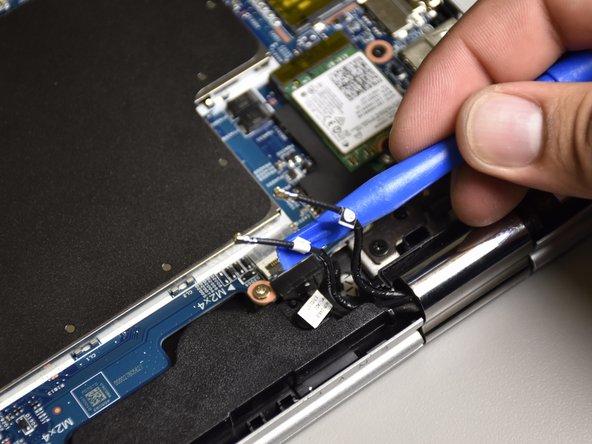
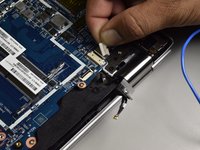
Remove the wire with the green plastic tape from between the motherboard and the black hinge using your hand by puling it backwards.
-
-
-
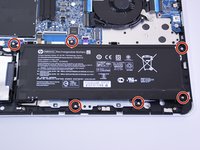
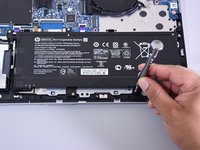
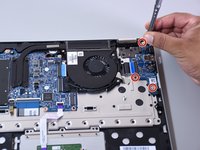
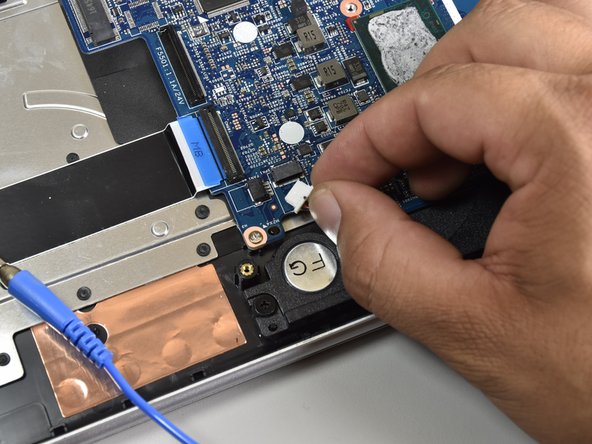
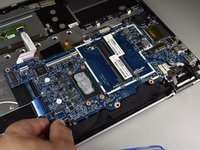
Using the Phillips head #1 screwdriver remove the five 4.5 mm grey screws.
-
Using the Phillips head #1 screwdriver remove the two 2.5 mm black screws.
-


To reassemble your device, follow these instructions in reverse order.
To reassemble your device, follow these instructions in reverse order.
Rückgängig: Ich habe diese Anleitung nicht absolviert.
6 weitere Personen haben diese Anleitung absolviert.

Team

Cal Poly, Team S4-G3, Livingston Fall 2017 Mitglied von Cal Poly, Team S4-G3, Livingston Fall 2017
CPSU-LIVINGSTON-F17S4G3
4 Mitglieder
9 Anleitungen geschrieben
4 Kommentare zur Anleitung
how to replace the keyboard?
need a solder gun?
What are the newer motherboards I can upgrade this laptop with ? please advise.