Zum Hauptinhalt wechseln

HP HDX 16-1160US DVD Drive Replacement

Was du brauchst

  1. HP HDX 16-1160US DVD Drive Replacement, Battery: Schritt 1, Bild 1 von 1
    • Turn the device over so that the bottom side is facing up and the battery is facing away from you.

  2. HP HDX 16-1160US DVD Drive Replacement: Schritt 2, Bild 1 von 3 HP HDX 16-1160US DVD Drive Replacement: Schritt 2, Bild 2 von 3 HP HDX 16-1160US DVD Drive Replacement: Schritt 2, Bild 3 von 3
    • Locate the slider under the right side of the battery.

    • Using your thumb, slide it all the way to the left until the front of the battery lifts up.

  3. HP HDX 16-1160US DVD Drive Replacement: Schritt 3, Bild 1 von 1
    • With your thumb still holding the slider to the left, use the opposite hand to lift the battery out, removing it from the computer.

  4. HP HDX 16-1160US DVD Drive Replacement, Keyboard: Schritt 4, Bild 1 von 1
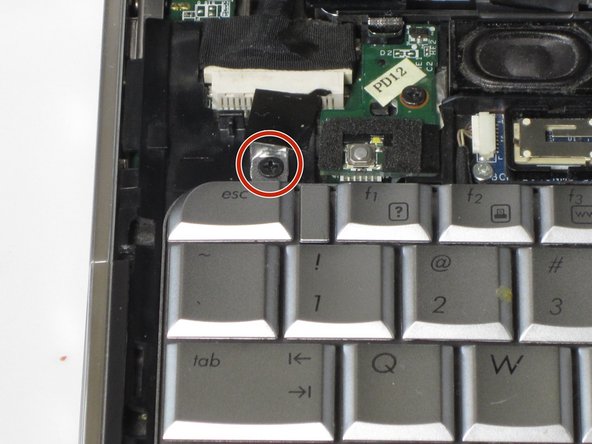
    • Remove the three 4mm screws using Phillips #1 screw driver.

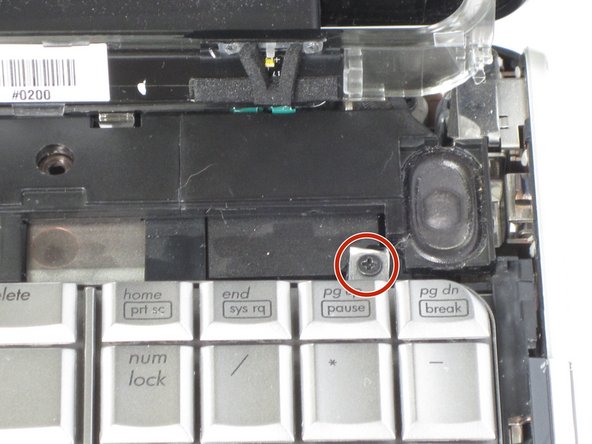
    • Remove the four 6mm screws using Phillips #1 screw driver.

    • Remove the two 3mm screws using Phillips #1 screw driver.

  5. HP HDX 16-1160US DVD Drive Replacement: Schritt 5, Bild 1 von 1
    • Using your fingers, pry off the speaker cover.

  6. HP HDX 16-1160US DVD Drive Replacement: Schritt 6, Bild 1 von 3 HP HDX 16-1160US DVD Drive Replacement: Schritt 6, Bild 2 von 3 HP HDX 16-1160US DVD Drive Replacement: Schritt 6, Bild 3 von 3
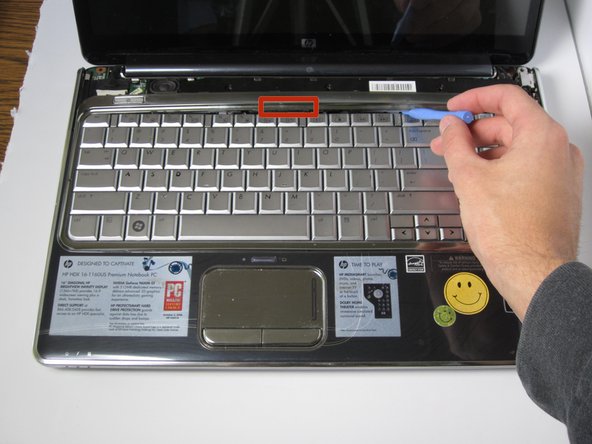
    • Use the plastic opener to pry up the chrome keyboard cover from the lab top itself. Carefully work around the edges by prying each snap individually.

    • Remove the chrome keyboard cover.

    • Be careful not to pull the chrome cover completely off because there is a black strip connecting it to the laptop itself.

  7. HP HDX 16-1160US DVD Drive Replacement: Schritt 7, Bild 1 von 3 HP HDX 16-1160US DVD Drive Replacement: Schritt 7, Bild 2 von 3 HP HDX 16-1160US DVD Drive Replacement: Schritt 7, Bild 3 von 3
    • Locate and remove the two 4mm screws with the Phillips #1 screw driver.

  8. HP HDX 16-1160US DVD Drive Replacement: Schritt 8, Bild 1 von 2 HP HDX 16-1160US DVD Drive Replacement: Schritt 8, Bild 2 von 2
    • Using your hands, pull the keyboard out.

    • Do not pull completely off because there is a grey strip connecting it to the laptop itself.

  9. HP HDX 16-1160US DVD Drive Replacement: Schritt 9, Bild 1 von 2 HP HDX 16-1160US DVD Drive Replacement: Schritt 9, Bild 2 von 2
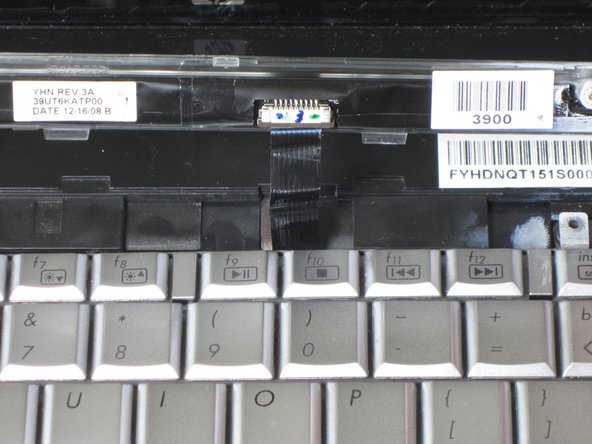
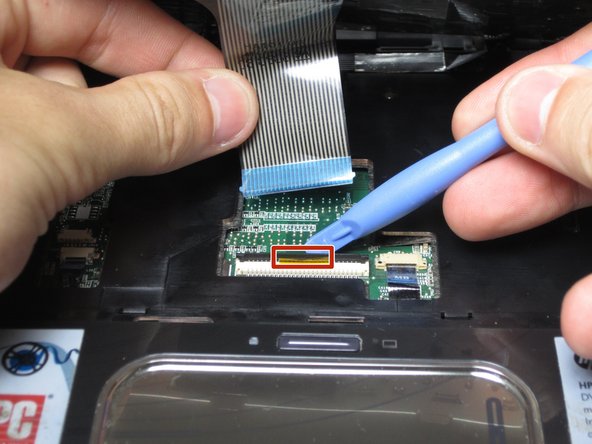
    • Lift the black tab using the plastic opening tool.

    • Gently pull the grey strip out, horizontally way from you. This will release the keyboard from the computer.

  10. HP HDX 16-1160US DVD Drive Replacement, DVD Drive: Schritt 10, Bild 1 von 1
    • Use the Phillips #1 Screw Driver to unscrew the 5mm screw.

  11. HP HDX 16-1160US DVD Drive Replacement: Schritt 11, Bild 1 von 1
    • Flip over the device so that the bottom side is facing up.

    • Use the Phillips #1 Screw Driver to unscrew the 7mm screw near the center of the device.

  12. HP HDX 16-1160US DVD Drive Replacement: Schritt 12, Bild 1 von 1
    • Push down and pull out the DVD on the left side of the device.

Abschluss

To reassemble your device, follow these instructions in reverse order.

3 weitere Nutzer:innen haben diese Anleitung absolviert.

Marshall Reid

Mitglied seit: 04/14/14

527 Reputation

3 Anleitungen geschrieben

Team

Cal Poly, Team 12-38, Maness Spring 2014 Mitglied von Cal Poly, Team 12-38, Maness Spring 2014

CPSU-MANESS-S14S12G38

4 Mitglieder

5 Anleitungen geschrieben

0 Kommentare

Kommentar hinzufügen

Seitenaufrufe:

Letzte 24 Stunden: 1

Letzte 7 Tage: 6

Letzte 30 Tage: 15

Insgesamt: 1,454