Zum Hauptinhalt wechseln

HP LaserJet P1102w Motherboard Replacement

Was du brauchst

  1. HP LaserJet P1102w Motherboard Replacement, Left Side Panel: Schritt 1, Bild 1 von 3 HP LaserJet P1102w Motherboard Replacement, Left Side Panel: Schritt 1, Bild 2 von 3 HP LaserJet P1102w Motherboard Replacement, Left Side Panel: Schritt 1, Bild 3 von 3
    • Flip printer on it's back. Using the plastic spudger, pry off front panel. There will be two main points to focus as shown.

    • Pry carefully to not break any plastic.

  2. HP LaserJet P1102w Motherboard Replacement: Schritt 2, Bild 1 von 2 HP LaserJet P1102w Motherboard Replacement: Schritt 2, Bild 2 von 2
    • Now that the pry points are free lift up the front panel.

  3. HP LaserJet P1102w Motherboard Replacement: Schritt 3, Bild 1 von 2 HP LaserJet P1102w Motherboard Replacement: Schritt 3, Bild 2 von 2
    • Unscrew the #1 Phillips screw 6mm on the back of the printer.

  4. HP LaserJet P1102w Motherboard Replacement: Schritt 4, Bild 1 von 3 HP LaserJet P1102w Motherboard Replacement: Schritt 4, Bild 2 von 3 HP LaserJet P1102w Motherboard Replacement: Schritt 4, Bild 3 von 3
    • Using the plastic spudger, remove the button housing from the top left of printer.

    • Pry carefully to not break any plastic.

  5. HP LaserJet P1102w Motherboard Replacement: Schritt 5, Bild 1 von 2 HP LaserJet P1102w Motherboard Replacement: Schritt 5, Bild 2 von 2
    • Once the housing is removed, remove the three buttons.

  6. HP LaserJet P1102w Motherboard Replacement: Schritt 6, Bild 1 von 3 HP LaserJet P1102w Motherboard Replacement: Schritt 6, Bild 2 von 3 HP LaserJet P1102w Motherboard Replacement: Schritt 6, Bild 3 von 3
    • Use the plastic spudger to remove the side panel. There are three main prying points as shown.

    • Pry carefully to not break any plastic.

  7. HP LaserJet P1102w Motherboard Replacement: Schritt 7, Bild 1 von 2 HP LaserJet P1102w Motherboard Replacement: Schritt 7, Bild 2 von 2
    • With all pry points free, remove the side panel.

  8. HP LaserJet P1102w Motherboard Replacement, Motherboard: Schritt 8, Bild 1 von 3 HP LaserJet P1102w Motherboard Replacement, Motherboard: Schritt 8, Bild 2 von 3 HP LaserJet P1102w Motherboard Replacement, Motherboard: Schritt 8, Bild 3 von 3
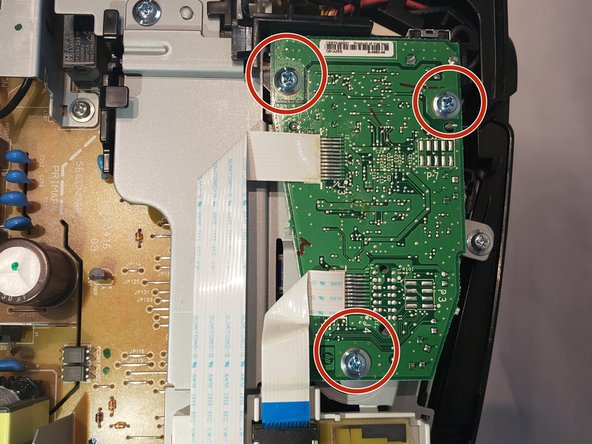
    • Remove three #1 Phillips 6mm screws with the #1 Phillips screwdriver.

  9. HP LaserJet P1102w Motherboard Replacement: Schritt 9, Bild 1 von 3 HP LaserJet P1102w Motherboard Replacement: Schritt 9, Bild 2 von 3 HP LaserJet P1102w Motherboard Replacement: Schritt 9, Bild 3 von 3
    In diesem Schritt verwendetes Werkzeug:
    Tweezers
    $4.99
    Kaufen
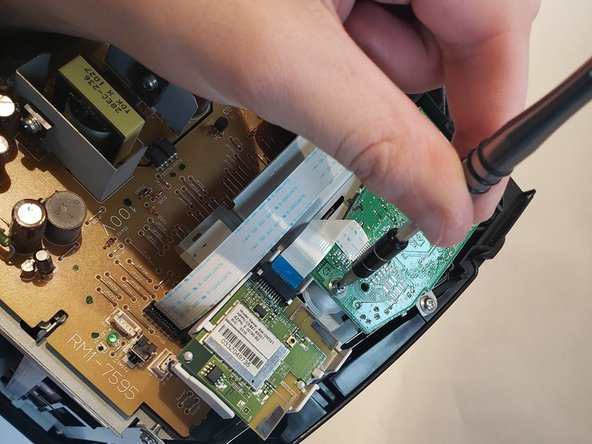
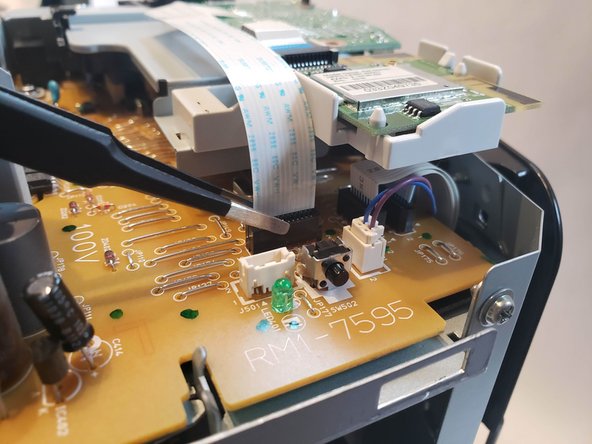
    • Using a pair of blunt nose tweezers, disconnect both ribbon wires.

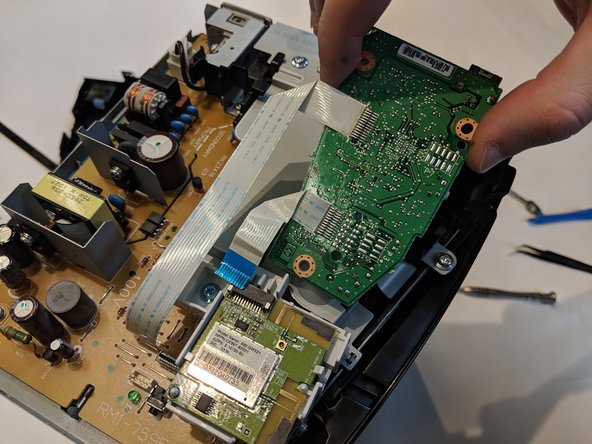
    • With both ribbon wires removed we can lift the motherboard out of its housing.

    • There is a little black notch holding the motherboard down by the thumb in the final picture.

    • Be careful pulling, as ribbon wires are very fragile.

Abschluss

To reassemble your device, follow these instructions in reverse order.

4 weitere Nutzer:innen haben diese Anleitung absolviert.

Jerome Etten

Mitglied seit: 10/04/18

709 Reputation

4 Anleitungen geschrieben

Team

UW Stout, Team S6-G4, Ogden Fall 2018 Mitglied von UW Stout, Team S6-G4, Ogden Fall 2018

UWSTOUT-OGDEN-F18S6G4

4 Mitglieder

10 Anleitungen geschrieben

0 Kommentare

Kommentar hinzufügen

Seitenaufrufe:

Letzte 24 Stunden: 2

Letzte 7 Tage: 8

Letzte 30 Tage: 47

Insgesamt: 1,869