Zum Hauptinhalt wechseln

HP Mini 1000 WWAN Board Replacement

Grundständige Anleitung
Dies ist eine grundständige Anleitung, die nur als Teil einer anderen Anleitung verwendet werden sollte.

Was du brauchst

  1. HP Mini 1000 WWAN Board Replacement, WWAN Board: Schritt 1, Bild 1 von 1
    • If present, carefully peel the piece of tape covering the WWAN board.

  2. HP Mini 1000 WWAN Board Replacement: Schritt 2, Bild 1 von 2 HP Mini 1000 WWAN Board Replacement: Schritt 2, Bild 2 von 2
    • Pry the WWAN antenna connectors (2 total) up off the WWAN board.

    • During reassembly, remember to correctly connect the antenna cables to their respective terminals. The red labeled antenna is connected to the "MAIN" terminal and the blue labeled antenna is connected to the "AUX" terminal.

  3. HP Mini 1000 WWAN Board Replacement: Schritt 3, Bild 1 von 3 HP Mini 1000 WWAN Board Replacement: Schritt 3, Bild 2 von 3 HP Mini 1000 WWAN Board Replacement: Schritt 3, Bild 3 von 3
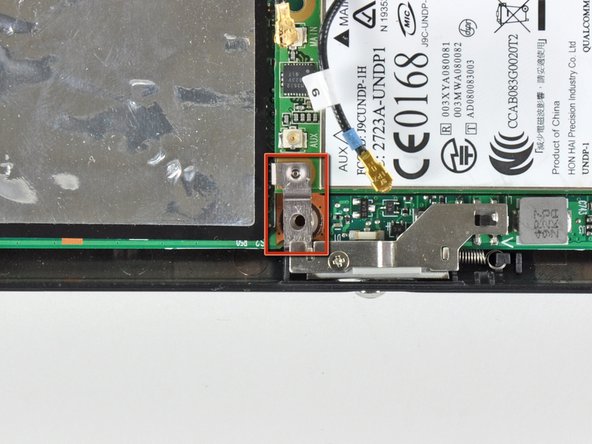
    • Remove the single 3 mm Phillips screw securing the WWAN metal bracket and WWAN board to the motherboard.

    • During reassembly, before securing the WWAN board to the upper case, be sure the metal bracket is correctly placed (as highlighted in the second picture).

    • Be cautious of the metal bracket's displacement. It can easily become lost during disassembly.

  4. HP Mini 1000 WWAN Board Replacement: Schritt 4, Bild 1 von 2 HP Mini 1000 WWAN Board Replacement: Schritt 4, Bild 2 von 2
    • Upon removing the Phillips screw that secures the WWAN board to the motherboard, the WWAN board should pop up from its left side.

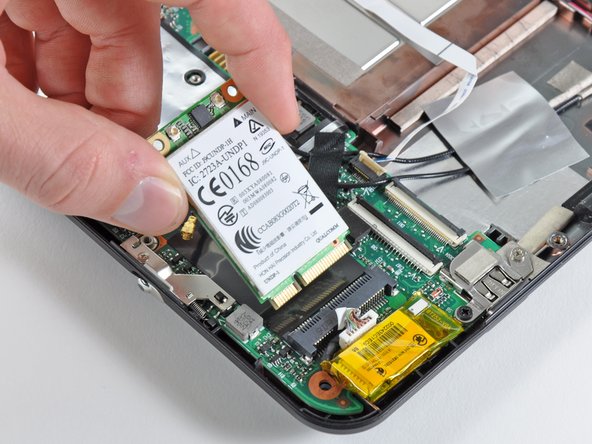
    • Grasp the WWAN board and pull it straight out of its socket on the motherboard.

Abschluss

To reassemble your device, follow these instructions in reverse order.

0 Kommentare

Kommentar hinzufügen

Seitenaufrufe:

Letzte 24 Stunden: 0

Letzte 7 Tage: 8

Letzte 30 Tage: 8

Insgesamt: 56