Einleitung
Sometimes the motherboard on the HP Officejet Pro 8600 Plus goes bad. This guide will explain how to replace the motherboard component.
Was du brauchst
-
-
Turn the printer so the back is facing you.
-
Put the printer in a vertical position by lifting its right side.
-
-
-
-
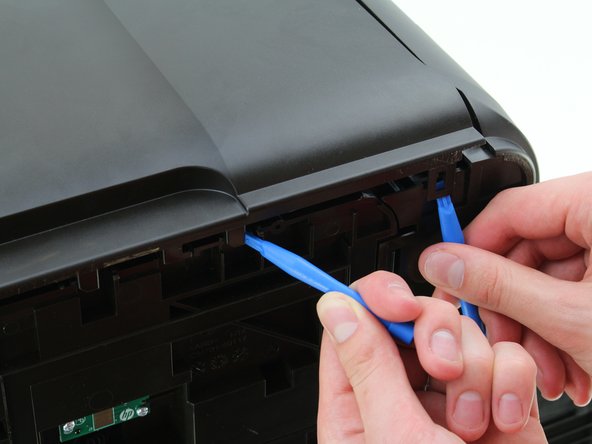
Insert the plastic opening tool underneath the slot on the right that aligns with the edge of the back panel.
-
Insert a second plastic opening tool in the notch lining up with the crease in the back panel.
-
-
-
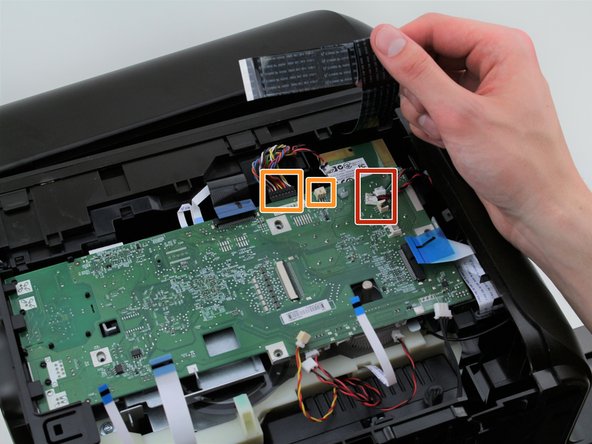
Remove the black brace from the right side of the motherboard, located near the black ribbon cable.
-
-
-
Remove the cables connected to the top of the motherboard by gently pulling them out of their ports.
-
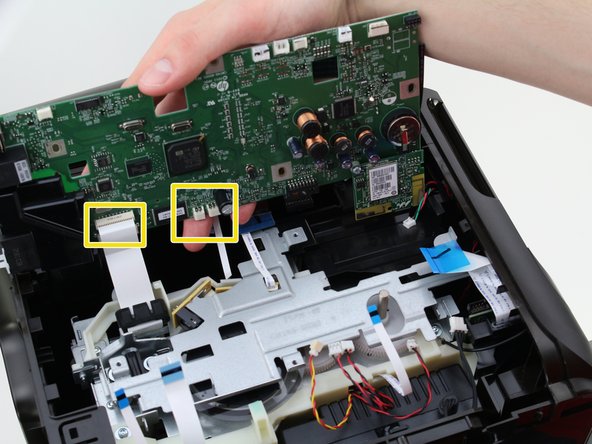
Remove the cables connected to the edge of the motherboard by gently pulling them out of their ports.
-
Remove the cables connected to the underside of the motherboard by gently pulling them out of their ports.
-


To reassemble your device, follow these instructions in reverse order.
To reassemble your device, follow these instructions in reverse order.
Rückgängig: Ich habe diese Anleitung nicht absolviert.
6 weitere Personen haben diese Anleitung absolviert.

Team

Cal Poly, Team S16-G4, Livingston Spring 2018 Mitglied von Cal Poly, Team S16-G4, Livingston Spring 2018
CPSU-LIVINGSTON-S18S16G4
4 Mitglieder
10 Anleitungen geschrieben
2 Kommentare
Hi,
Was having trouble with wifi connectivity. Printer says it is connected but can’t get to on the network. Shows IP address and all looks good from printer side but can’t find printer on network even with the assigned IP address. I replaced the mother board as shown above but still the same problem. Any ideas on what the problem may be? Every other device on network works fine but this HP printer. Phones, Chrome books, laptops, i-Pads… Any help would be appreciated.
Last note - There was a small circuit board attached to the mother board. I removed from the old MB and put on new MB. Could this be wireless card and if so any source for a new one. Only place I could find MB was on NewEgg.
THANKS!!
Oh, and BTW - instruction for MB removal were excellent!!
Are there any procedures required after either battery replacement or motherboard replacement? Re-loading of firmware, initialization, etc. Does the printer's serial number change as a result of battery replacement or motherboard replacement?