Diese Version enthält möglicherweise inkorrekte Änderungen. Wechsle zur letzten geprüften Version.
Was du brauchst
-
Dieser Schritt ist noch nicht übersetzt. Hilf mit, ihn zu übersetzen!
-
Use the nylon spudger to remove the rubber pads near the hinge of the screen, then remove the screws under the pads.
-
Use the Phillips #0 to remove four 9mm screws.
-
Use the Phillips #0 to remove seven 6mm screws.
-
-
Dieser Schritt ist noch nicht übersetzt. Hilf mit, ihn zu übersetzen!
-
Use the nylon spudger to pry the back casing near the hinges for the screen.
-
Continue to pry along the edge of the back case until the back is ready to be removed.
-
-
Dieser Schritt ist noch nicht übersetzt. Hilf mit, ihn zu übersetzen!
-
Use the blue plastic opening tool to lift up on the white tab that is holding the cable in place on the motherboard.
-
Now carefully pull the cable out of place and remove the entire back casing.
-
-
-
Dieser Schritt ist noch nicht übersetzt. Hilf mit, ihn zu übersetzen!
-
Remove the five 6mm screws that hold the battery in place using the Phillips #0.
-
-
Dieser Schritt ist noch nicht übersetzt. Hilf mit, ihn zu übersetzen!
-
Use the nylon spudger to pry away the blue/white wire that is positioned near your battery.
-
-
Dieser Schritt ist noch nicht übersetzt. Hilf mit, ihn zu übersetzen!
-
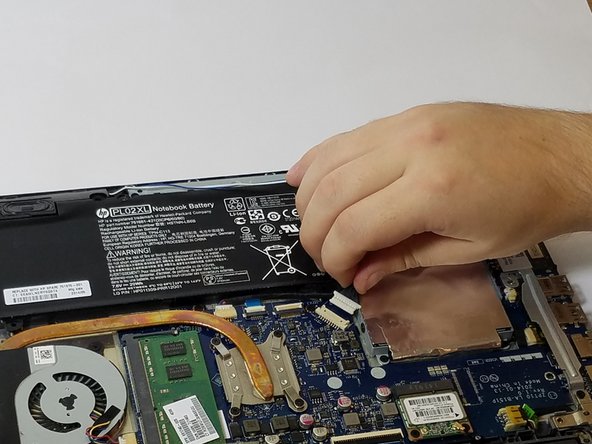
Disconnect the battery cable from the motherboard by carefully pulling on the black wire at the point closest to the white tab.
-
-
Dieser Schritt ist noch nicht übersetzt. Hilf mit, ihn zu übersetzen!
-
Remove the battery from your device.
-
-
Dieser Schritt ist noch nicht übersetzt. Hilf mit, ihn zu übersetzen!
-
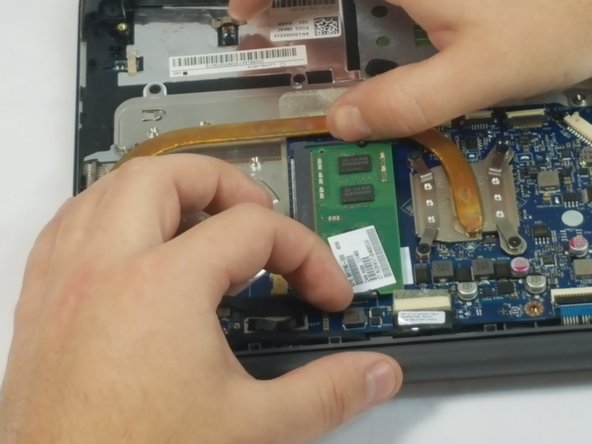
Using your fingernails, pull the tabs on either side of the RAM to release the module from its secured spot.
-
-
Dieser Schritt ist noch nicht übersetzt. Hilf mit, ihn zu übersetzen!
-
Carefully grab and pull to remove the RAM from your device.
-


Rückgängig: Ich habe diese Anleitung nicht absolviert.
Ein:e weitere:r Nutzer:in hat diese Anleitung absolviert.
Team

USF Tampa, Team 11-5, Blackwell Fall 2016 Mitglied von USF Tampa, Team 11-5, Blackwell Fall 2016
USFT-BLACKWELL-F16S11G5
3 Mitglieder
5 Anleitungen geschrieben