Einleitung
Don’t feel like you need to purchase a new computer to upgrade to a better system!
This is a step-by-step guide on how to remove and replace a wireless card for the HP Pavilion laptop. Whether you are experiencing hardware failure, issues with connectivity, or just need to upgrade to a better card, this simple guide will help you quickly and safely replace and install a new card to your device.
To begin this project, we recommend that you find a clean, dry, and flat surface to work on. Before you start this project, you will need to power down the device completely.
Note: the images presented show a before and after picture for each individual step to help you keep track of your progress.
Was du brauchst
-
-
Flip the laptop upside down so that the bottom is facing you.
-
Push the slide on the right toward the center of the laptop, releasing the battery latch.
-
Lift the battery up and away from the laptop.
-
-
-
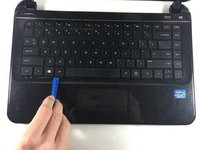
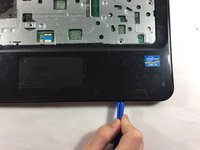
Insert the plastic opening tool between the keyboard and the palm rest.
-
Pry upwards until the keyboard section detaches from the laptop.
-
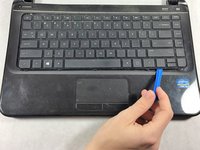
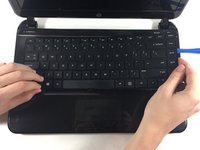
Repeat this around the edge of the entire keyboard.
-
-
-
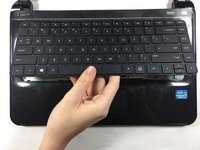
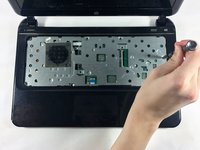
Lift the keyboard slowly up until the connecting cable is exposed.
-
Carefully lift the flap on the ZIF connector using a fingernail or plastic opening tool. This will release the cable.
-
Detach the cable.
-
-
-
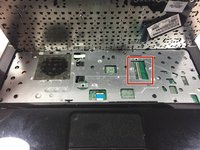
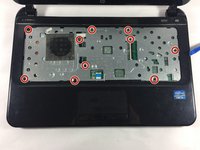
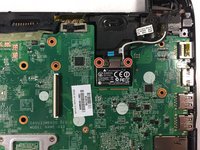
Unscrew the 10 6.0 mm screws under the keyboard housing with a Philips #0 head screwdriver.
-
-
-
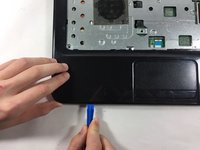
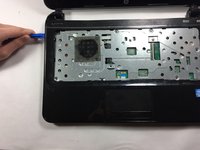
Insert the plastic opening tool into the seam between the palm rest and the laptop.
-
Pry upwards until the palm rest separates from the laptop.
-
Repeat this process around the entire computer.
-
-
-
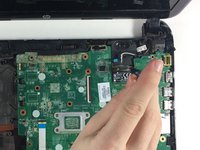
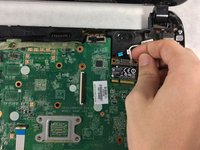
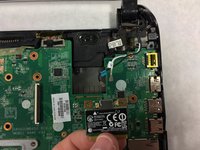
Remove the two 4.0 mm screws using a Philips #00 head screwdriver.
-


To reassemble your device, follow these instructions in reverse order.
To reassemble your device, follow these instructions in reverse order.
Rückgängig: Ich habe diese Anleitung nicht absolviert.
Eine weitere Person hat diese Anleitung absolviert.
Team

UMass Dartmouth, Team 4-4, Catania Fall 2016 Mitglied von UMass Dartmouth, Team 4-4, Catania Fall 2016
UMASSD-CATANIA-F16S4G4
3 Mitglieder
6 Anleitungen geschrieben