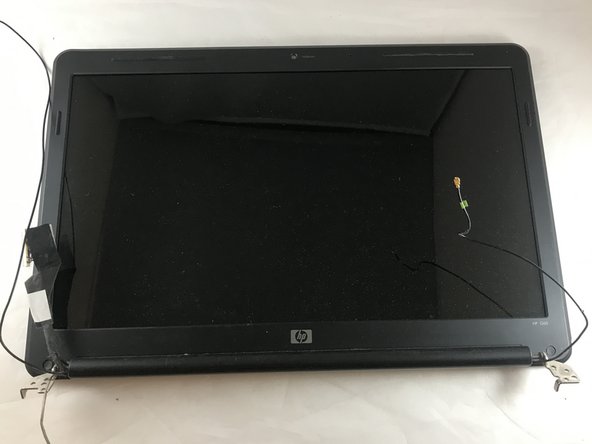
Zum Hauptinhalt wechseln

HP Pavilion G60-630US Screen Replacement

Was du brauchst

  1. HP Pavilion G60-630US Screen Replacement, Battery: Schritt 1, Bild 1 von 3 HP Pavilion G60-630US Screen Replacement, Battery: Schritt 1, Bild 2 von 3 HP Pavilion G60-630US Screen Replacement, Battery: Schritt 1, Bild 3 von 3
    • Make sure the laptop is powered off and unplugged first.

    • Turn your laptop over so the bottom is facing up.

    • Locate the battery latch and slide the latch switch all the way to the left.

    • The latch will lock and stay in place.

  2. HP Pavilion G60-630US Screen Replacement: Schritt 2, Bild 1 von 3 HP Pavilion G60-630US Screen Replacement: Schritt 2, Bild 2 von 3 HP Pavilion G60-630US Screen Replacement: Schritt 2, Bild 3 von 3
    • Carefully lift the battery out and away from the laptop.

  3. HP Pavilion G60-630US Screen Replacement, Power Button: Schritt 3, Bild 1 von 3 HP Pavilion G60-630US Screen Replacement, Power Button: Schritt 3, Bild 2 von 3 HP Pavilion G60-630US Screen Replacement, Power Button: Schritt 3, Bild 3 von 3
    • Open the laptop normally.

    • Using your fingers (or a spudger if needed), loosen the silver cover surrounding the keyboard.

    • You will not be able to fully remove the keyboard/silver border all the way until the next step.

  4. HP Pavilion G60-630US Screen Replacement: Schritt 4, Bild 1 von 3 HP Pavilion G60-630US Screen Replacement: Schritt 4, Bild 2 von 3 HP Pavilion G60-630US Screen Replacement: Schritt 4, Bild 3 von 3
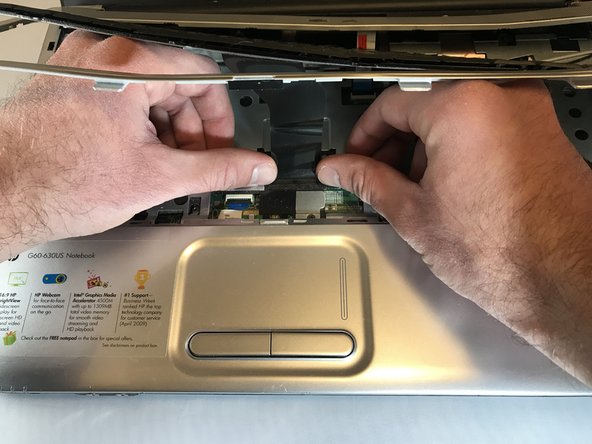
    • Carefully place your hands underneath the now loosened keyboard and locate the ribbon keeping the keyboard connected to the laptop.

    • Locate the tabs keeping the ribbon in place.

    • Gently push the tabs inward to release the ribbon and to detach the keyboard.

    • Carefully remove the keyboard and place it off to the side.

    • The silver border and the power button will still be connected by a different ribbon.

  5. HP Pavilion G60-630US Screen Replacement: Schritt 5, Bild 1 von 3 HP Pavilion G60-630US Screen Replacement: Schritt 5, Bild 2 von 3 HP Pavilion G60-630US Screen Replacement: Schritt 5, Bild 3 von 3
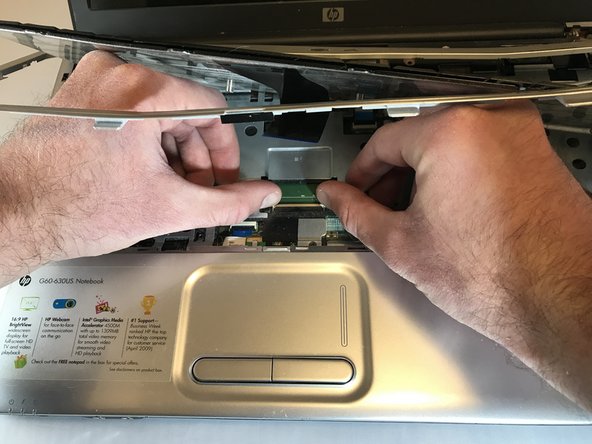
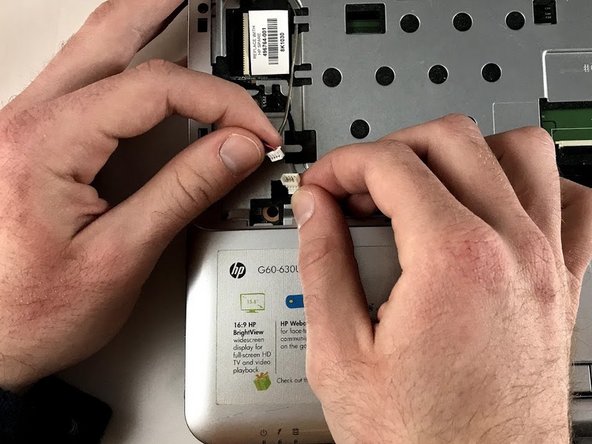
    • Locate the ribbon keeping the power button attached to the laptop.

    • Push the tab attaching the ribbon to the laptop to detach the silver border and the power button.

  6. HP Pavilion G60-630US Screen Replacement: Schritt 6, Bild 1 von 3 HP Pavilion G60-630US Screen Replacement: Schritt 6, Bild 2 von 3 HP Pavilion G60-630US Screen Replacement: Schritt 6, Bild 3 von 3
    • If you are looking at this in the HP Pavilion G60-630US Screen Replacement Guide, ignore this step

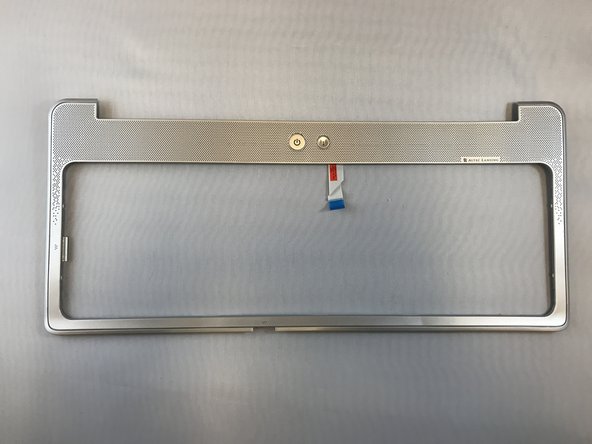
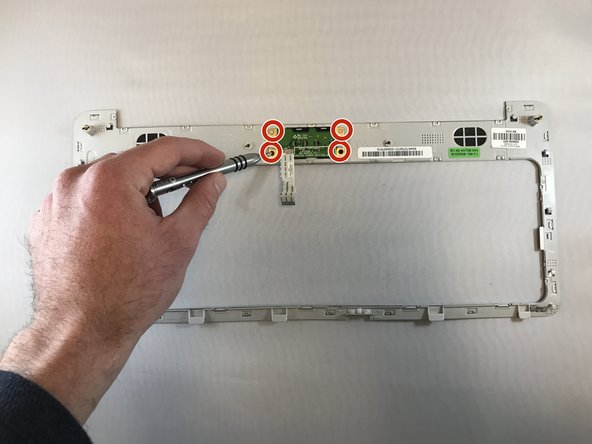
    • Flip the silver border over to expose the underside of the power bar.

    • Unscrew the 4 screws keeping the power bar in place. Place the screws off the the side.

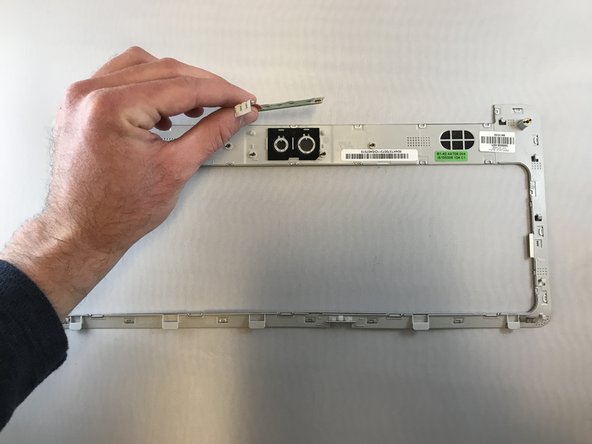
    • Carefully remove the power bar.

  7. HP Pavilion G60-630US Screen Replacement, Screen: Schritt 7, Bild 1 von 3 HP Pavilion G60-630US Screen Replacement, Screen: Schritt 7, Bild 2 von 3 HP Pavilion G60-630US Screen Replacement, Screen: Schritt 7, Bild 3 von 3
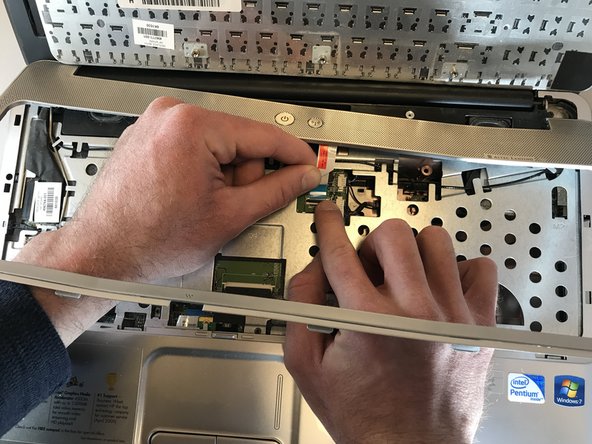
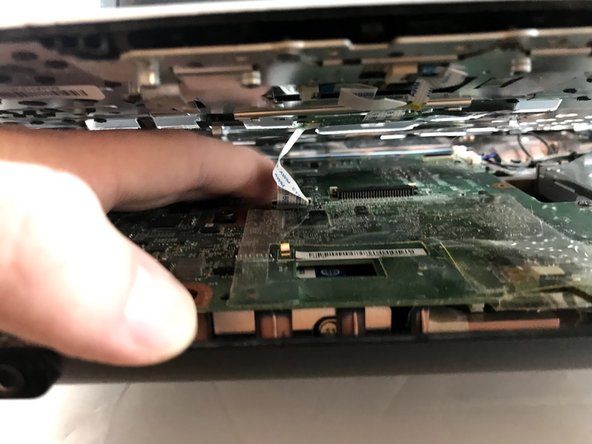
    • Locate the serial cable, this piece will look like a black ribbon.

    • Gently pull the cable connector to unplug.

  8. HP Pavilion G60-630US Screen Replacement: Schritt 8, Bild 1 von 2 HP Pavilion G60-630US Screen Replacement: Schritt 8, Bild 2 von 2
    • Unplug smaller attachment cable towards the bottom right part of the laptop

    • Make sure you are extremely gentle when pulling these two pieces apart.

  9. HP Pavilion G60-630US Screen Replacement: Schritt 9, Bild 1 von 3 HP Pavilion G60-630US Screen Replacement: Schritt 9, Bild 2 von 3 HP Pavilion G60-630US Screen Replacement: Schritt 9, Bild 3 von 3
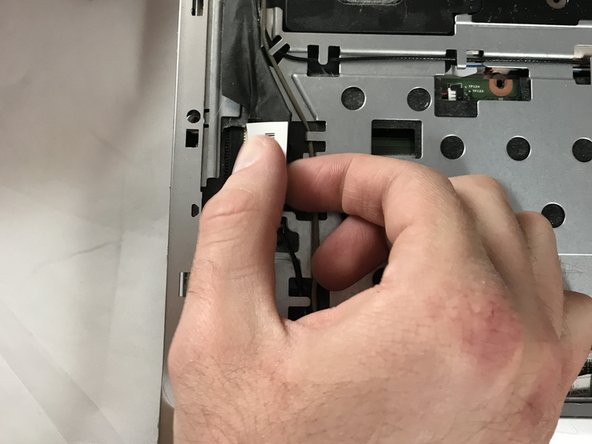
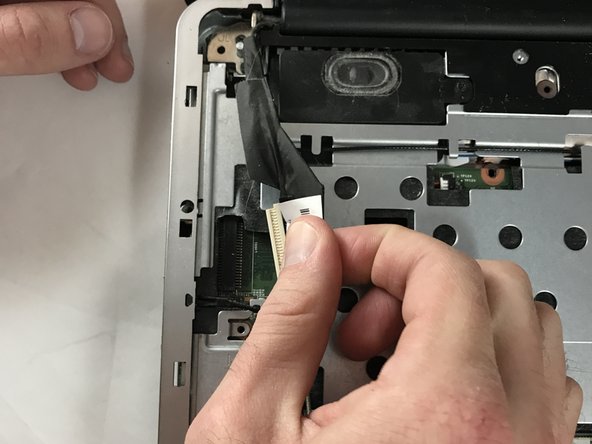
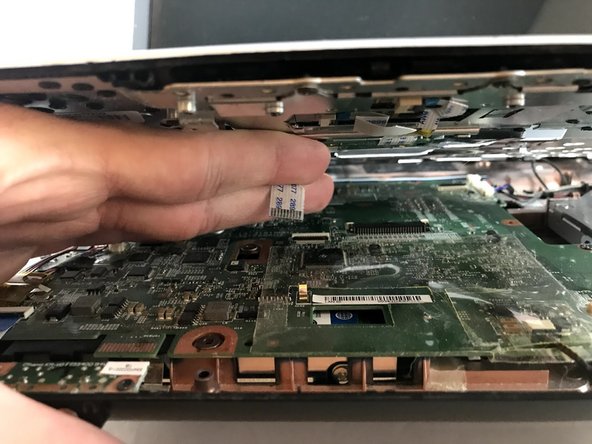
    • Slightly lift up the top metal cover, underneath locate another smaller serial cable.

    • This will look like a white ribbon.

    • Gently, pull this smaller cable towards you and it should disconnect.

  10. HP Pavilion G60-630US Screen Replacement: Schritt 10, Bild 1 von 2 HP Pavilion G60-630US Screen Replacement: Schritt 10, Bild 2 von 2
    • There are two screws in each top corner that need to be removed, in order to properly separate the screen. These screws are 4mm in length.

    • Unscrew these four screws to easily separate the screen from the bottom half of the laptop

  11. HP Pavilion G60-630US Screen Replacement: Schritt 11, Bild 1 von 2 HP Pavilion G60-630US Screen Replacement: Schritt 11, Bild 2 von 2
    • Gently separate the whole screen by lifting the screen away from the laptop's base.

    • The screen should separate easily with little force. If some cables are still connected gently pull them away from the rest of the laptop.

  12. HP Pavilion G60-630US Screen Replacement: Schritt 12, Bild 1 von 3 HP Pavilion G60-630US Screen Replacement: Schritt 12, Bild 2 von 3 HP Pavilion G60-630US Screen Replacement: Schritt 12, Bild 3 von 3
    • In order to be able to unplug the cables that connect the screen to the motherboard, we will need to remove the metal support.

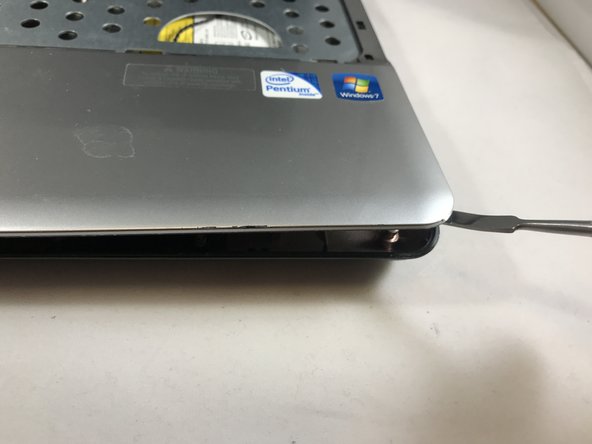
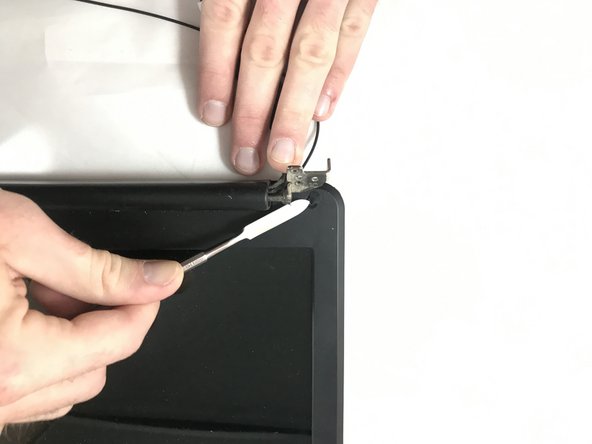
    • You will need a spudger to perform this step.

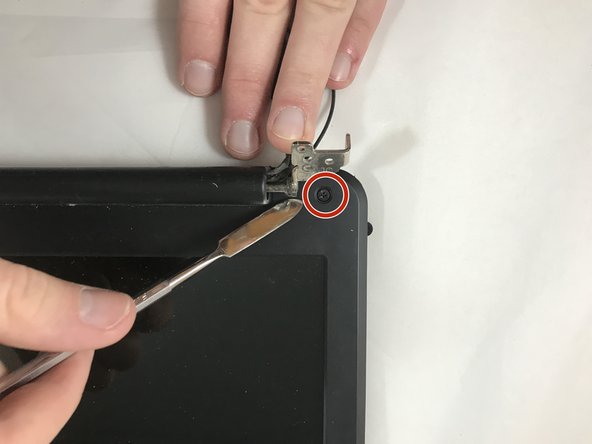
    • Separate the metal support, starting from the edges. This task is demonstrated in the second picture.

    • Once the metal support pops out, use you hands to finish the separation process.

  13. HP Pavilion G60-630US Screen Replacement: Schritt 13, Bild 1 von 3 HP Pavilion G60-630US Screen Replacement: Schritt 13, Bild 2 von 3 HP Pavilion G60-630US Screen Replacement: Schritt 13, Bild 3 von 3
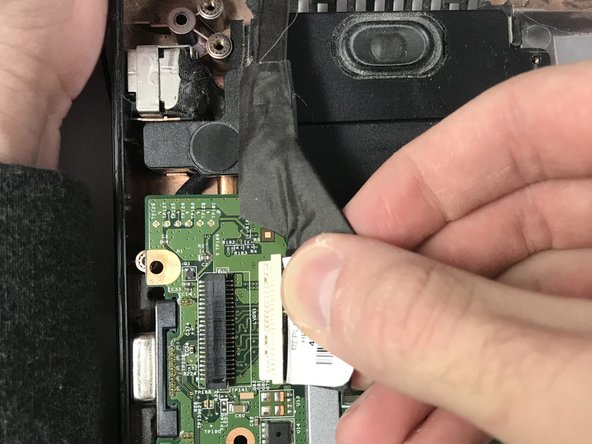
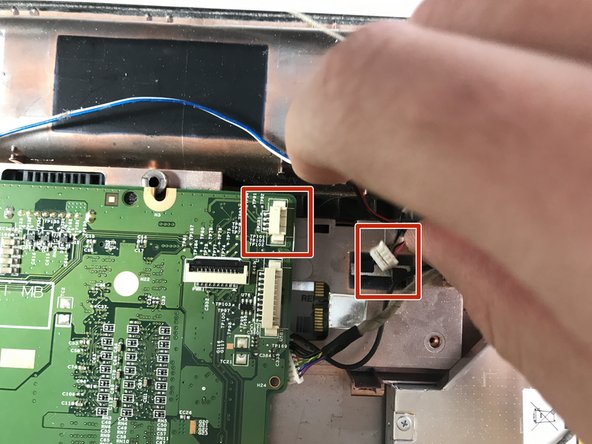
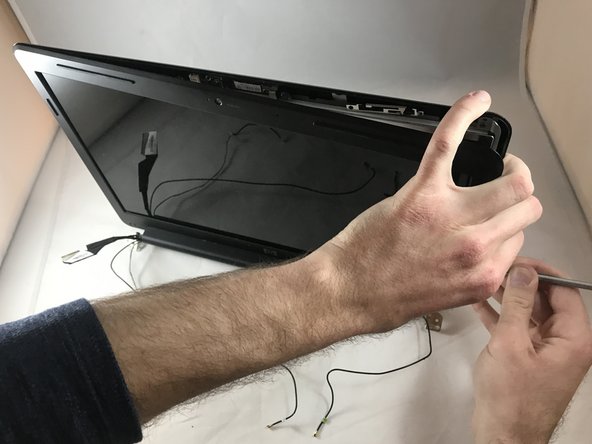
    • Unplug the cables that connect the screen to the motherboard.

    • Figure two and three show the cables already unplugged.

    • On figure three, the red marks show the socket of the cable, and the plug-in part of the cable.

  14. HP Pavilion G60-630US Screen Replacement: Schritt 14, Bild 1 von 3 HP Pavilion G60-630US Screen Replacement: Schritt 14, Bild 2 von 3 HP Pavilion G60-630US Screen Replacement: Schritt 14, Bild 3 von 3
    • Next remove the rubber casing that surrounds the outside of the screen.

    • To do this you will want to use the metal spudger

    • Once the rubber casing is removed locate the screws that connect the rest of the screen to the backside of the case. The screws are located on the bottom corners of the laptop.

    • Unscrew the two screws from the casing so nothing is holding it down. These screws are 3mm in length.

  15. HP Pavilion G60-630US Screen Replacement: Schritt 15, Bild 1 von 2 HP Pavilion G60-630US Screen Replacement: Schritt 15, Bild 2 von 2
    • Using the metal spudger, wedge out the screen corners in order to pop out the screen.

  16. HP Pavilion G60-630US Screen Replacement: Schritt 16, Bild 1 von 3 HP Pavilion G60-630US Screen Replacement: Schritt 16, Bild 2 von 3 HP Pavilion G60-630US Screen Replacement: Schritt 16, Bild 3 von 3
    • Now that the front part of the case has been removed there should be four screws at the bottom corners (two in each corner) and two on the top left and right corners. These screws are connecting the screen to the back of its case.

    • Unscrew all 6 screws as so that the screen can be taken out of the case. These screws are 3mm in length.

    • There is also a cord that runs through the case. Make sure that is removed safely without damaging the cord.

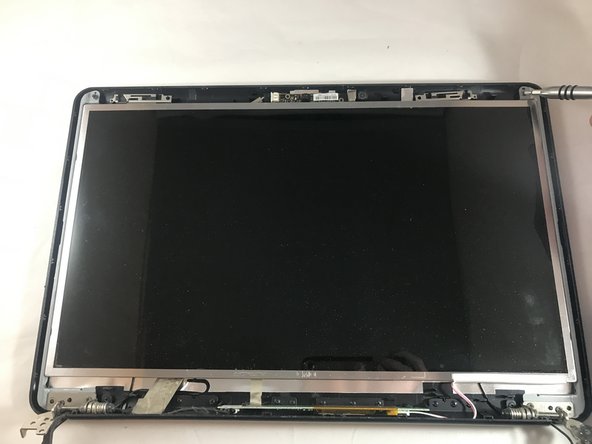
    • The screen should be able to be fully separated from the case.

  17. HP Pavilion G60-630US Screen Replacement: Schritt 17, Bild 1 von 2 HP Pavilion G60-630US Screen Replacement: Schritt 17, Bild 2 von 2
    • You will now have to disconnect all of the power/connection cables. Make sure that you safely hold the screen before start performing the following steps.

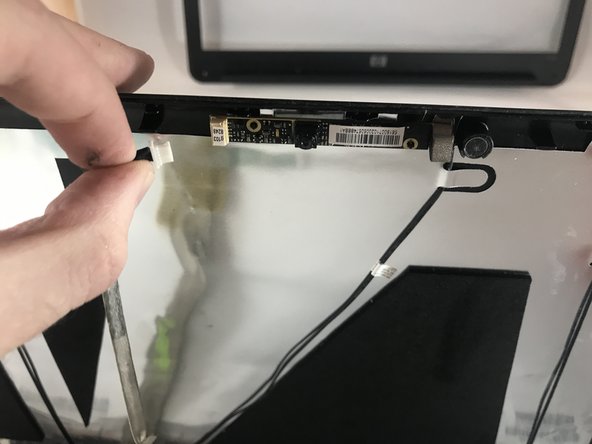
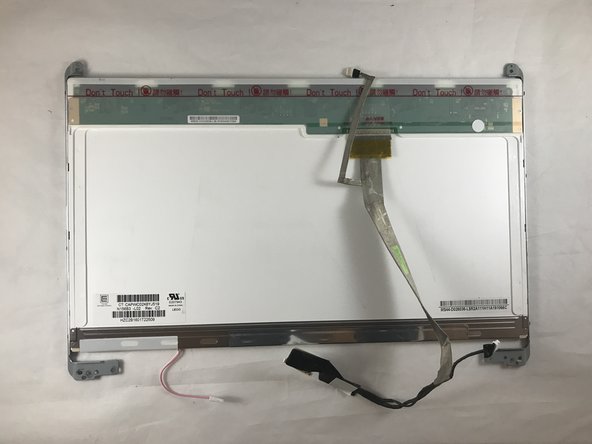
    • Carefully unplug the power cable on the top of the screen frame. This cable is located close to where the webcam is.

  18. HP Pavilion G60-630US Screen Replacement: Schritt 18, Bild 1 von 2 HP Pavilion G60-630US Screen Replacement: Schritt 18, Bild 2 von 2
    • You may need to use pliers to perform. It`s not required, but it can help to unplug the cable, because it might be too tight between the logic board and the screen frame.

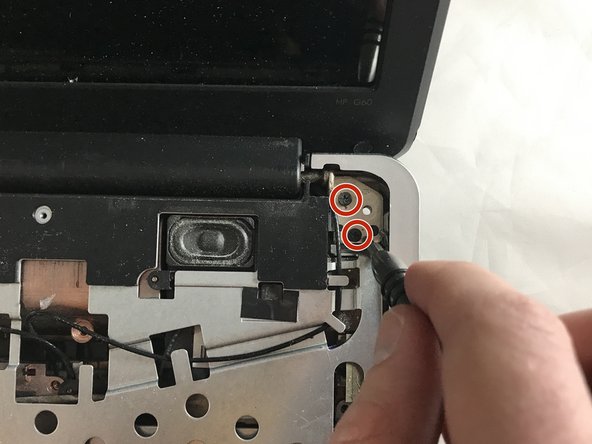
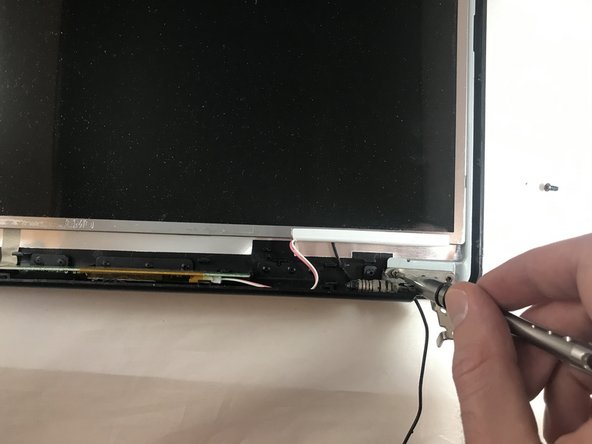
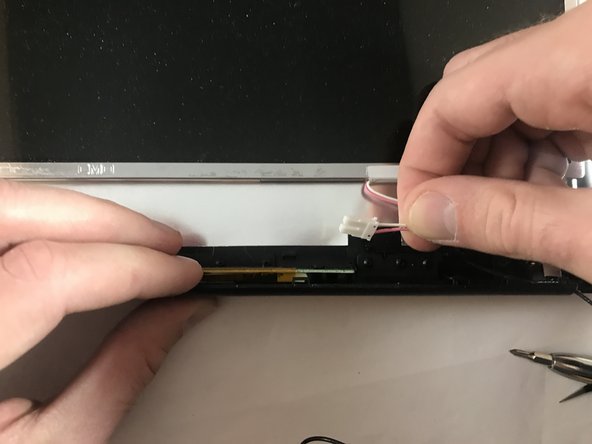
    • Carefully unplug the power cable located in the bottom of the screen frame located to the left of the hinge on the right side of the screen.

  19. HP Pavilion G60-630US Screen Replacement: Schritt 19, Bild 1 von 2 HP Pavilion G60-630US Screen Replacement: Schritt 19, Bild 2 von 2
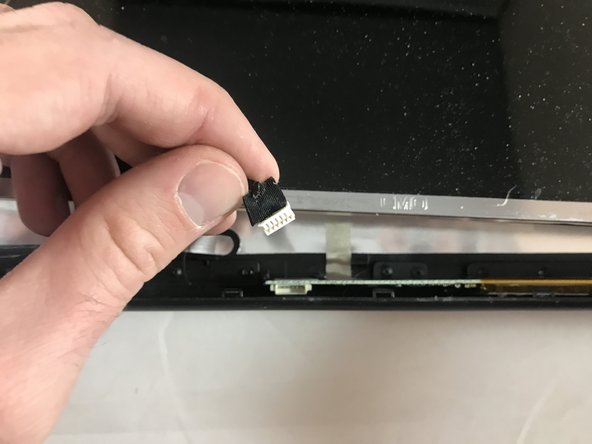
    • Carefully unplug the power cable located in the bottom of the screen frame located to the right of the hinge on the left side of the screen.

  20. HP Pavilion G60-630US Screen Replacement: Schritt 20, Bild 1 von 2 HP Pavilion G60-630US Screen Replacement: Schritt 20, Bild 2 von 2
    • Gently pull out the screen.

    • Make sure the broken screen is properly recycled to limit e-waste.

Abschluss

To reassemble your device, follow these instructions in reverse order.

2 weitere Nutzer:innen haben diese Anleitung absolviert.

0 Kommentare

Kommentar hinzufügen

Seitenaufrufe:

Letzte 24 Stunden: 1

Letzte 7 Tage: 1

Letzte 30 Tage: 6

Insgesamt: 644